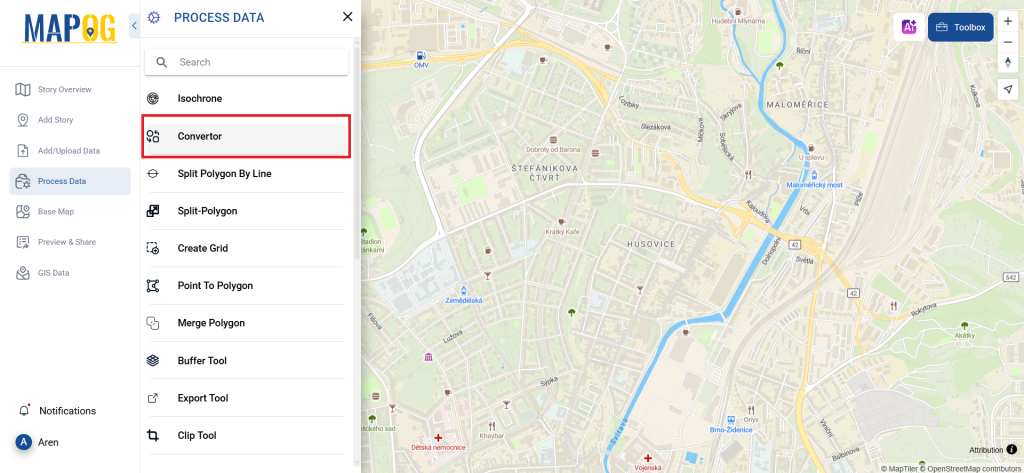
File conversion plays a vital role in the GIS workflow, as it allows data to be used effectively across different platforms and applications. In this context, the Converter Tool in MAPOG simplifies the entire process, making data conversion quick and efficient between various formats.
What is MapInfo File?
MapInfo Professional, a widely used geographic information system software, works with a file format known as a MapInfo file. This format stores geographic data such as boundaries, points of interest, and maps. Moreover, it supports building and analyzing maps, which proves highly useful in fields like environmental studies, urban planning, and many other applications involving spatial data.
Online GIS Data Conversion
Key Concept for Conversion MapInfo to GPKG:
To bridge the gap between formats, the Converter Tool in MAPOG offers a user-friendly platform. In addition, its intuitive design ensures that users can carry out conversions without unnecessary complexity. Consequently, even tasks that might seem challenging become easier to complete. Furthermore, this accessibility empowers a wider range of users, from beginners to professionals, to manage their data effectively.
Step-by-Step Guide to Converting MapInfo to GPKG
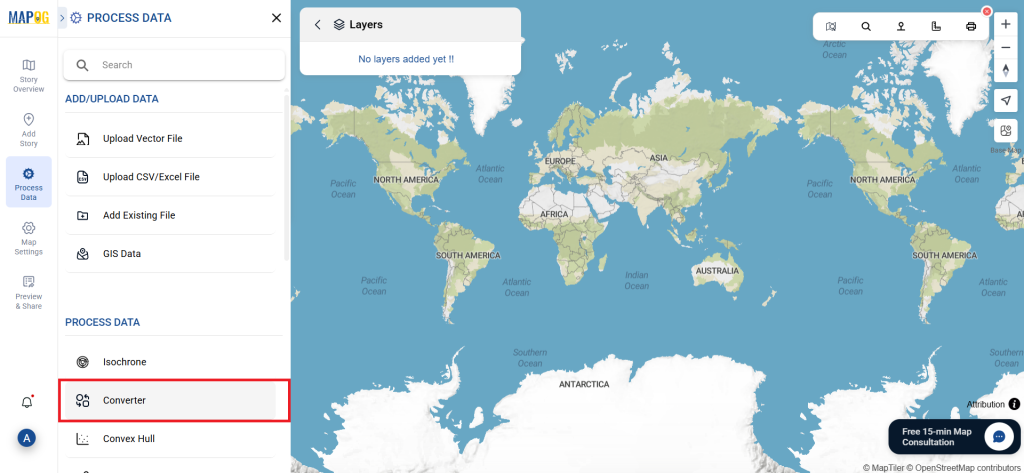
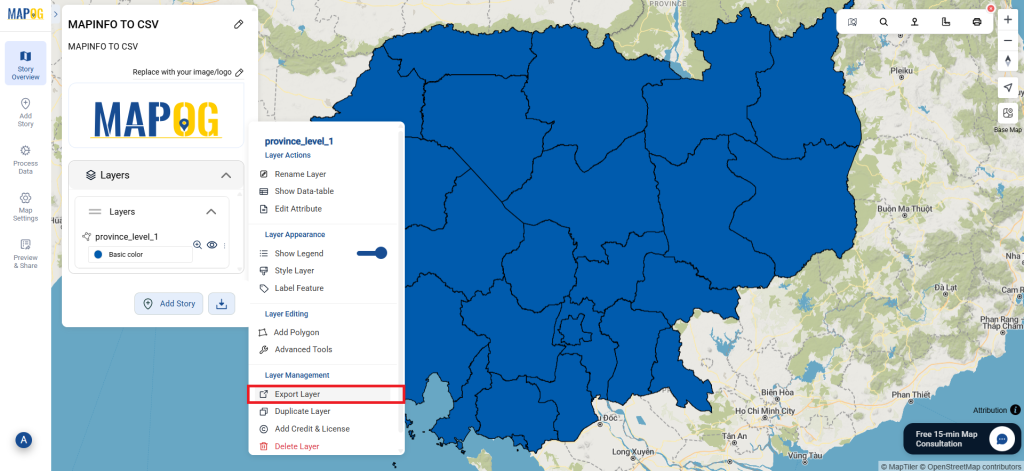
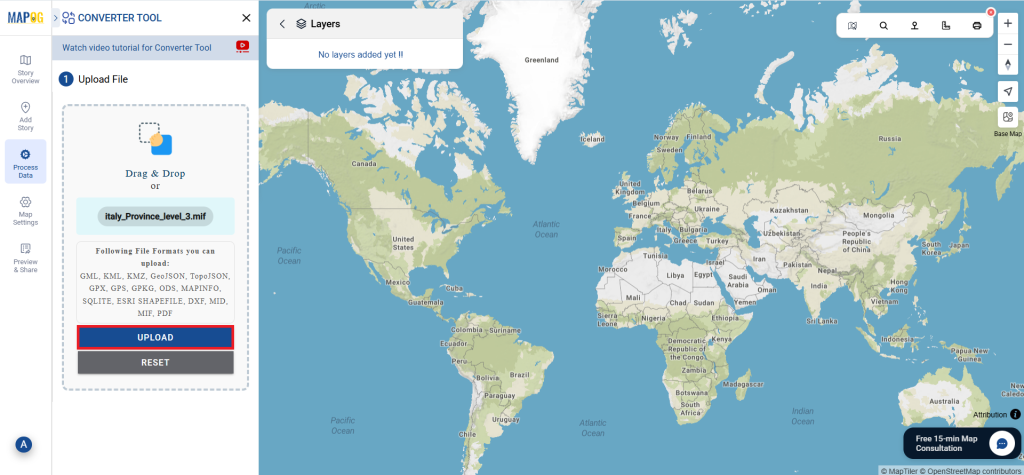
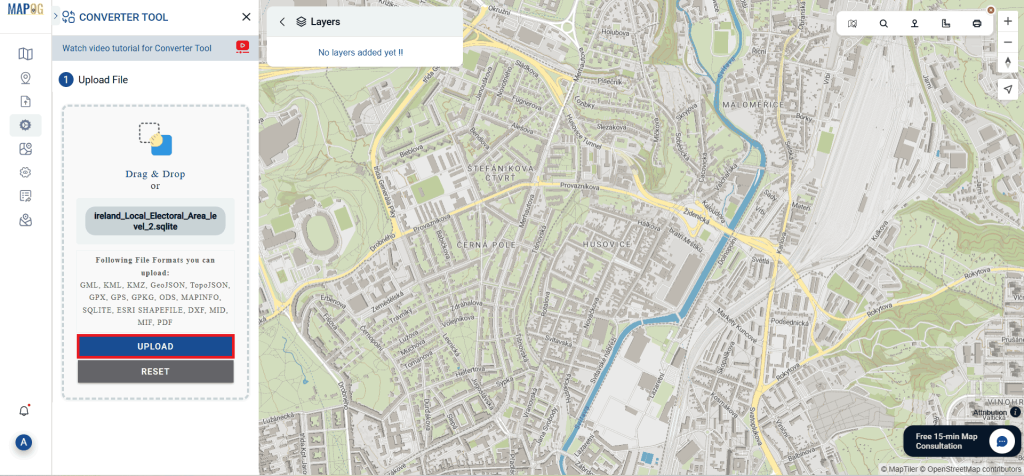
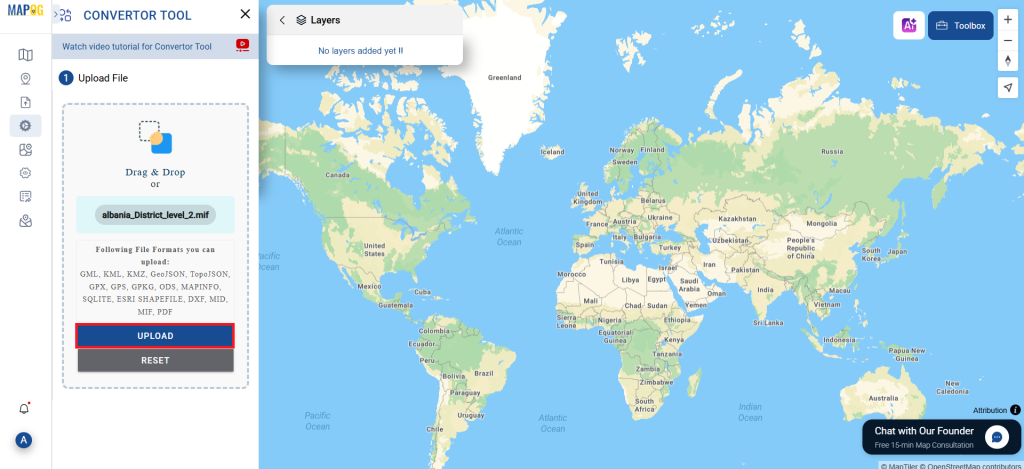
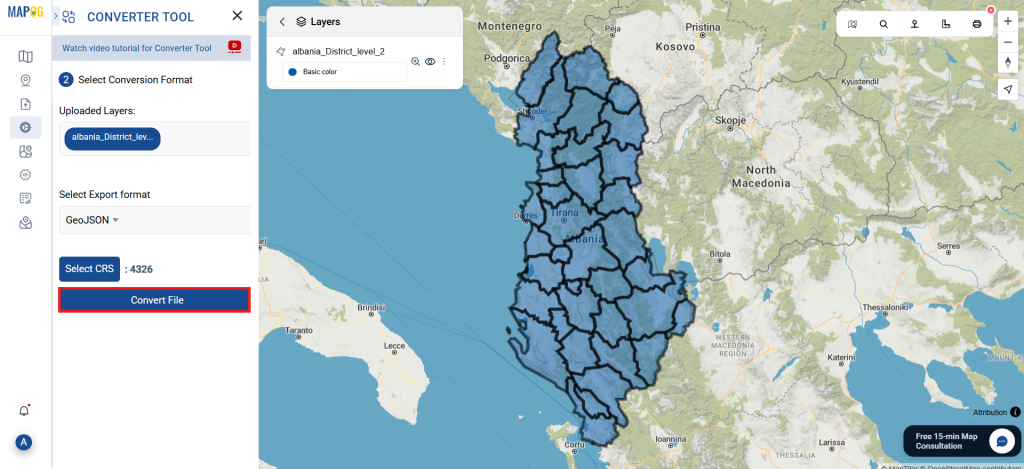
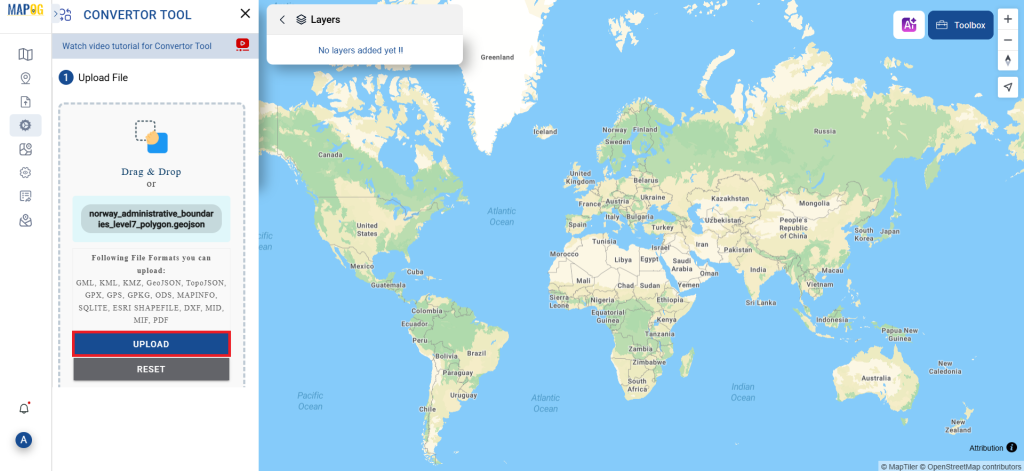
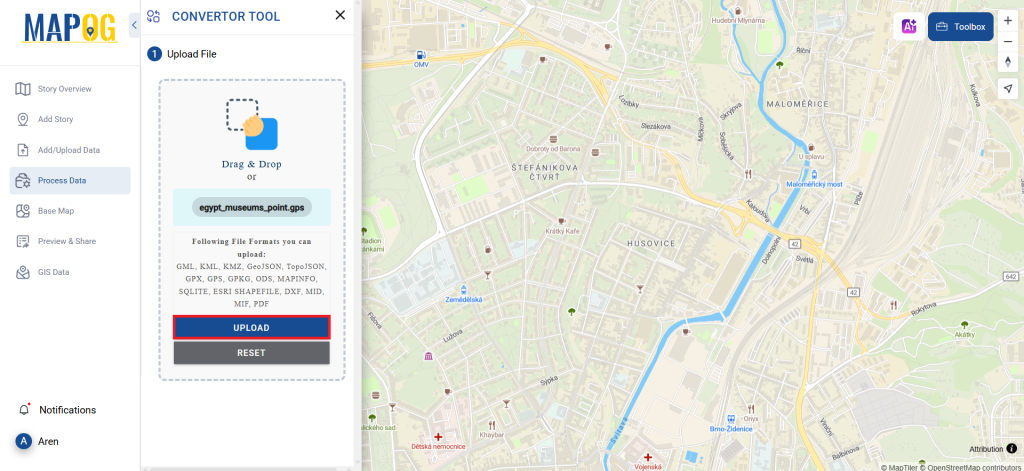
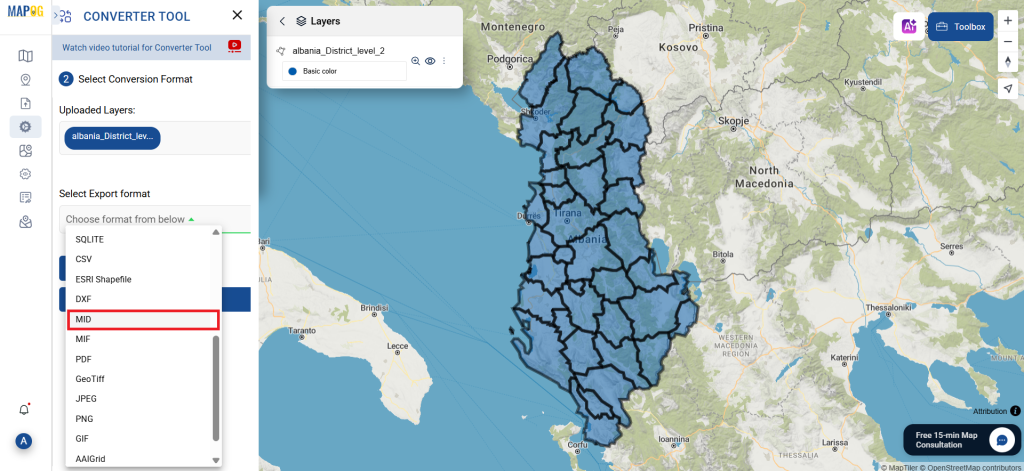
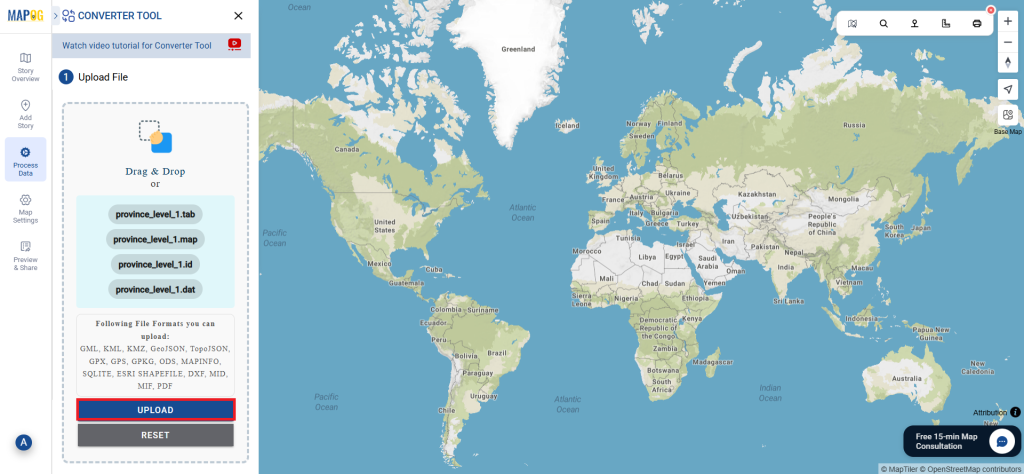
Step 1: Upload the Data
Open MAPOG and navigate to the Process Data option. From that option, select the Converter Tool option. Ensure that your MapInfo file is ready for conversion before uploading it.

To begin the conversion, upload your MapInfo file by selecting the data you want to convert.
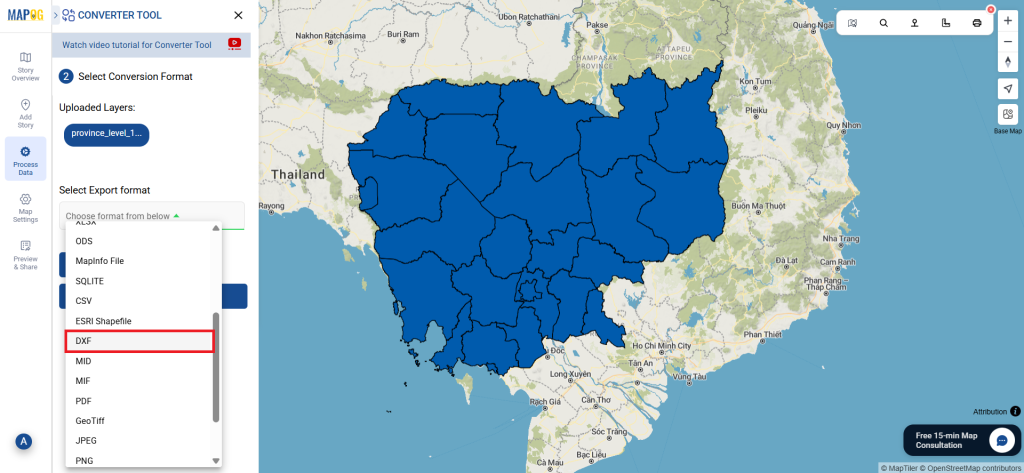
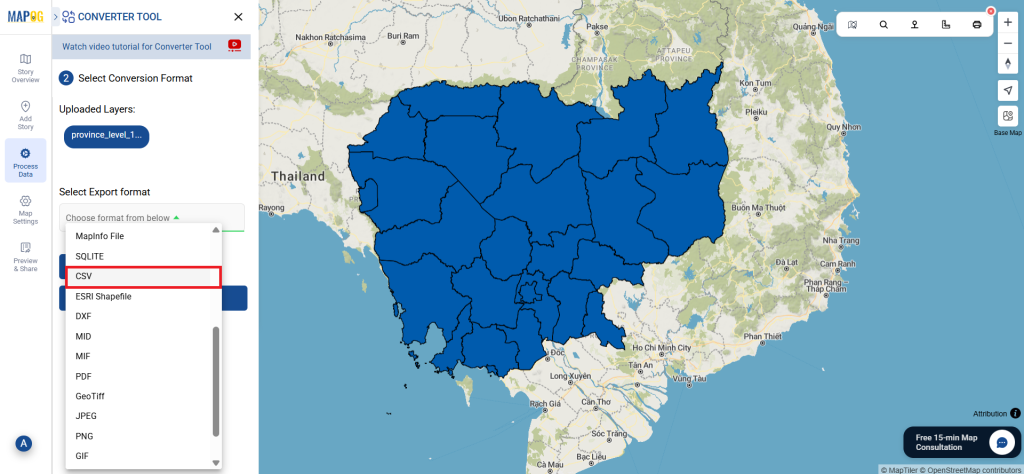
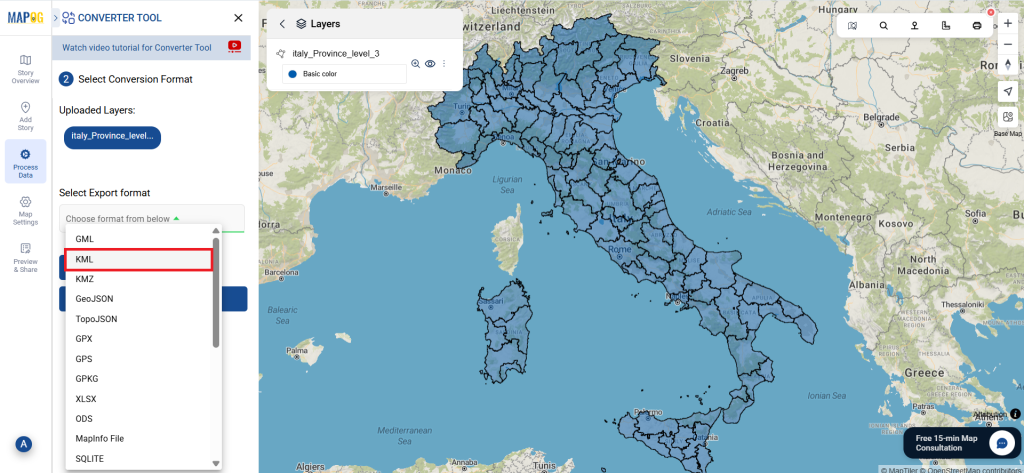
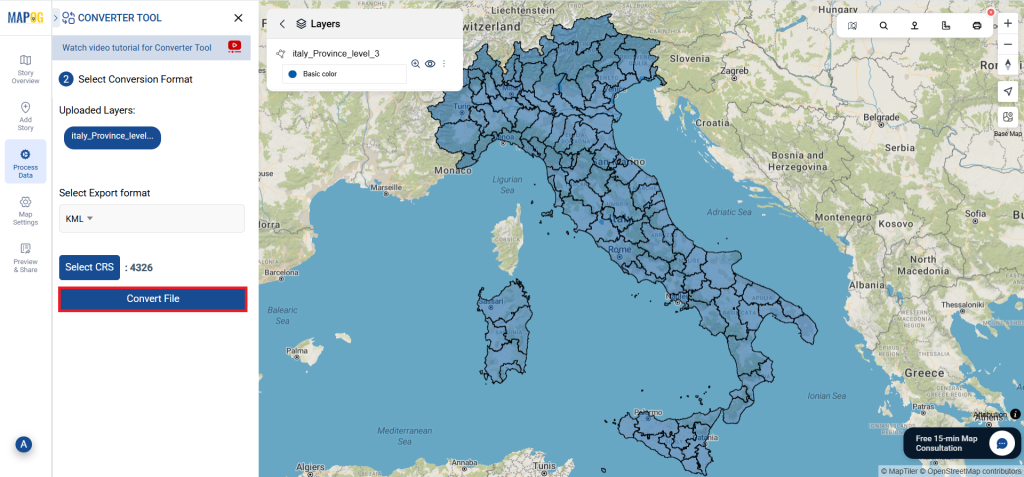
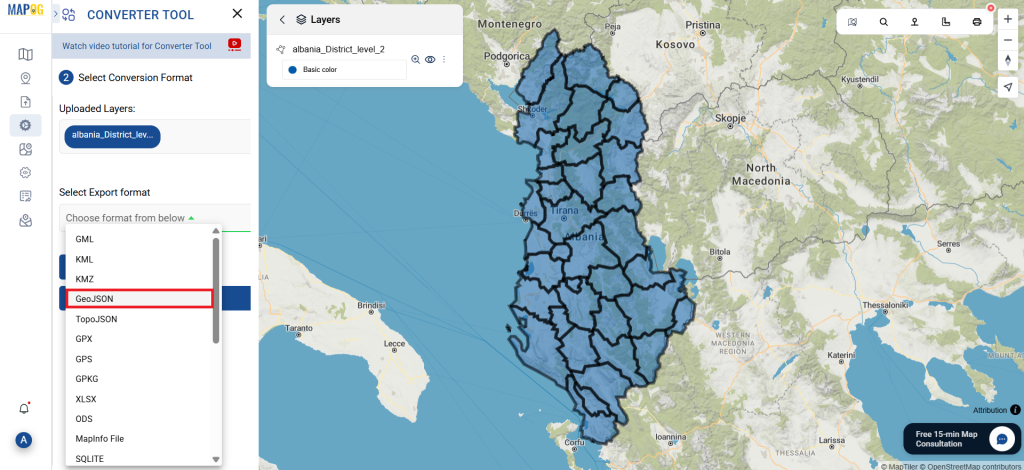
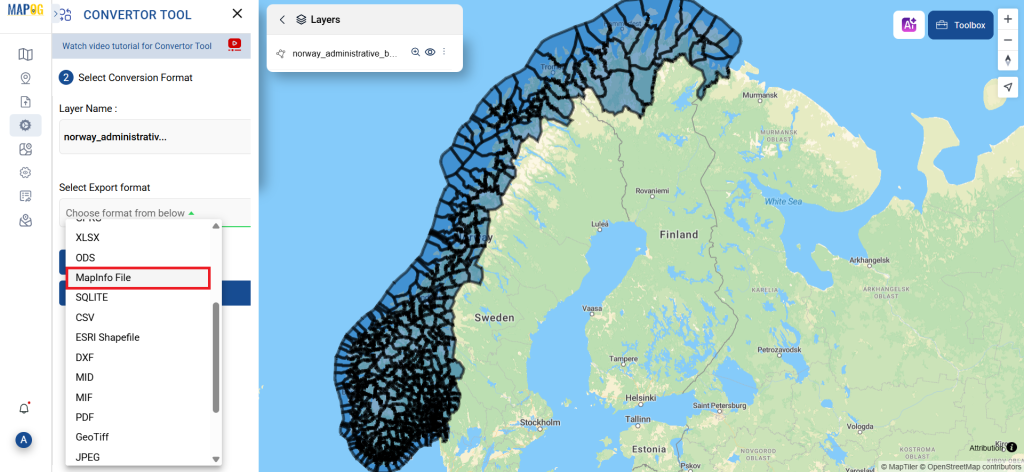
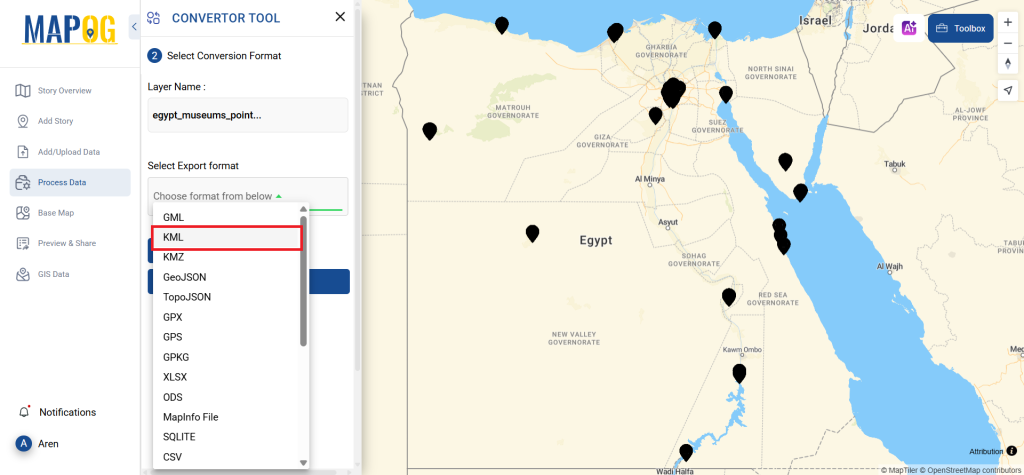
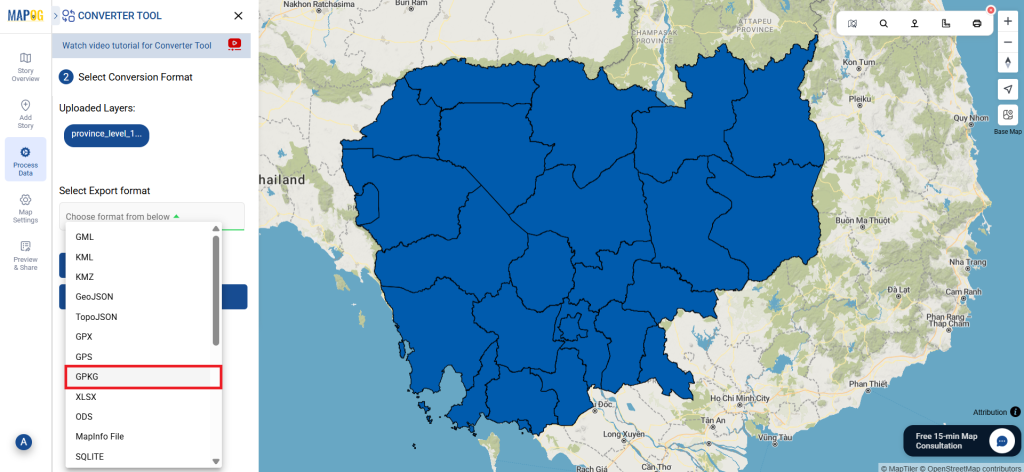
Step 2: Select the Format for Conversion
Next, choose GPKG as your output format. This step allows you to identify the target format for your data, ensuring that it is compatible with applications that support the GeoPackage standard.
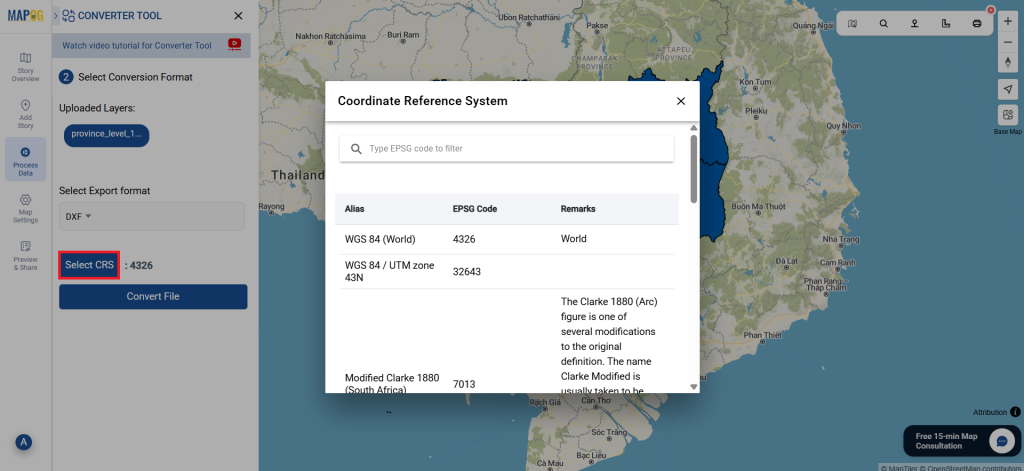
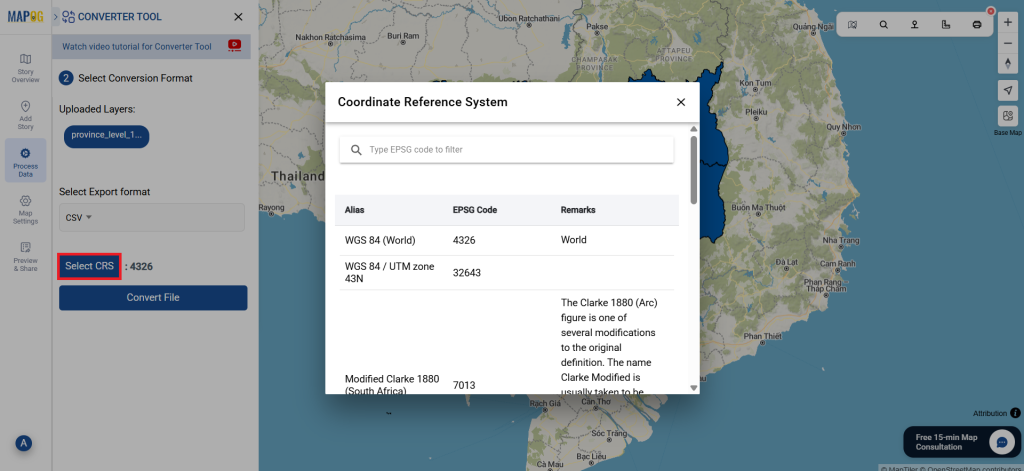
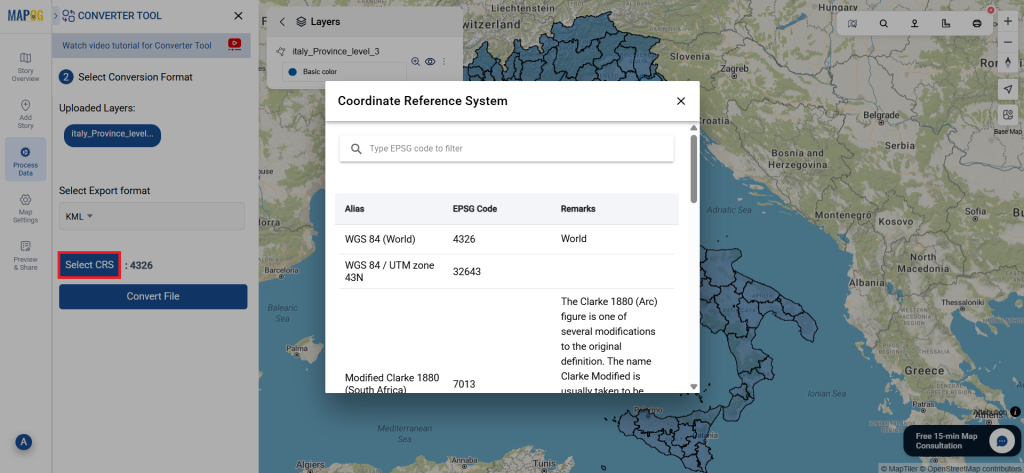
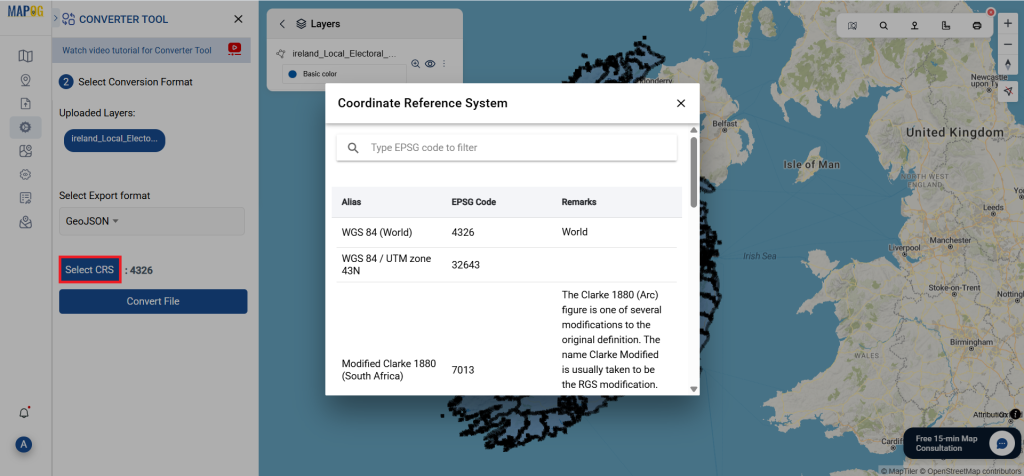
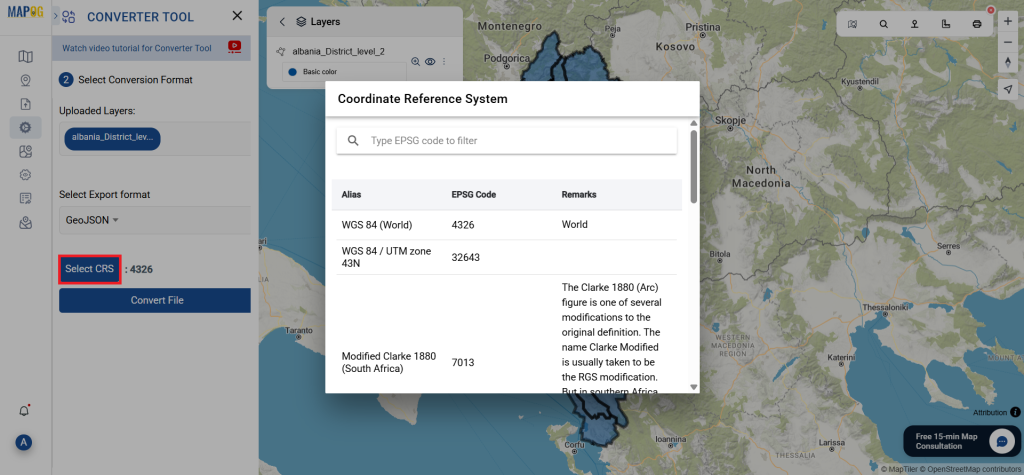
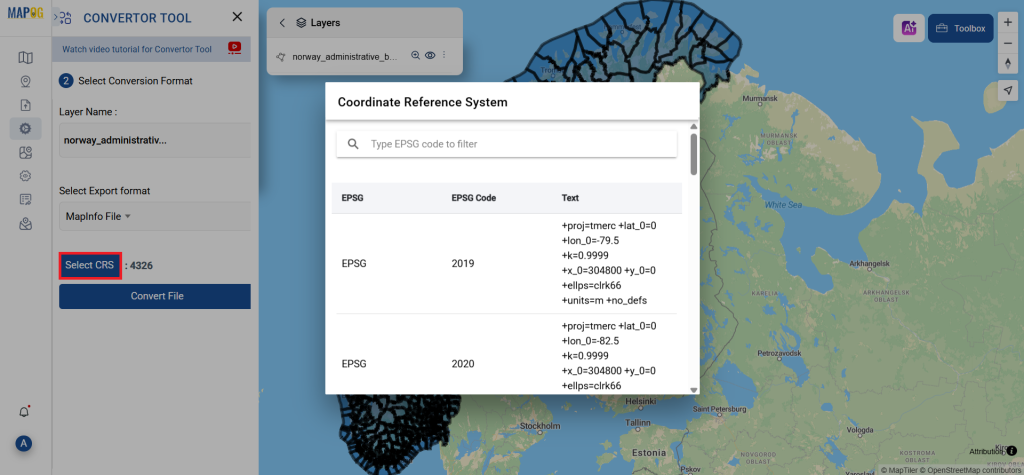
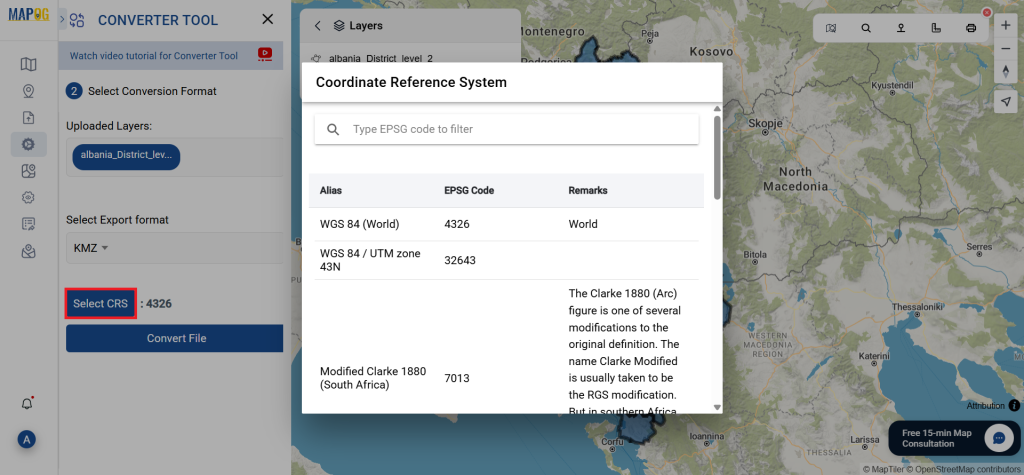
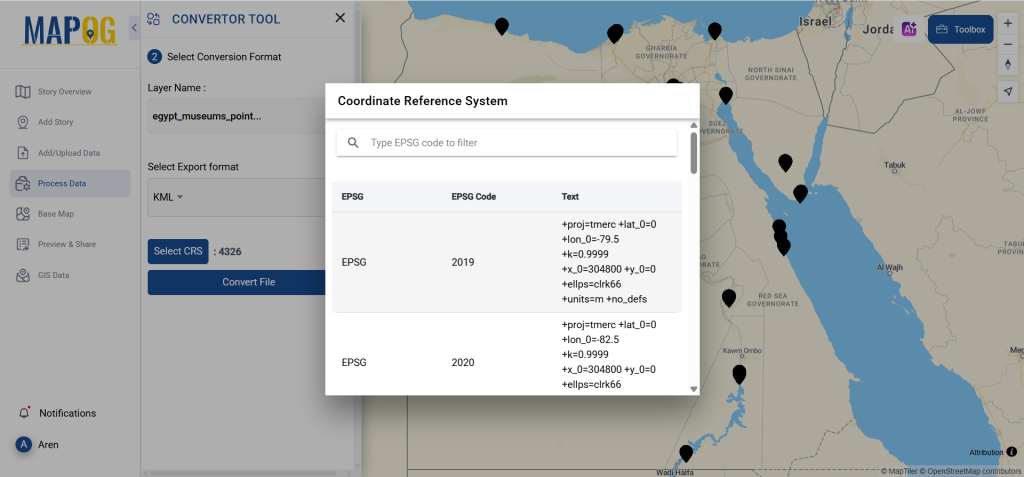
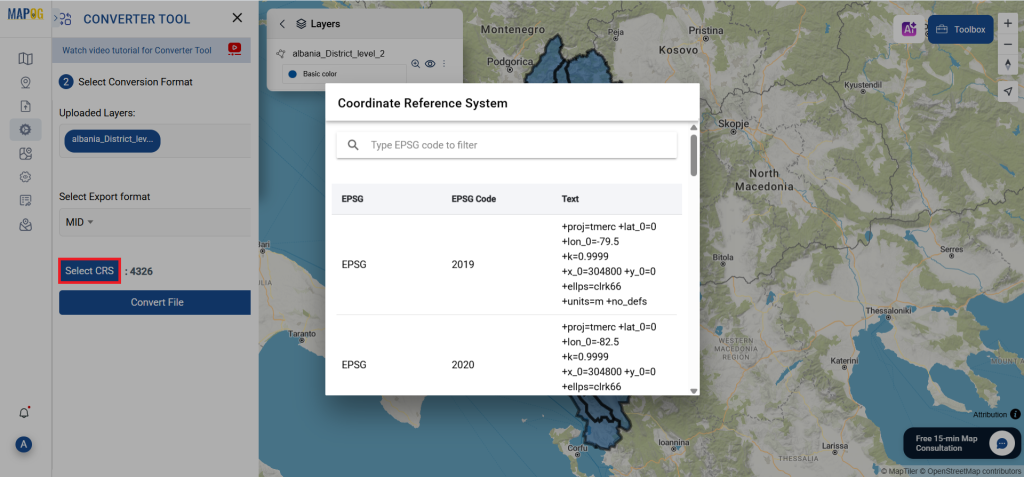
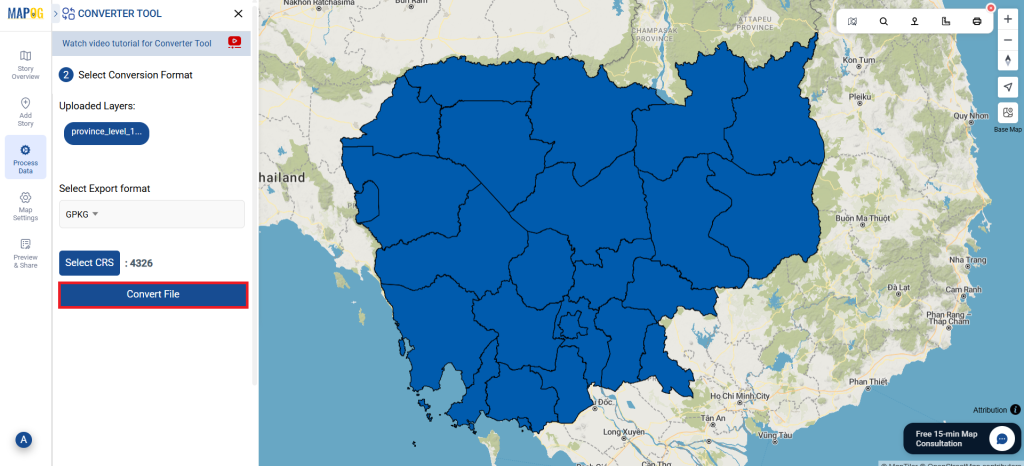
Step 3: Choose the Output Coordinate Reference System (CRS)
Select the appropriate Coordinate Reference System for your GPKG file based on your specific requirements. This ensures that your data is correctly georeferenced, which is crucial for accurate mapping and analysis.

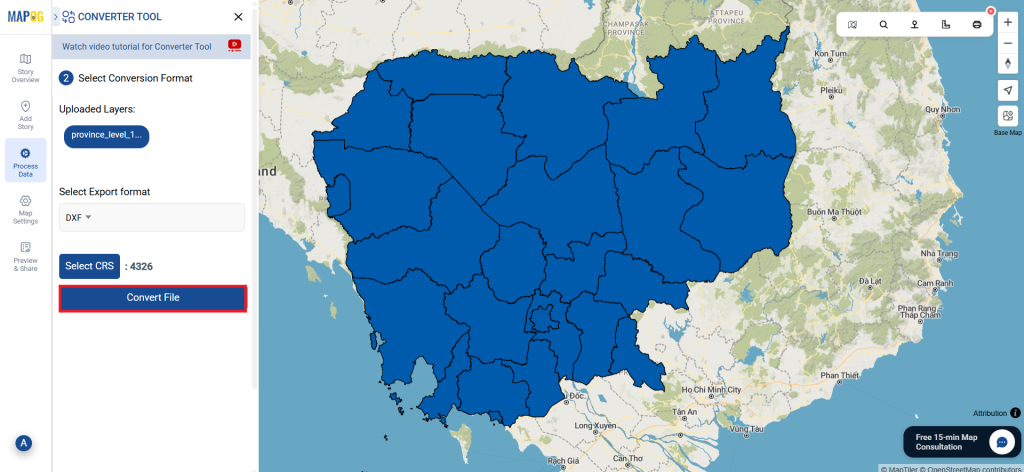
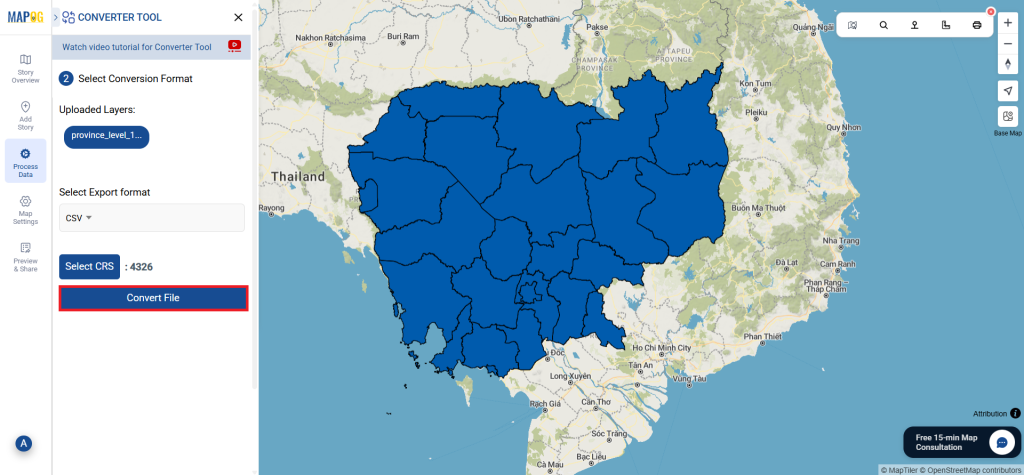
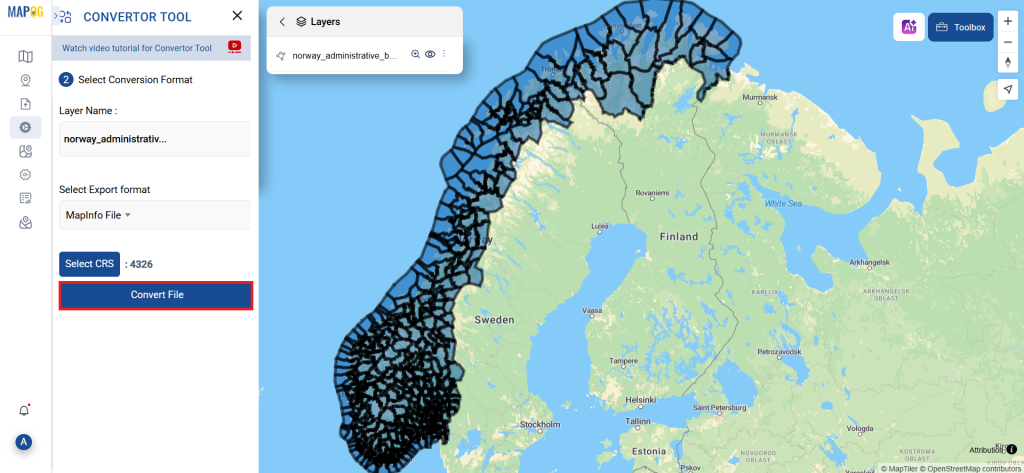
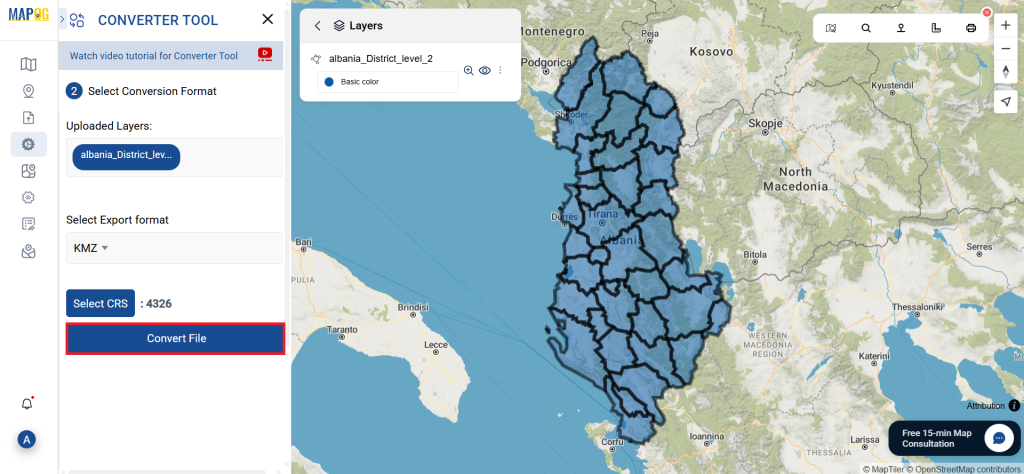
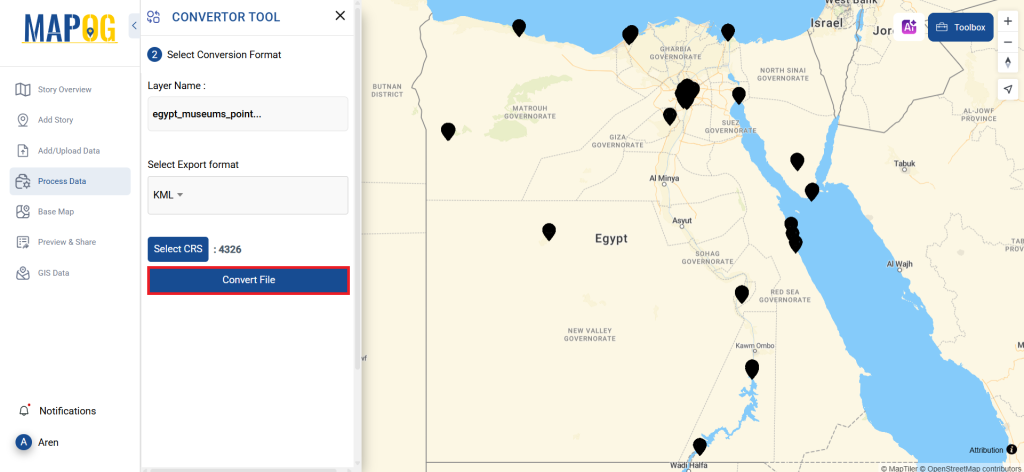
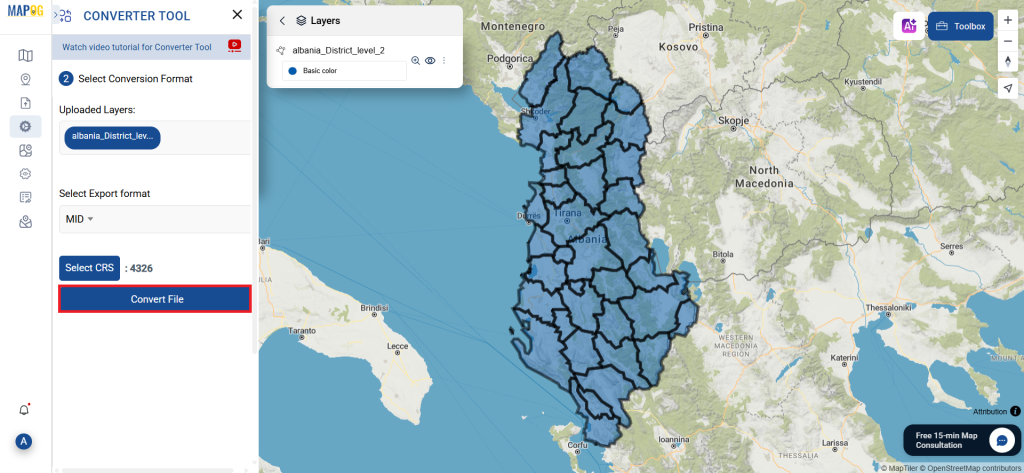
Step 4: Execute the Conversion
Once your options are set, finish the conversion process. The tool will successfully process the MapInfo file, converting it into the GPKG format.
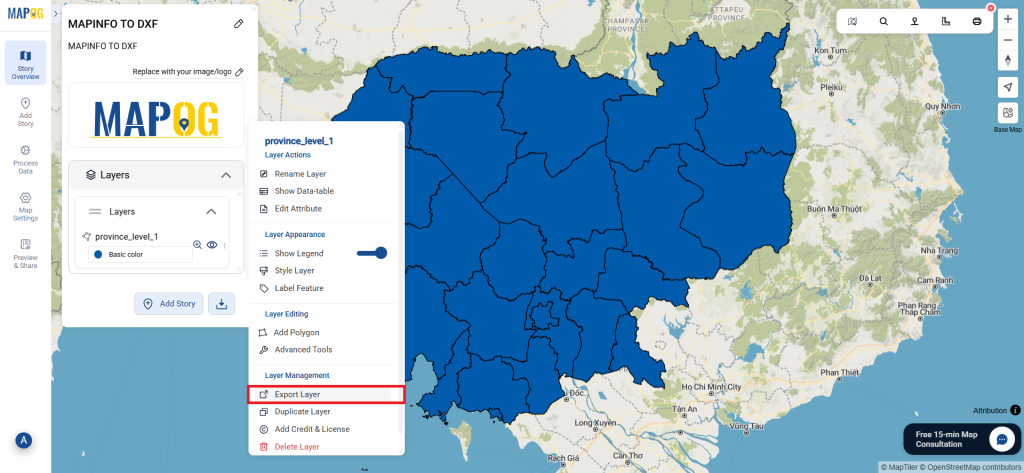
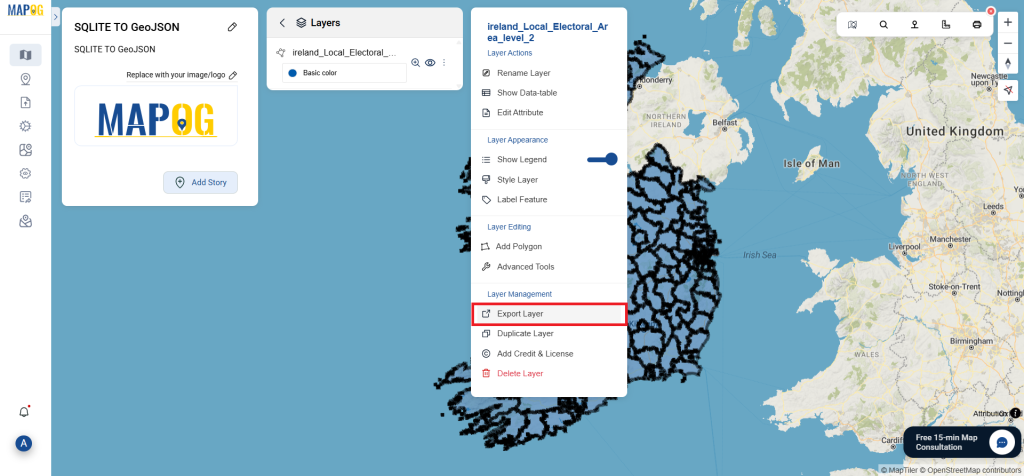
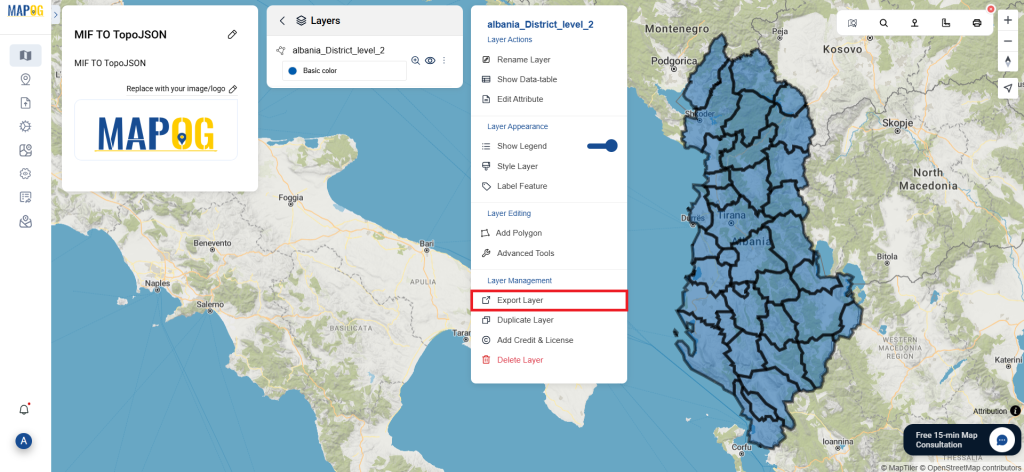
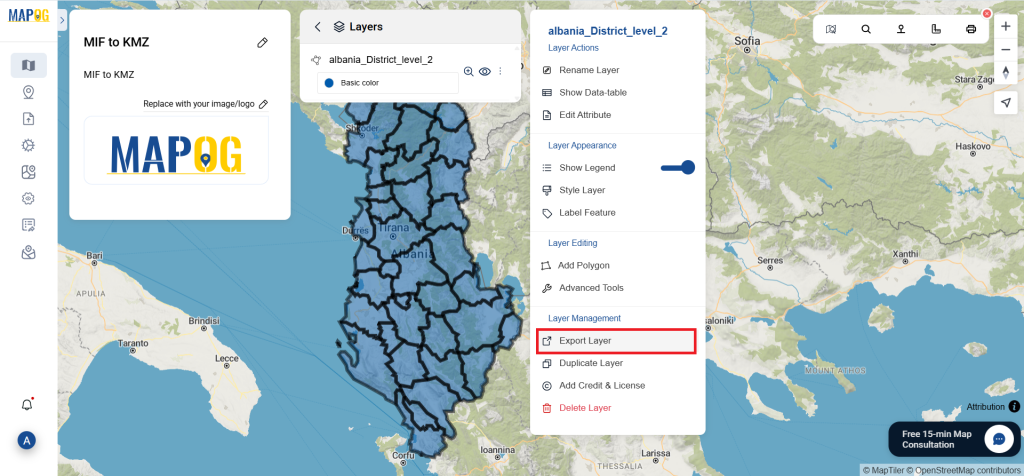
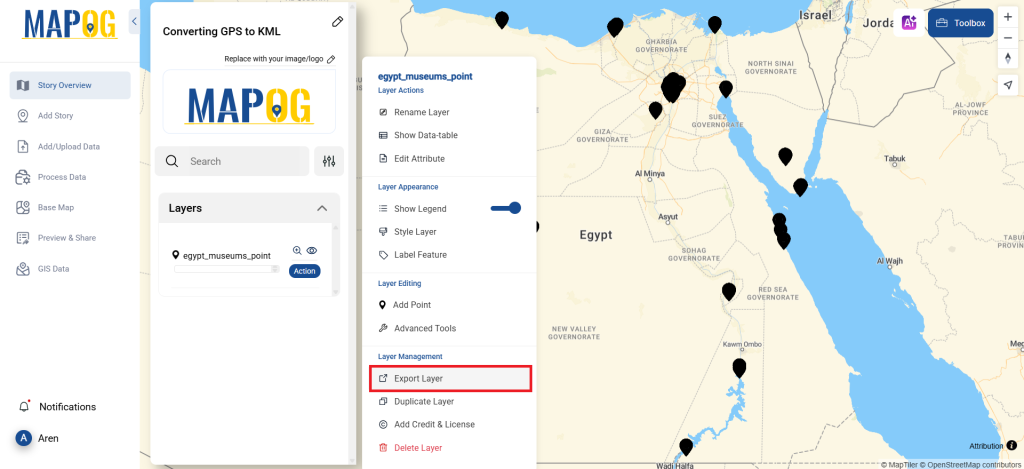
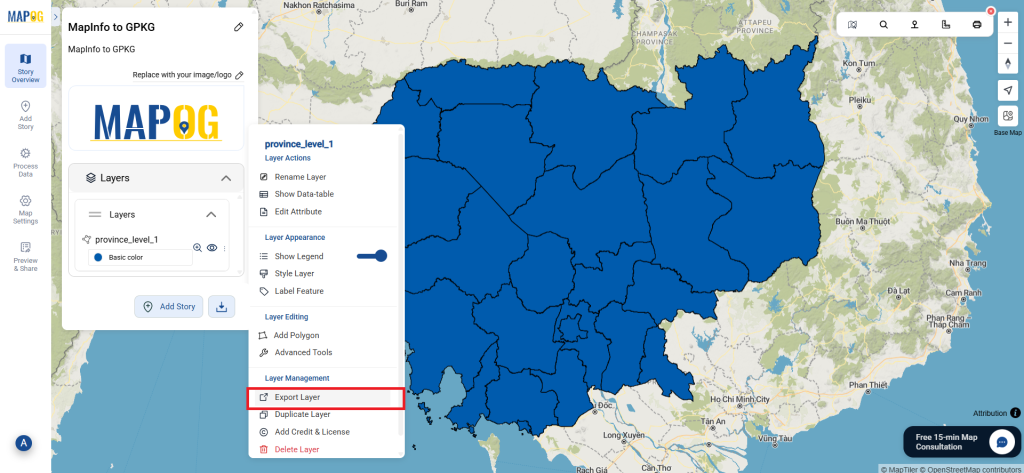
Step 5: Review and Download
After the conversion is complete, review the output to ensure that the data has been accurately converted. Finally, download the GPKG file, which is now ready for further analysis.
Conclusion:
The MAPOG Converter Tool simplifies the process of converting data between different formats, making it an invaluable resource for GIS professionals. By following these simple steps, you can easily convert MapInfo files to GPKG format, ensuring that your data is ready for a wide range of applications. If you need to download any data file in CSV or in any other formats like KML, DXF, TOPOJSON. visit GIS DATA. Here we have 900+ data layers for 200+ countries.
Additional Tools for Further Analysis:
With MAPOG’s versatile toolkit, you can effortlessly upload vectors and upload Excel or CSV data, incorporate existing layers, perform polygon splitting, use the converter for various formats, calculate isochrones, and utilize the Export Tool.
Learn About MAPOG:
For users who wish to create dynamic and eye-catching maps that visually engage, MAPOG is ideal. By combining maps with multimedia components like text and photographs, it enables you to create compelling stories. Making shareable content is simple with MAPOG, whether you’re leading a tour, presenting research, or promoting a project.
Here are some other blogs you might be interested in:
- Convert Online GIS data : KML to PDF file
- Converting KML to GeoTIFF , Online Gis Data Converter
- Converting KMZ to SHP : Online GIS Data Conversion
- Converting TopoJSON to SHP Online : GIS Data Converter
- Converting GeoJSON to TopoJSON with MAPOG
- Converting GeoJSON to CSV with MAPOG
- Converting KMZ to KML with MAPOG
- Converting GML to KML with MAPOG
- Convert KMZ to TopoJSON Online
- Converting KMZ to GeoJSON Online
- Convert KML to MID Online
- Online Conversion KML to MIF