Raster data in GIS are pixelated data format or images that are georeferenced. Here each pixel represent a geographic area storing the values of any parameter associated with that area. Parameters represented by raster images are mostly continuous in geography such as precipitation, elevation, temperature, vegetation indices etc. Raster images also represents categorical features such as land use land cover.
The conversion of an object’s geometry, color, texture, lighting, and other attributes into a display image is called the rendering of an image. It is the technique of creating a photorealistic or non-photorealistic image from a 2D or 3D model using a computer program. A geospatial raster is only different from a digital photo in that it is accompanied by spatial information that connects the data to a particular location. A raster image can be visualized in different styles such as categorical, quantitative, paletted, multiband etc. These visualization can be stored and saved, so that to be used in other platforms for image interpretations for remote sensing analysis.
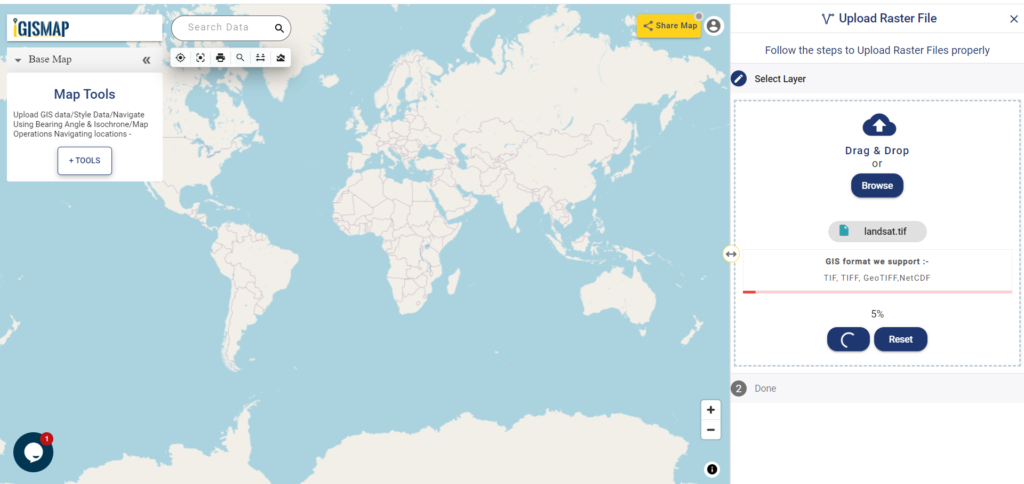
IGISMap Upload Raster File tool can add the rendered raster image in GeoTIFF format. IGISMap is a GIS-based web platform, that provides multiple GIS applications that are most important in the field of geospatial analytics. The peculiarity of IGISMap in the GIS Industry is its UI/UX, which helps the user to perform effortless geospatial operations.
Click https://map.igismap.com/upload-raster to open Upload Raster File tool
Let’s see how this can be done.
Uploading the Rendered Raster Image
After opening Upload Raster File tool, Browse your system folder and select the rendered raster file. Then click on the Upload option.
About the rendered raster data
As we said in the introduction, the conversion of an image’s geometry, color, texture, lighting, and other attributes into a display image is called the rendering of an image. When it comes to GIS raster images, the alteration in geometry and style of visualization depends on pixel values.
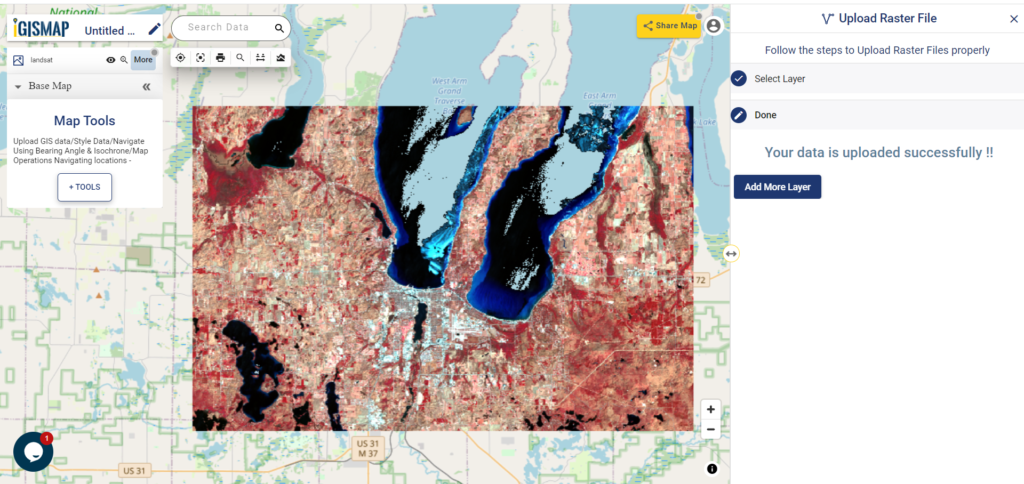
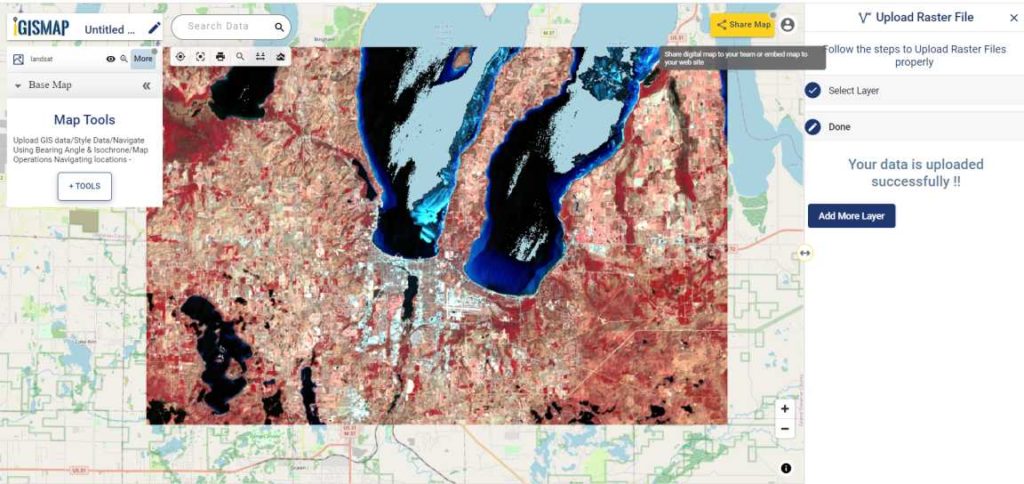
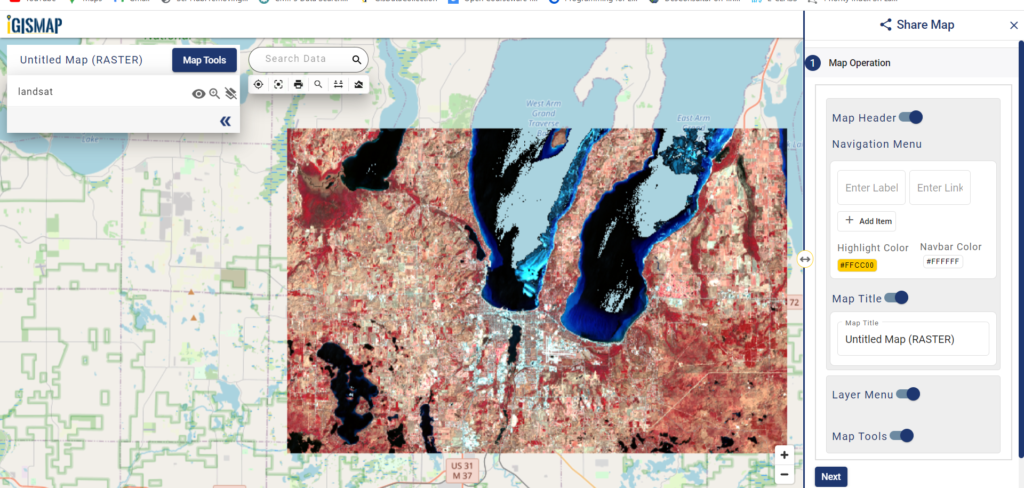
The image that we have uploaded here is a stacked image of Landsat bands – Green, Red, and Near Infrared. And this stacked image is rendered into the style of False Color Composite, which we have uploaded here.
Raster image visualized
After successfully uploading, the rendered raster image is published on the map, which can be further analyzed through image interpretations.
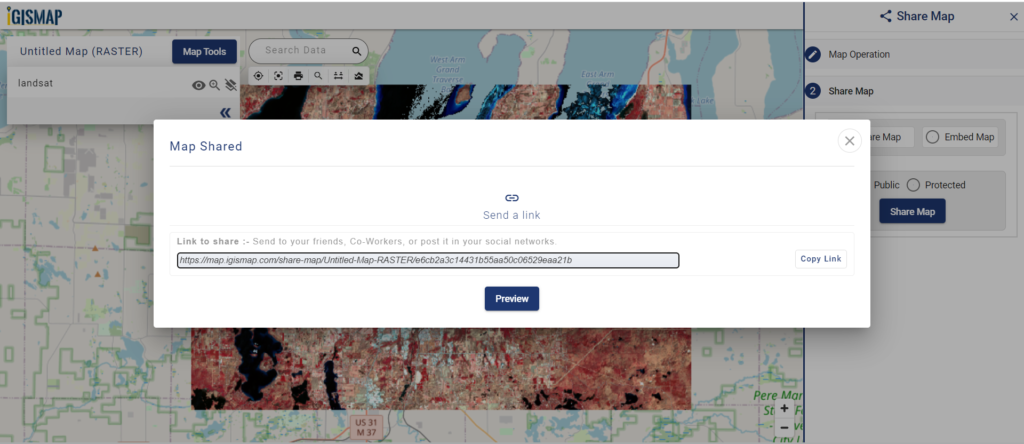
Sharing Map
Share Map will also work with map conatining raster image uploaded. For this, first click Share Map button at the map.
The Map Operation menu will open up to enter and enable the details for the shared map. Click Next button after completing the settings.
Now two options will appear – Share Map and Embed Map. Here we will simply share the map without any security. So click Share Map and click Public.
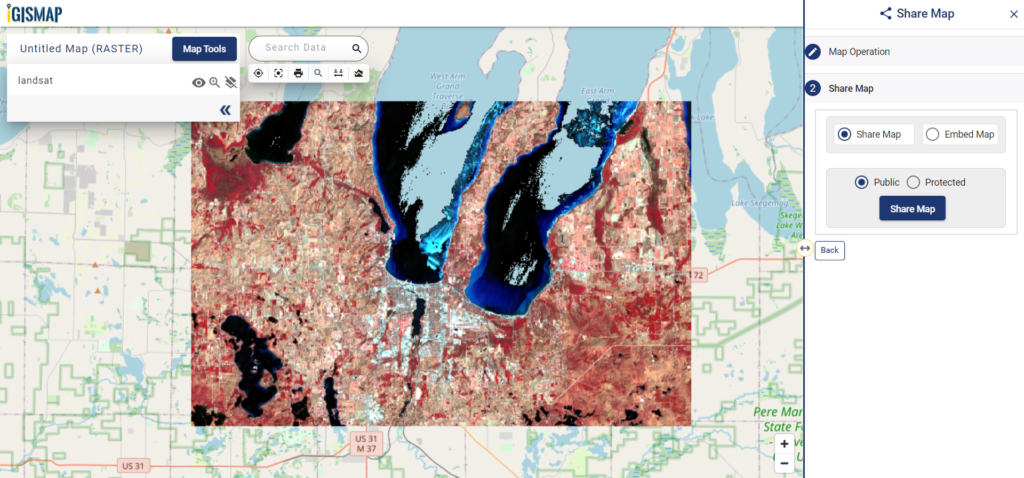
Then select Share Map button to open the popup containing a link. Copy this link and share with anyone whom you want to share your map with raster data.