Web Mapping is a service through which the consumers will choose what they want to show on the map. It is a great way to publish your Geographical information system data to their web and make it accessible by the other consumers. web mapping is tightly related to programming and it has a learning curve. GIS users are typically aren’t web programmers and it presents a challenge when one needs to create a web map that is of the same quality as a map creating in a GIS. In this post we will learn how can we use QGIS2Web for creating the web map.
We make maps because we want to send out a message. The great advantage here is when you put your spatial data on a web map as opposed to an offline map, your map is to be seen and you get your message sent to much wider audience. You can just spread out the URL of your web map and have people explore your beautiful maps.
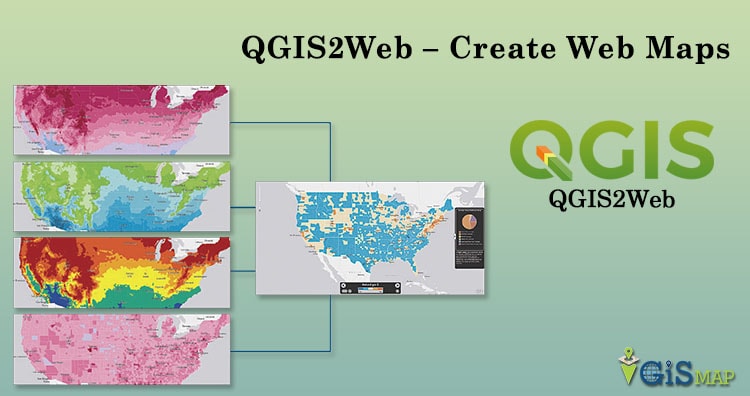
QGIS2Web – Create Web Maps
QGIS2Web is a tool that turns QGIS layers into HTML, JavaScript, and CSS files. QGIS2Web can create an interactive web map that pops up information for the user.
Using Qgis2web is no big deal and it is really very is to use. Let’s start it how and what we can do with Qgis2web.
Creating Map in QGIS – QGIS2Web
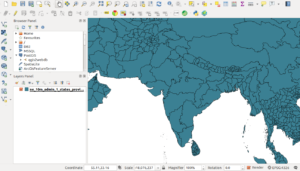
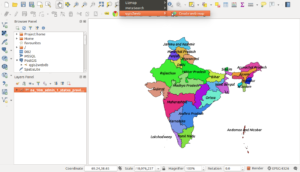
- Go to your QGIS application and click add vector layer, Now browse the Layer from your downloaded project.

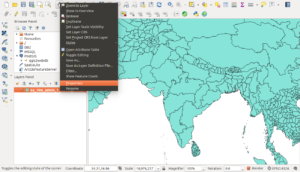
- Now lets just create a map in QGIS. here in this map when a user clicks on a state we would want it to popup the information about it. the information is already present in the attribute table of this layer. Right click on the layer and select properties.

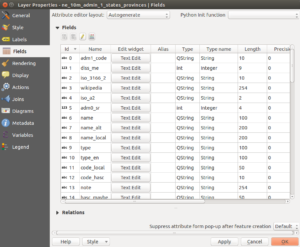
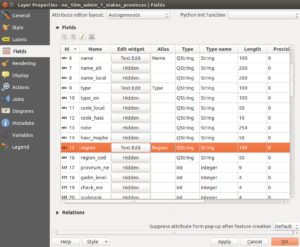
- For the different attributes present in the layer. Switch to the Fields tab. Some of these aren’t relevant to us for web map, so we can choose to hide these. We will keep
admin,region,postal,woe_label,name,longitude,latitudeandtypefields and hide the others fields. Click on Text Edit button under the Edit widget column foradm1_codefield.

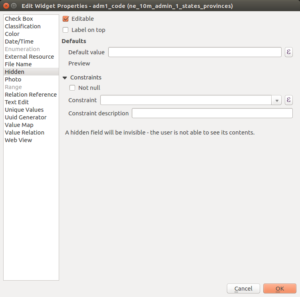
- In the Edit Widget Properties dialog, choose Hidden as the type. Click OK. Do the with all the others.

- We can also use the Alias column to indicate an alternate name for the fields without actually changing the underlying data table. This is useful to give more user-friendly field names to the users of our map. Add aliases as per your choices and click Ok.

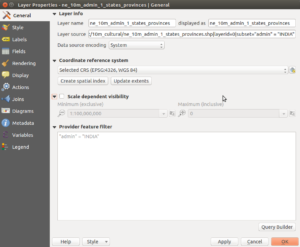
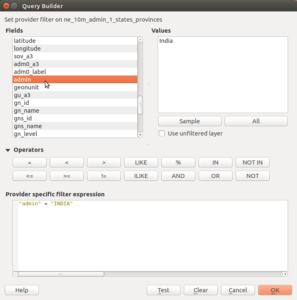
- Now if we want to show only specific data or area in our web map, Switch to General tab.

- In General tab now we will build a query in Query builder in Provider feature filter for filtering the data we want to show to the map. So click to Query Builder and then select field by which you want to filter that data and insert the filter value. You can also test your query by clicking Test button there. Then click OK on both windows.

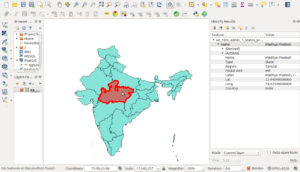
- Back in the main QGIS window, choose the Identify tool and click on any point. The Identify Results panel will display the nicely formatted attributes with the newly added aliases. You will notice that the hidden fields do not appear in the results.

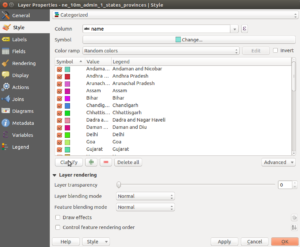
- Now let’s style our layer to be more visually appealing and informative. Right-click the layer and select Properties. Switch to the Style tab. Choose Categorized style and our field Name as the Column. Click Classify.

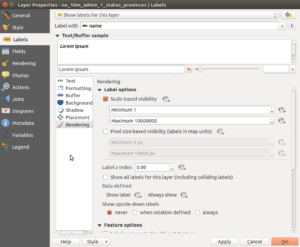
- We need to label each State. Switch to the Labels tab in the Properties dialog. Select Show labels for this layer and choose name as the value for Label with. We will also set Rendering option so that the labels only appear when the user is sufficiently zoomed in. Check Scale-based visibility under Label options. Enter 1 as the Minimum scale and 10000000 as the maximum scale. This setting will render the labels only after the user has zoomed in more than 1:10000000 scale and will be visible till 1:1 scale.

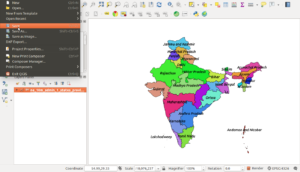
- The map is ready now. Time to save our work go to Project > Save. Enter name of the project you want to give.

QGIS2WEB Web Mapping
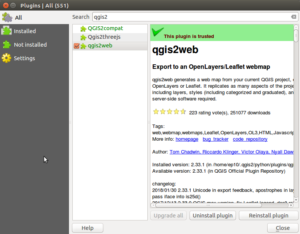
- Now as our Map is completed and saved. We will use Qgis2web which is a plugin of the QGIS software. You should first install the Qgis2web plugin from inside QGIS. To do that, In QGIS and go to Plugins > Manage and Install Plugins… Then search for qgis2web and click Install plugin.

- Our QGIS map is now ready to be converted into a HTML map with qgis2web. Qgis2web reads QGIS layers and their style and converts them into HTML, Javascript, and CSS files that can be viewed from the browser.
- Once the plugin is installed, we will create a web map, go to .

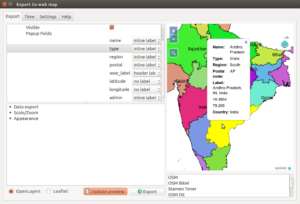
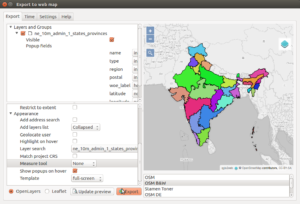
- In the Export web map dialog, select how you want the popups to be labelled in the web map in upper panel.

- In the Export to web map dialog, Select Expanded or Collapsed in Add layers list in the bottom panel under the Appearance section. Also select the field for Label search whatever you like to see in your web map. Check the Show popups on hover to allow display of info-windows on hover. We can also set a basemap so the users have more context when looking at the layer. Select OSM B&W to use a black-and-white themed basemap create using OpenStreetMap data. You also have an option to choose from either OpenLayers or Leaflet as the web mapping library. We will restrict this tutorial to use the OpenLayers library. Click Update Preview` to see how your exported map will look like. Before we do the actual export, we need to set the Export folder. You can select a folder of your choice and click Export.

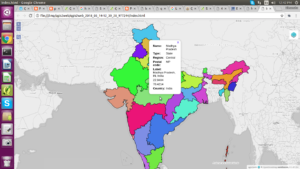
- Once the export is complete, the default browser for your computer will open and show the interactive web map.

- OpenLayes and Leaflet libraries ha many functions and operations that we can apply in Qgis2web but Qgis2web also has some limitations. Here In this post we created a template with Qgis2web by which you can customize the web map. Qgis2web plugin saves a lot of valuable time in web mapping. The output created from this process can be readily changed to suit your requirement.
Pressing the Export button in QGIS2Web generates an index.html file and three folders with associated Javascript and CSS files. If you want to publish this map online, you would need to get a web hosting account and simply upload the index.html file and the three associated folders to the main public html directory. Visiting the URL of your website would then show the map in the browser.
- Go to your QGIS application and click add vector layer, Now browse the Layer from your downloaded project.