
In our previous articles we went through how vector and raster data can be publish on Geoserver using stores. Here, in this article we would be discussing what is importer and how this extension can be used to upload and publish the data i.e with Geoserver Importer Extension API. If you haven’t looked over how to install geoserver, here is the article to install geoserver in linux or install geoserver in windows.
Geoserver Importer Extension API – Upload and Publish Data
Install Importer Extension in GeoServer
As this an official extension, it can be downloaded from its website that is http://geoserver.org/release/stable/ link.
Follow the steps to install extension-
- Download the extension from given website according to your geoserver version.
- Extract the archive in
WEB-INF/libdirectory. - After this, restart the Geoserver.
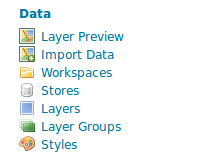
- To check the availability of extension, open the geoserver in browser and check the Data section and find import data.
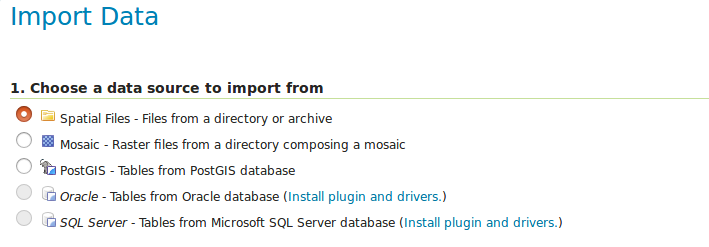
Supported Data format by Importer Extension GeoServer
For spatial data it supports
- Shapefile and
- GeoTiff
For DataBases it supports
- PostGIS
- Oracle
- Microsoft SQL Server
Upload and Publish Data – Geoserver Importer Extension API
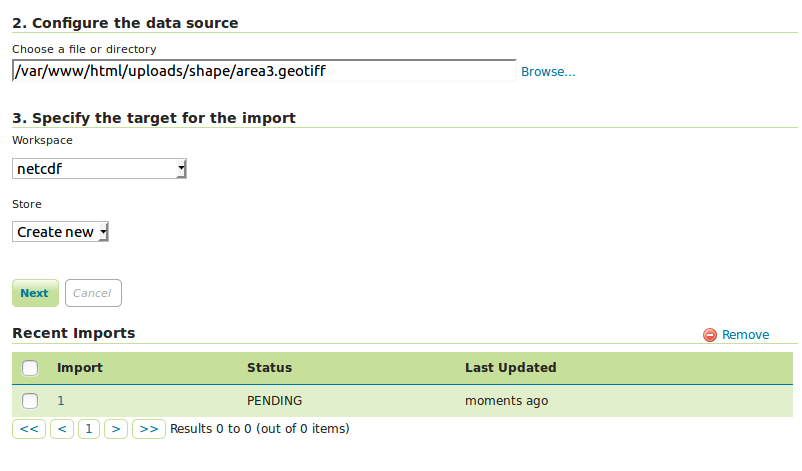
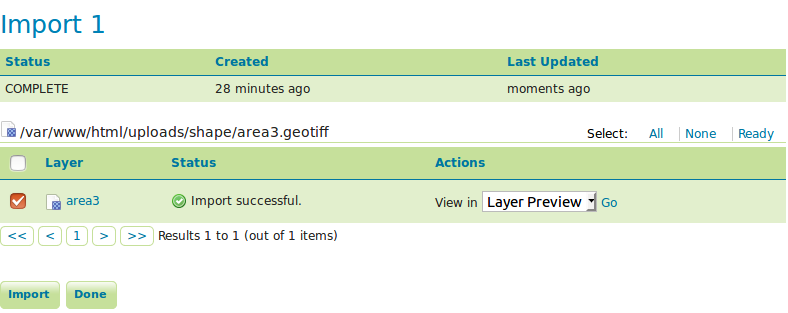
There are two simple steps to upload and publish data. To upload data you can click on browse and find the file to upload, select workspace and store then click to next . If data is successfully uploaded an import id is generated with status pending. The status shows that data has been added but it is not published.
To publish data you can click on import id. New page will open. Here you can click on layer name to change any setting or style. 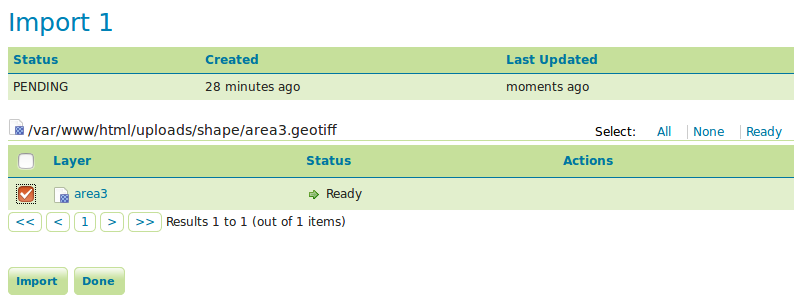
To publish click on check box and hit import button. Now published data is available to you to view in layer preview and google earth. Select the desired option and click to go.
Publish Data using REST API- Geoserver Importer Extension
To upload and import data we can also use REST API (Representational state transfer Application programming interface). For this you need to follow the code.
private function create_a_task($workspace)
 {
 $headers = ['Content-Type: application/json', 'accept: application/json'];
 $data['import']=array('targetWorkspace'=> array('workspace'=> array('name'=>$workspace)));
 $settings = [
 CURLOPT_HTTPHEADER => $headers,
 CURLOPT_USERPWD => $this->passwordString,
 CURLOPT_RETURNTRANSFER => TRUE,
 CURLOPT_POST => TRUE,
 CURLOPT_POSTFIELDS=> json_encode($data),
 ];

$endpoint = "rest/imports";
 $response = $this->call($endpoint, $settings);
 if($response)
 {
 return $response;
 }else{
 return FALSE;
 }
 }
Whether task has created or not, you can check by browsing http://localhost:8080/geoserver/rest/imports link. you will get the following output.
{"imports":[{"id":1,"href":"http://localhost:8080/geoserver/rest/imports/1","state":"PENDING"}]}After creating a task you can publish the task by executing the given function.
private function upload_task_data($fileName,$id,$workspace)
 {
 $headers = ['Content-Type: multipart/form-data', 'accept: application/json'];
 $finfo = finfo_open(FILEINFO_MIME_TYPE);
 $finfo = finfo_file($finfo, $fileName);
 $cFile = new CURLFile($fileName, $finfo, basename($fileName));
 $data = array( "filedata" => $cFile, "filename" => $cFile->postname);
 $settings = [
 CURLOPT_HTTPHEADER => $headers,
 CURLOPT_USERPWD => $this->passwordString,
 CURLOPT_RETURNTRANSFER => TRUE,
 CURLOPT_POST => TRUE,
 CURLOPT_POSTFIELDS => $data,
 CURLOPT_INFILESIZE => filesize($fileName),
 ];

$endpoint = "rest/imports/".$id."/tasks";
 $response = $this->call($endpoint, $settings);
 if($response)
 {
 return $response;
 }else{
 return FALSE;
 }
 }
To check the output of code follow the link and get the output.
http://localhost:8080/geoserver/rest/imports/1/tasks
{"tasks":[{"id":0,"href":"http://localhost:8080/geoserver/rest/imports/1/tasks/0","state":"READY"}]private function ready_imports($import_id,$workspace)
{
$headers = ['Content-Type: application/json', 'accept: application/json'];
$settings = [
CURLOPT_HTTPHEADER => $headers,
CURLOPT_USERPWD => $this->passwordString,
CURLOPT_RETURNTRANSFER => TRUE,
CURLOPT_POST => TRUE,
];
$endpoint = "rest/imports/".$import_id;
$response = $this->call($endpoint, $settings);
if($response)
{
return $response;
}else{
return FALSE;
}
}Output will be
{"import":{"id":1,"href":"http://localhost:8080/geoserver/rest/imports/1","state":"COMPLETE","archive":false,"targetWorkspace":{"workspace":{"name":"netcdf"}},"data":{"type":"file","format":"GeoTIFF","file":"area3.geotiff"},"tasks":[{"id":0,"href":"http://localhost:8080/geoserver/rest/imports/1/tasks/0","state":"COMPLETE"}]}}After publishing your data, you can also look for how to style your raster layer in geoserver and how to style vector layer in geoserver. Simultaneously you can check the data on geoserver. In this way you can upload and publish the data on geoserver with importer api. For any help and suggestions you can comment us in given box.