The GIS process needs file conversion in order for it to function properly in various applications. The MAPOG Map Analysis Converter Tool makes this process quick and easy with the simple format conversion of data.
What is MapInfo File?
The geographic information system software MapInfo Professional uses a file format called a MapInfo file. It can be used to build and analyze maps and stores geographic data such as boundaries, points of interest, and maps. Environmental studies, urban planning, and other applications using spatial data frequently use it.
Key Concept for Conversion MapInfo to GPX:
The Converter Tool in MAPOG Map Analysis provides a platform that’s for converting data in different formats. All users can now easily complete the conversion procedure due to this tool’s huge simplicity. Here’s how to use MAPOG to convert MapInfo files to GPX:
Step-by-Step Guide to Converting MapInfo to GPX
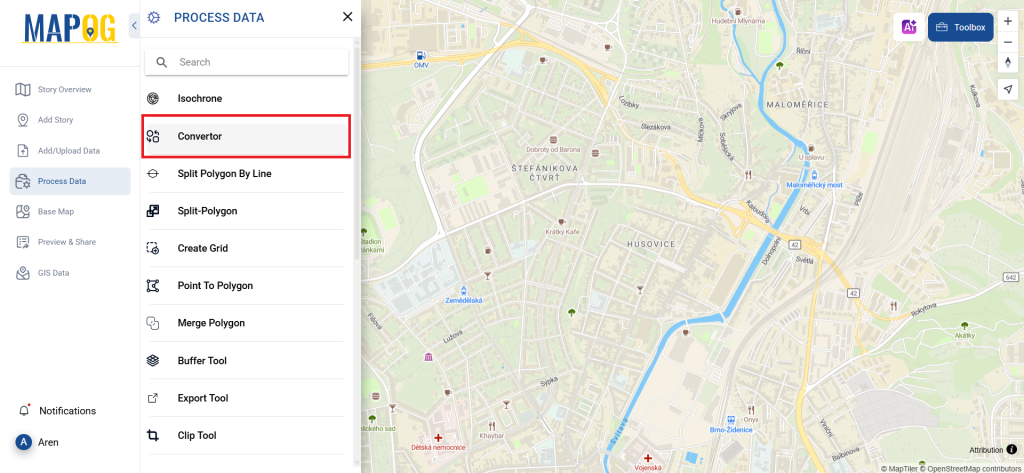
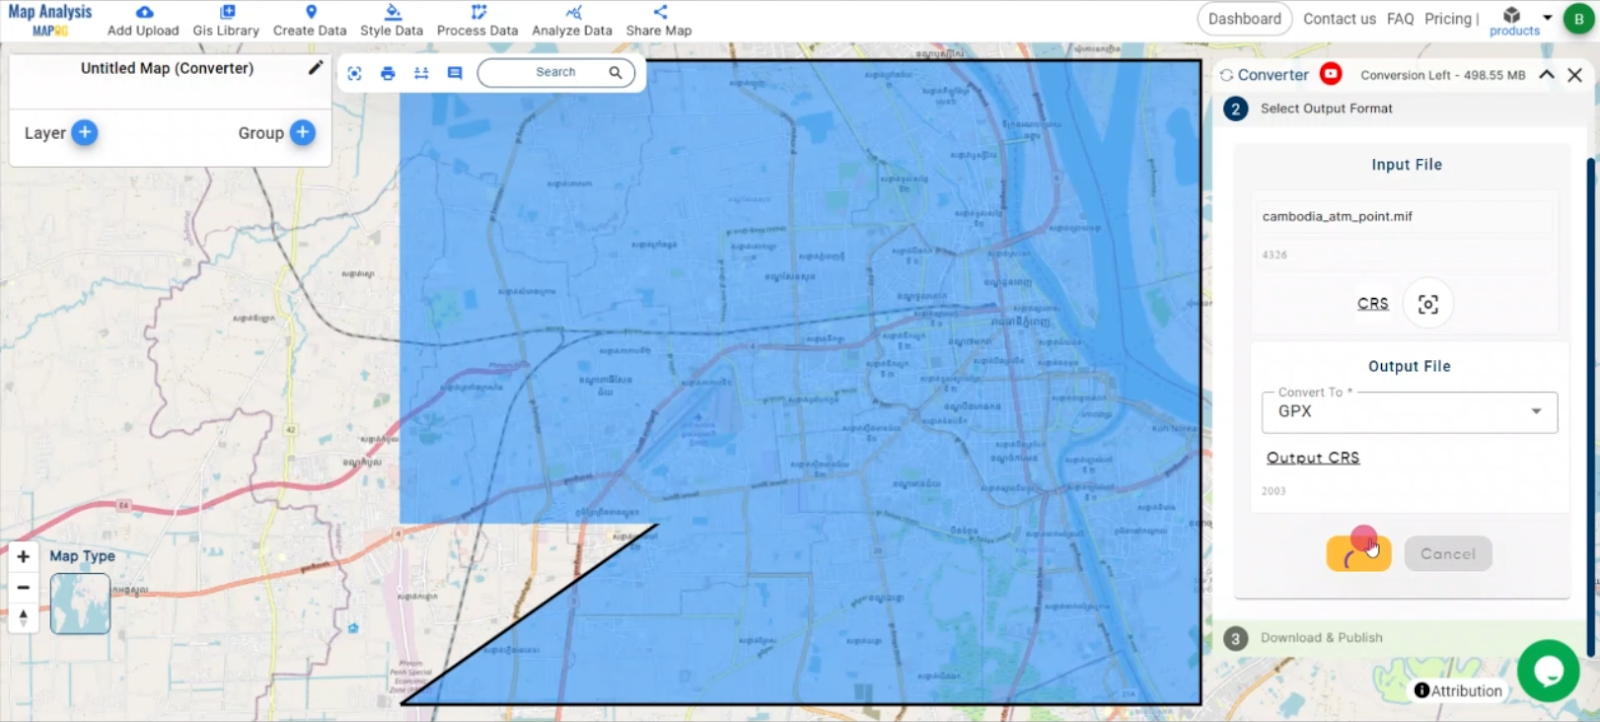
Step 1: Upload the Data
To begin, open MAPOG Map Analysis and go to the Process Data area. Choose the “Converter Tool” option from there. Make sure your MapInfo file is prepared for conversion before uploading it.

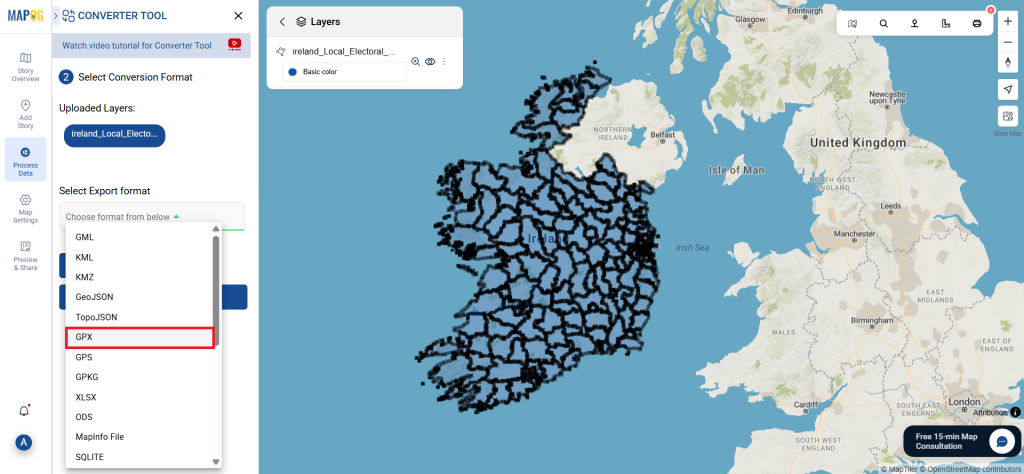
Step 2: Select the Format for Conversion
Select GPX as the output format next. The file format that can be output after the conversion is selected in this stage.

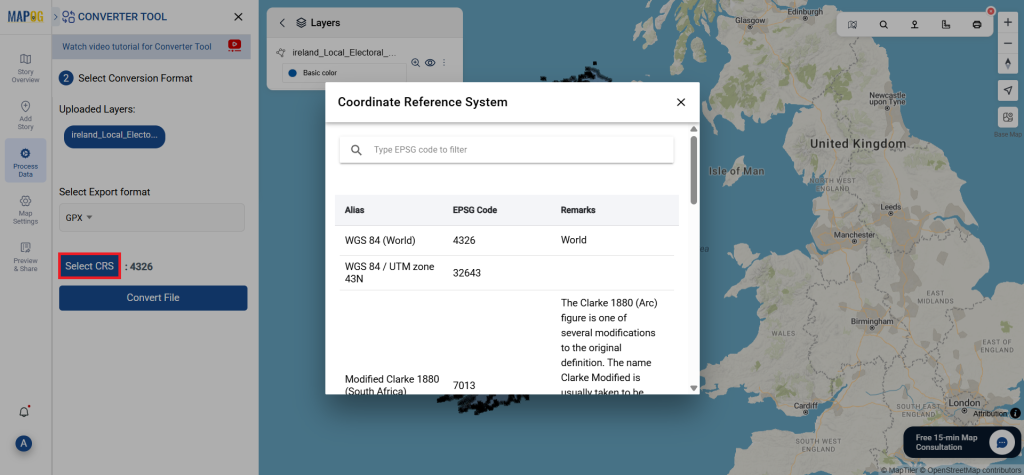
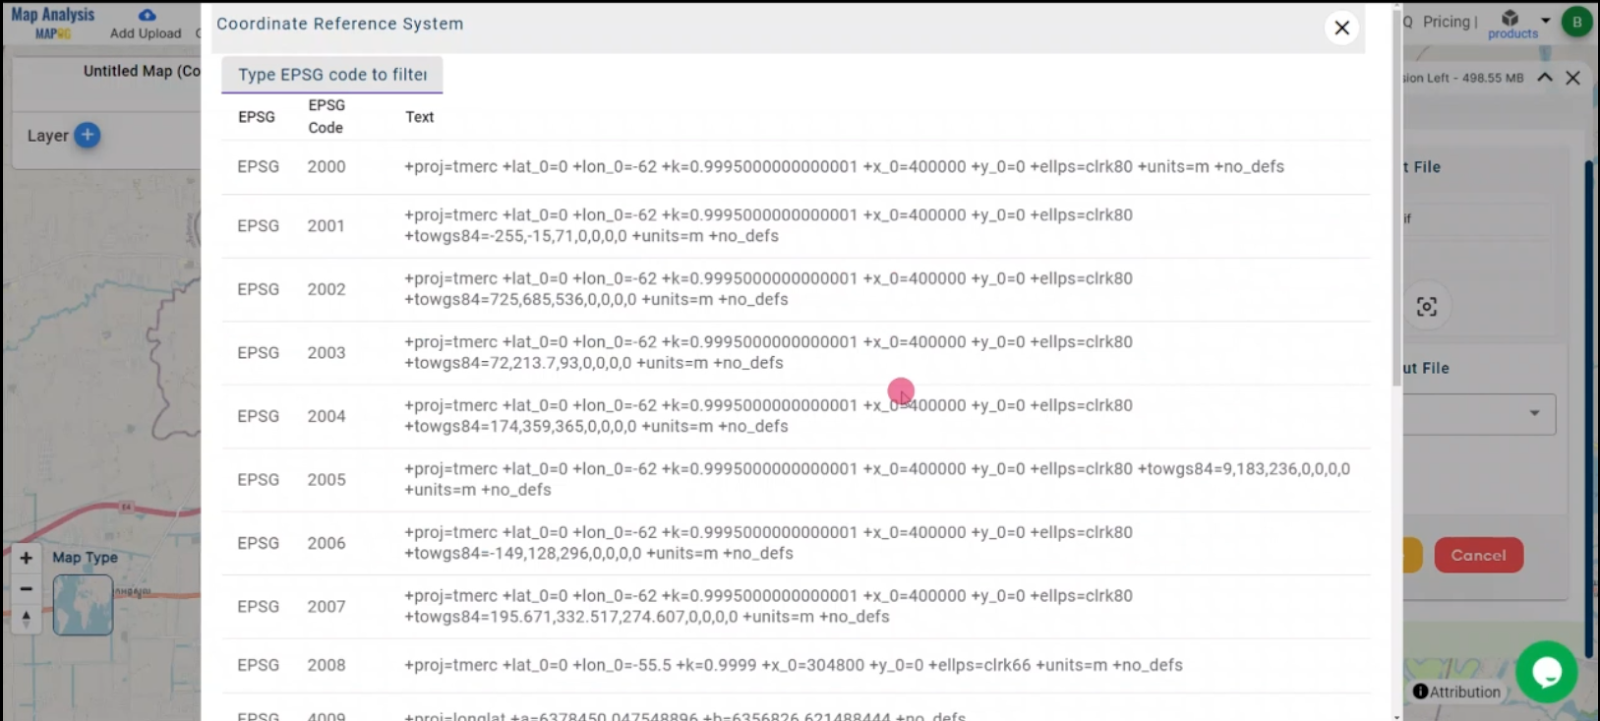
Step 3: Choose the Output CRS
Choose the proper CRS for your GPX file based on your requirements. This makes sure that the data is properly georeferenced for your particular use case.
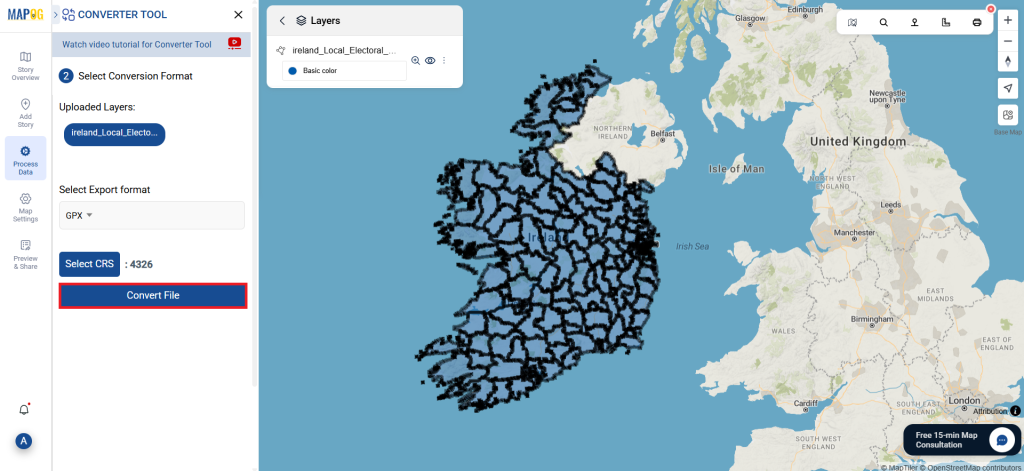
Step 4: Run the Conversion
Begin the conversion procedure once your options have been created. The Mapinfo file gets completed by the tool and converted into a GPX file.
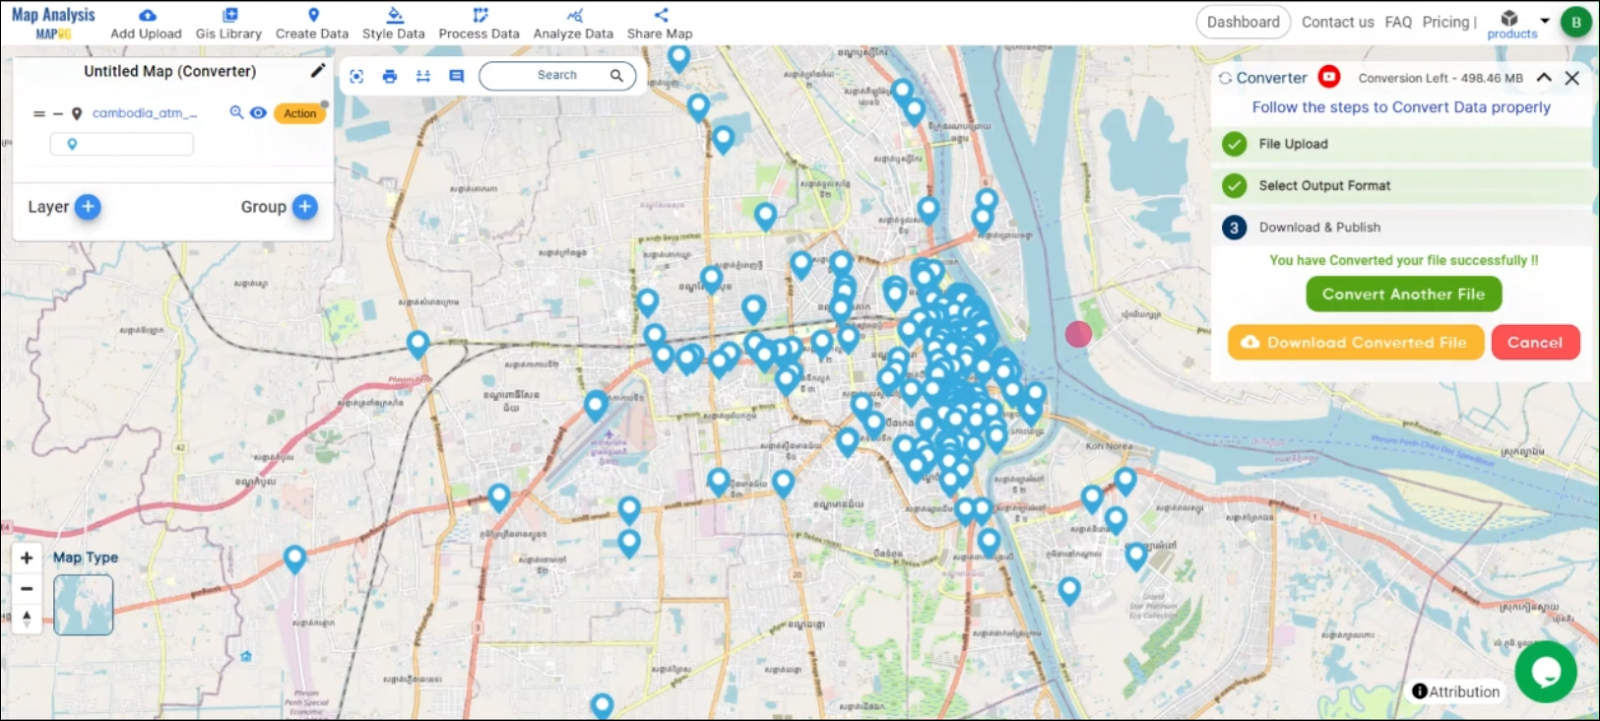
Step 5: Review and Download
Check the output after the conversion and Download the GPX file.
Conclusion:
An essential tool for GIS professionals, the MAPOG Converter Tool simplifies the process of converting data between various formats. By following these simple steps, you can quickly convert Mapinfo files to GPX and make sure your data is ready for a wide range of applications. If you need to download any data file in MapInfo or in any other formats like DXF, GML, MID. visit GIS DATA. Here we have 900+ data layers for 200+ countries.
Feature Tool:
Story by MAPOG:
For users who wish to employ interactive and eye-catching maps to bring their data to life, Story by MAPOG is ideal. By combining maps with multimedia components like text and photographs, you may create compelling narratives. Story by MAPOG simplifies the process of producing shareable content, whether you’re leading a tour, presenting research, or exhibiting a project.