Converting GeoJSON to PDF: A Step-by-Step Guide

This guide outlines a simple and clear process for converting GeoJSON files into PDF format using the Converter Tool  within MAPOG. Whether you’re new to MAPOG or have prior experience, this tutorial will help you navigate the conversion process smoothly.

What is GeoJSON Data Format:

GeoJSON is a geospatial data format based on JSON (JavaScript Object Notation) used to represent geographic features such as points, lines, and polygons. It stores both spatial data (coordinates) and attribute information, making it widely used for web mapping and data exchange in GIS applications due to its simplicity and compatibility with various platforms.

                                     Online GIS Data Conversion

Converting GeoJSON to PDF Data:

MAPOG’s features an advanced Converter Tool that allows users to seamlessly switch between different data formats based on their needs. This tool simplifies data conversion across multiple GIS applications, providing both flexibility and efficiency in managing various formats. For example, MAPOG’s Converter Tool can convert GeoJSON data into PDF format, optimizing file size while retaining crucial geographic details. This enhances the data’s compatibility with web-based mapping and interactive platforms, improving workflows and significantly boosting the usability of GIS data.

                    Steps to Convert GeoJSON to PDF:

Step 1: Upload Your Data:

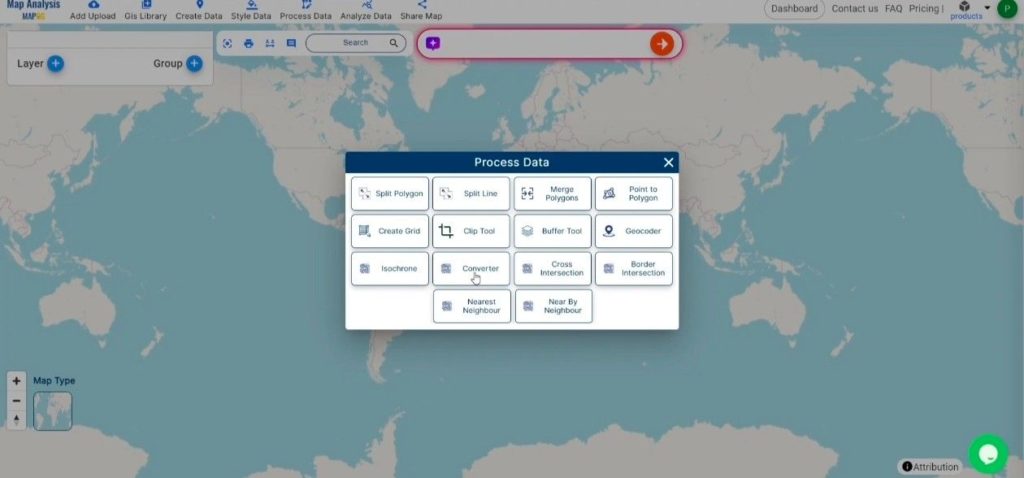
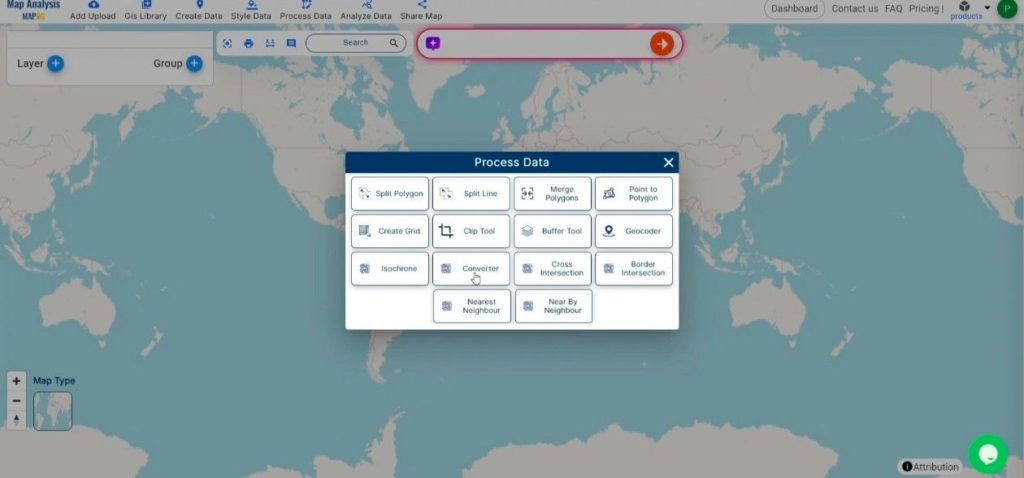
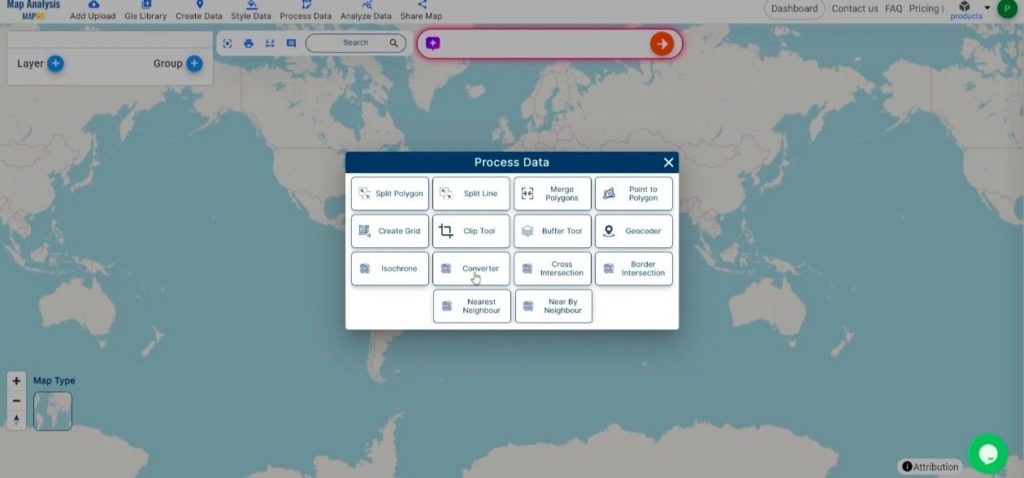
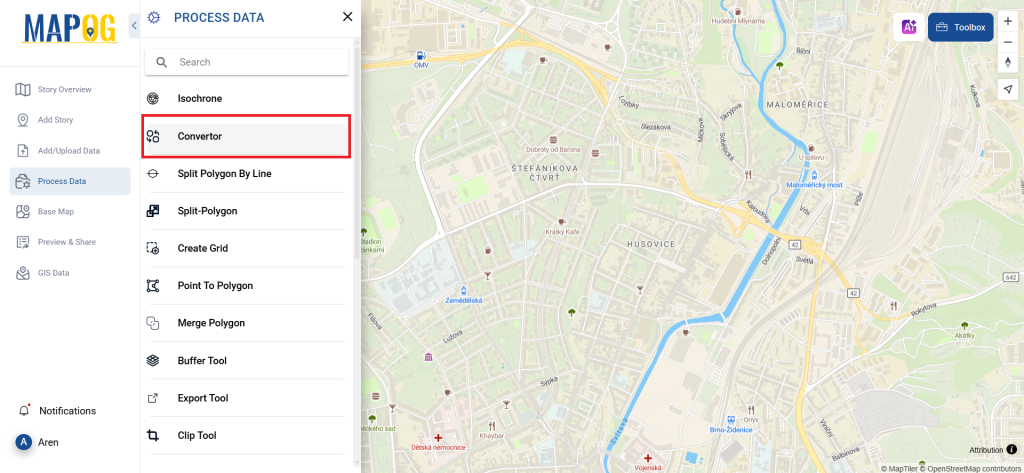
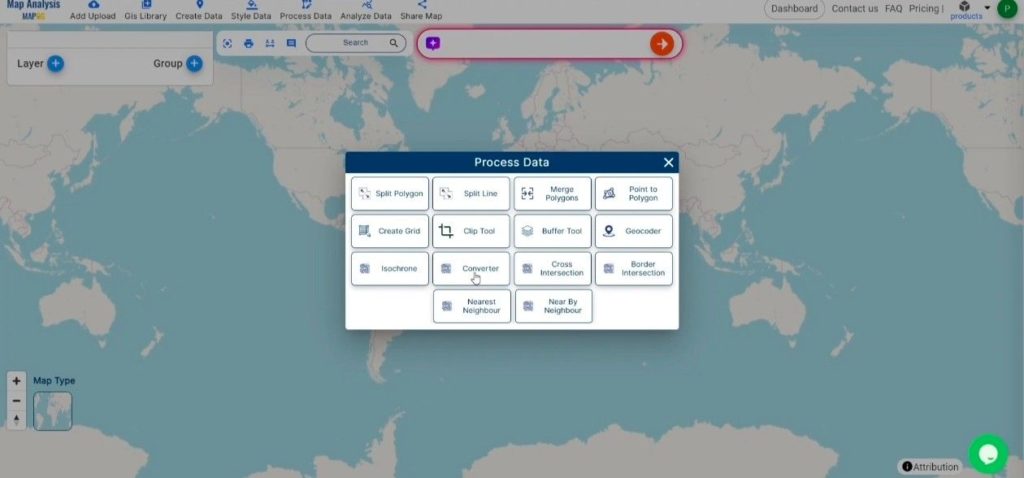
  1. From the top menu, click on “Process Data” and select “Converter Tool” to start the conversion process.
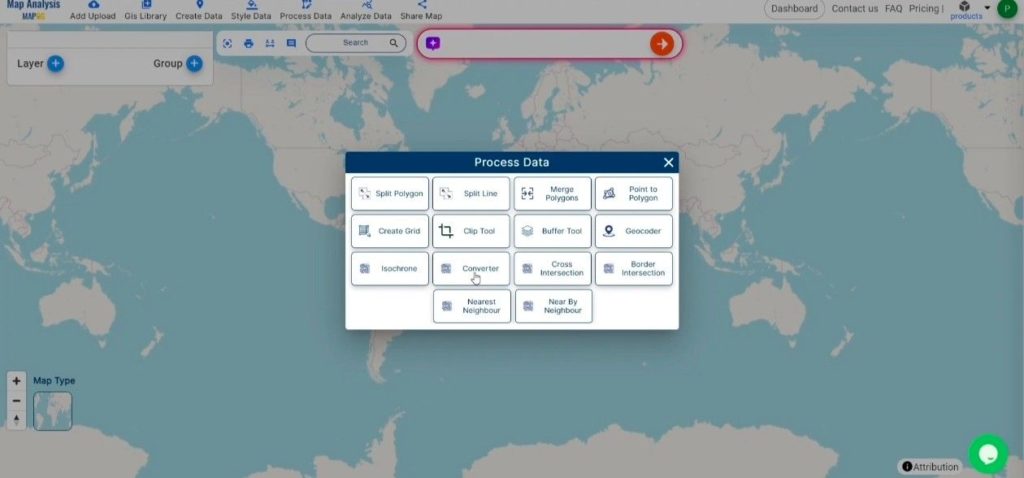
Converting GeoJSON to PDF Online
Choose the converter tool

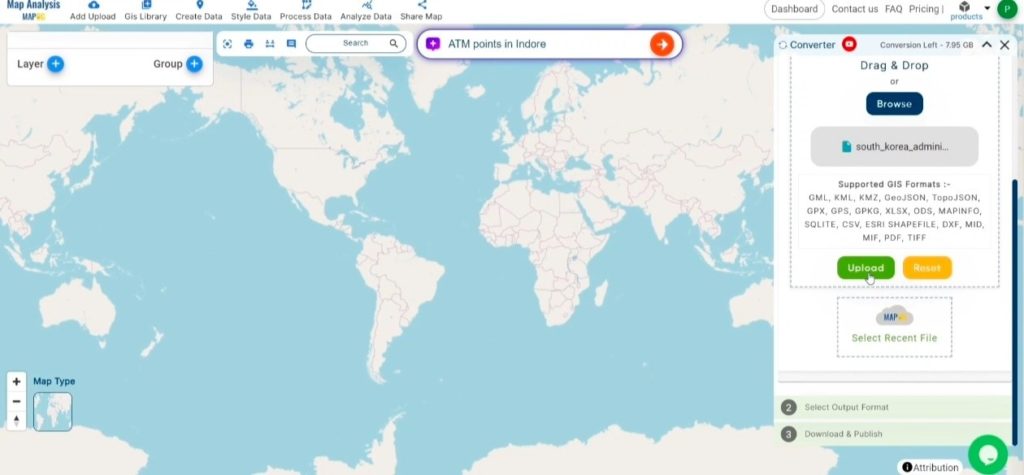
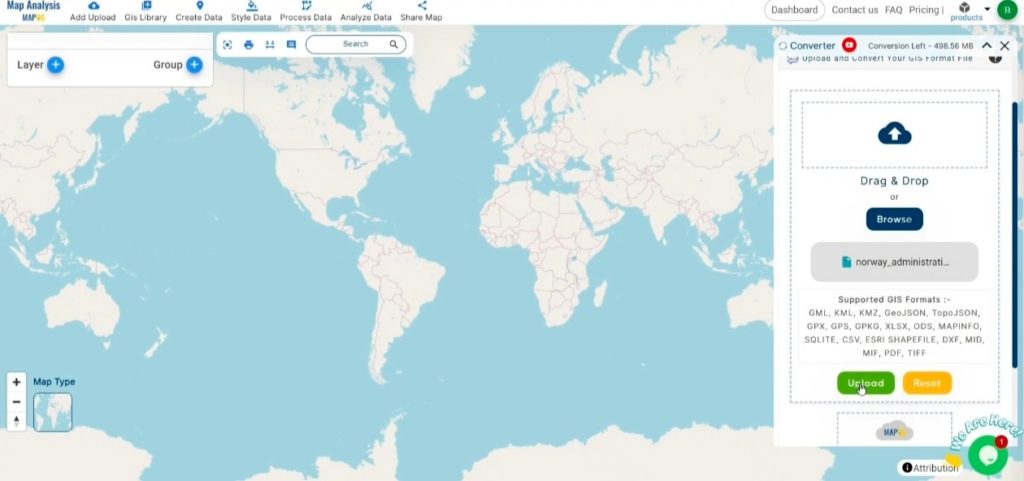
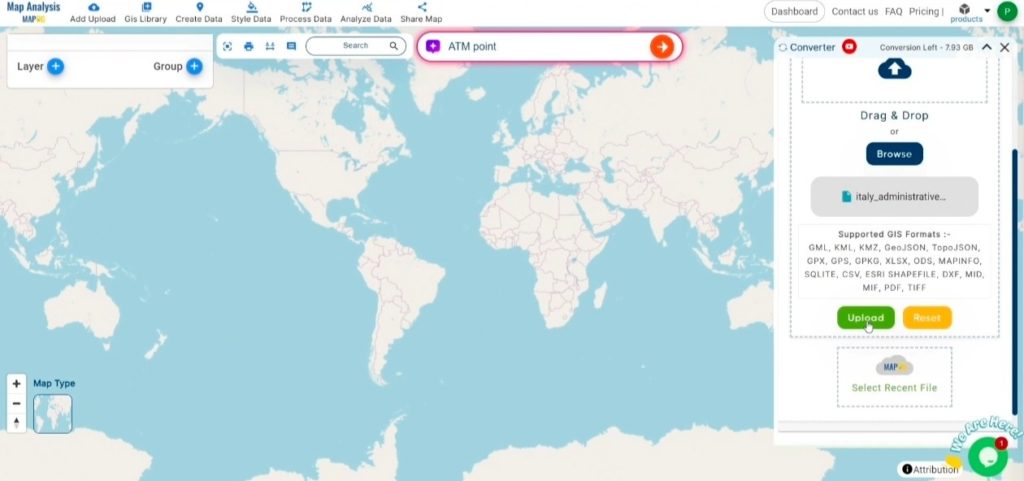
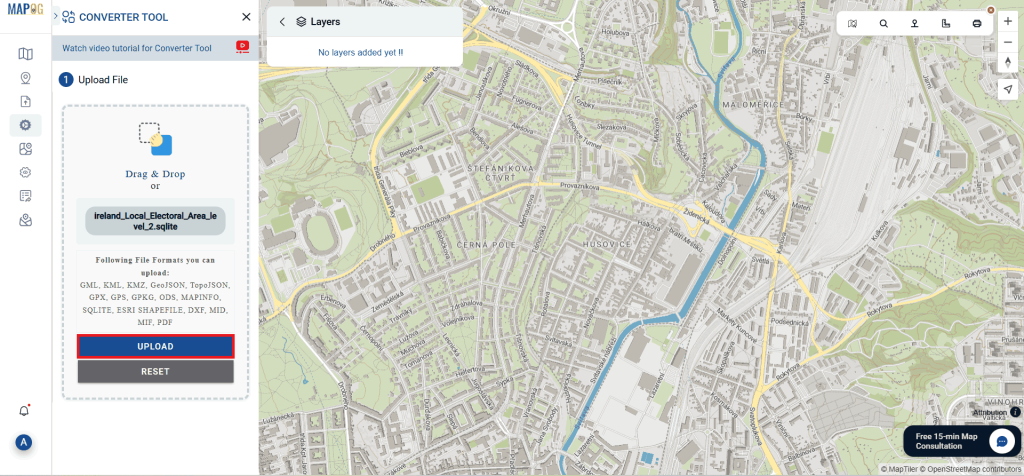
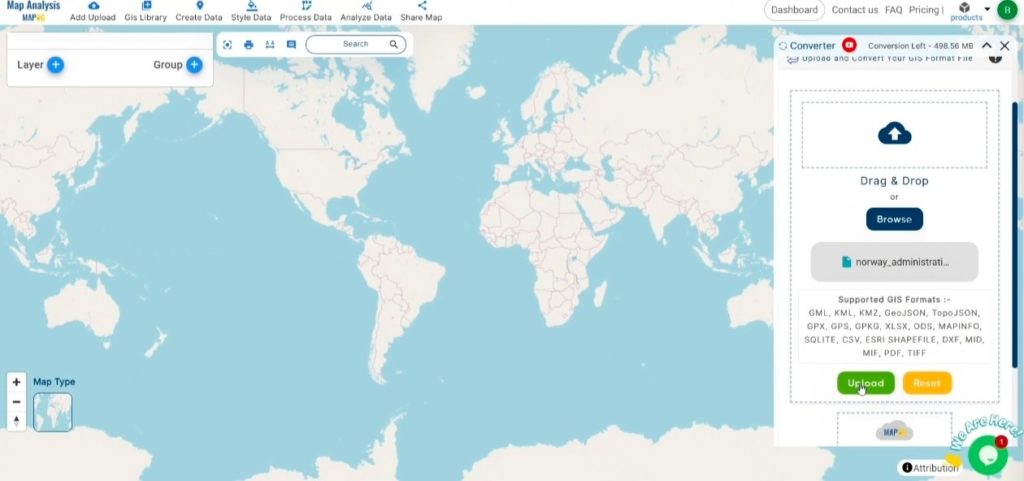
2. To start the conversion, upload your GeoJSON file by selecting the data you want to convert.
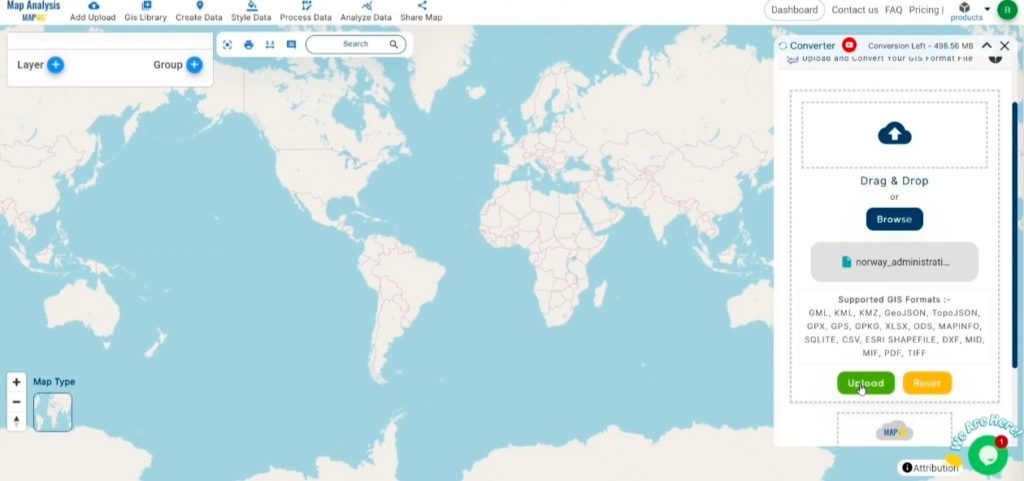
Converting GeoJSON to PDF Online
Upload your data

Step 2: Select the Output Format:

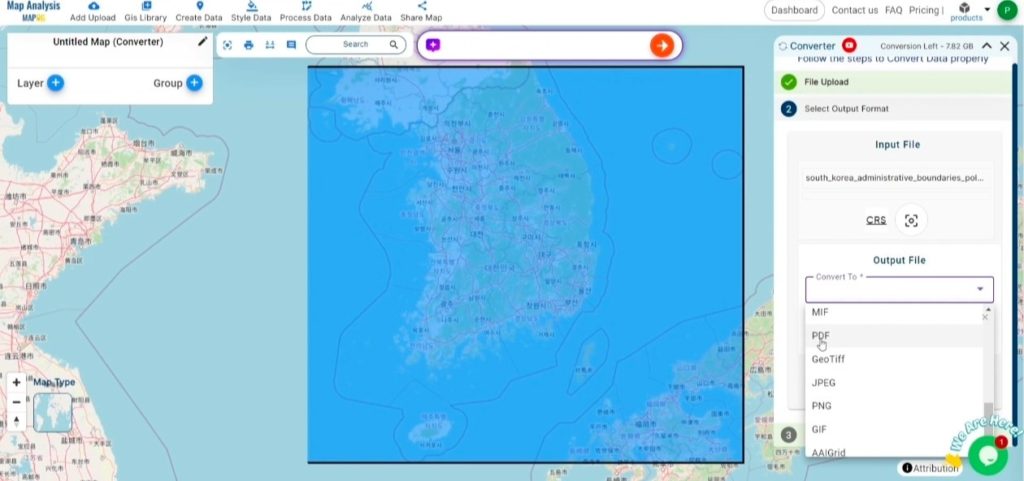
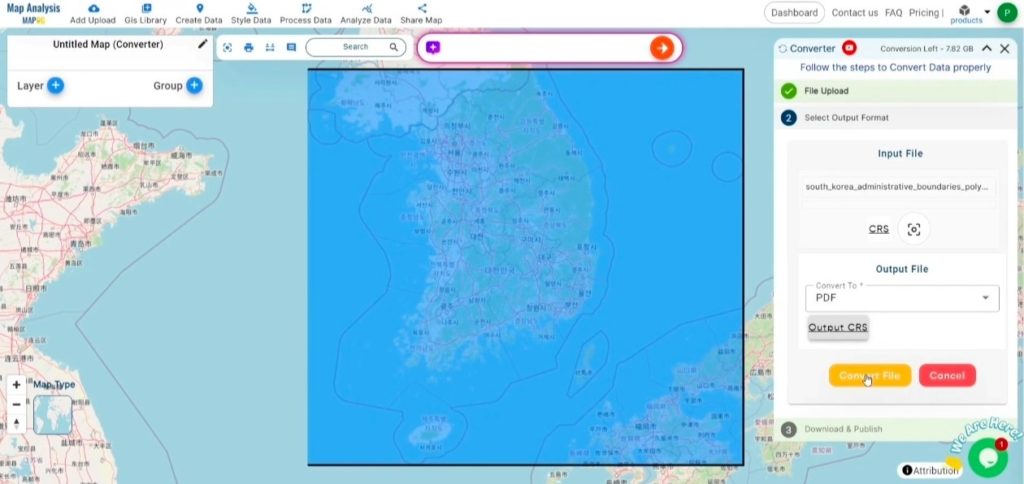
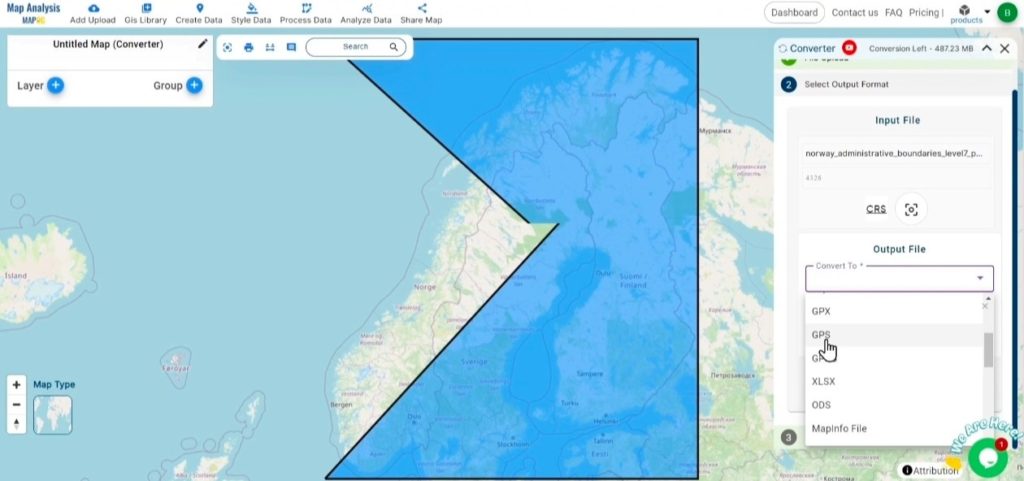
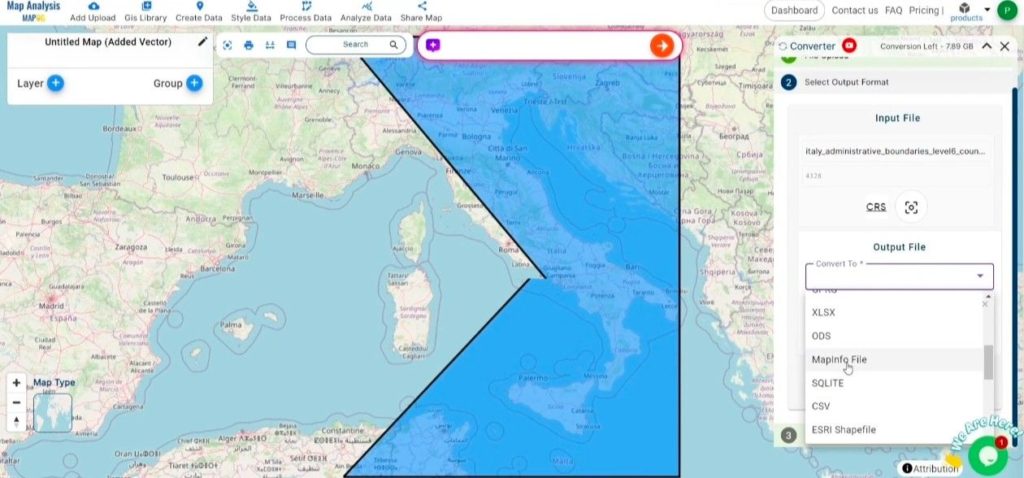
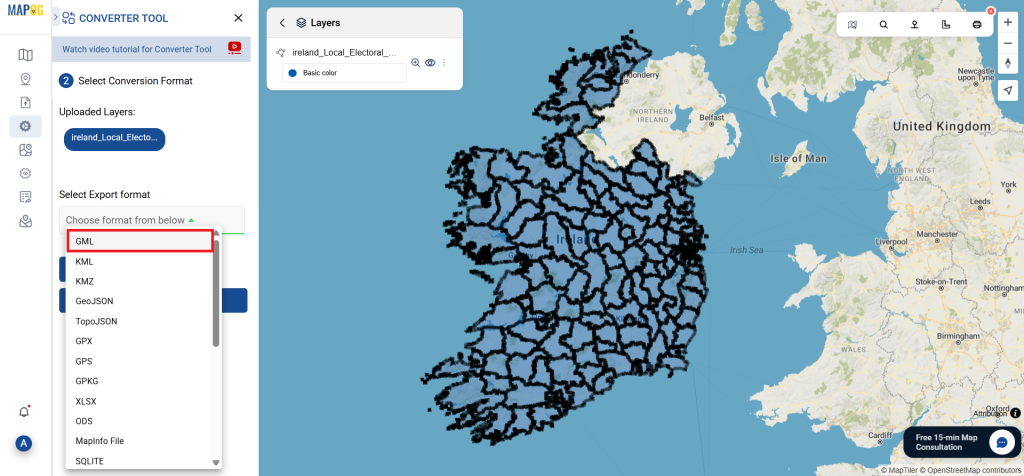
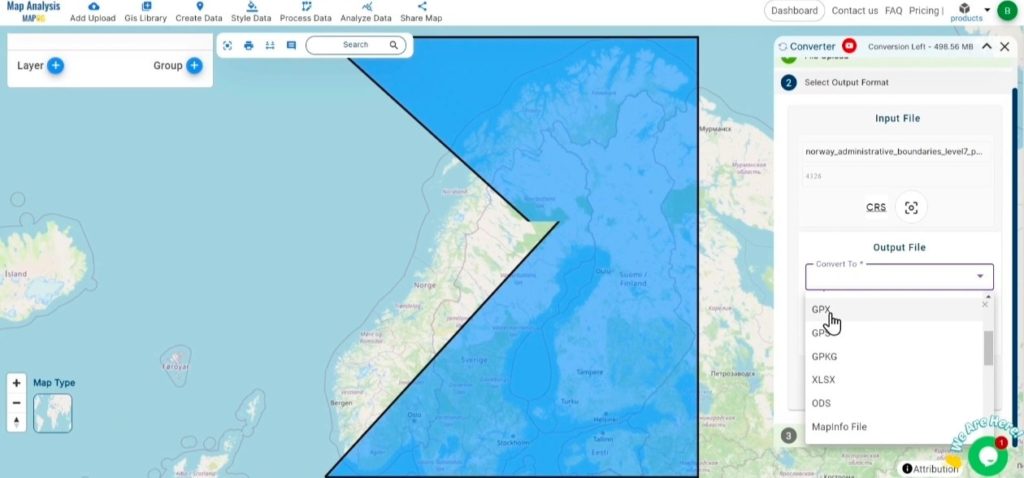
  1. In the Converter Tool, you’ll find several output format options. Choose PDF as the format for exporting your data. Although the tool supports multiple formats, this guide focuses specifically on converting your GeoJSON file to PDF format.
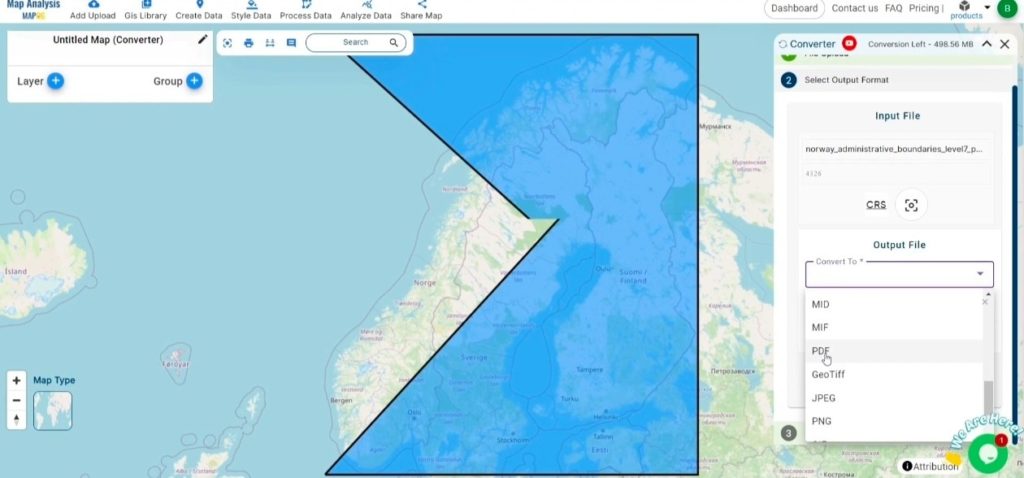
Converting GeoJSON to PDF Online
Select the format

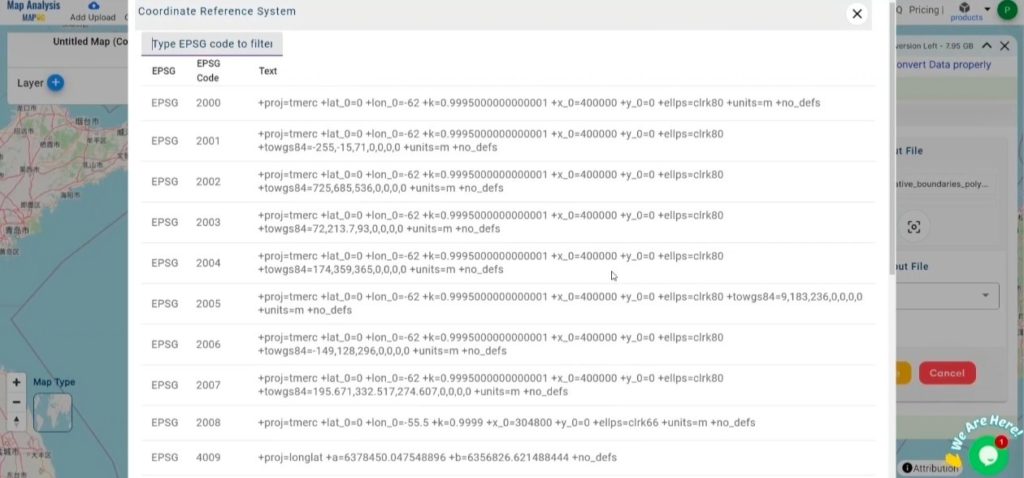
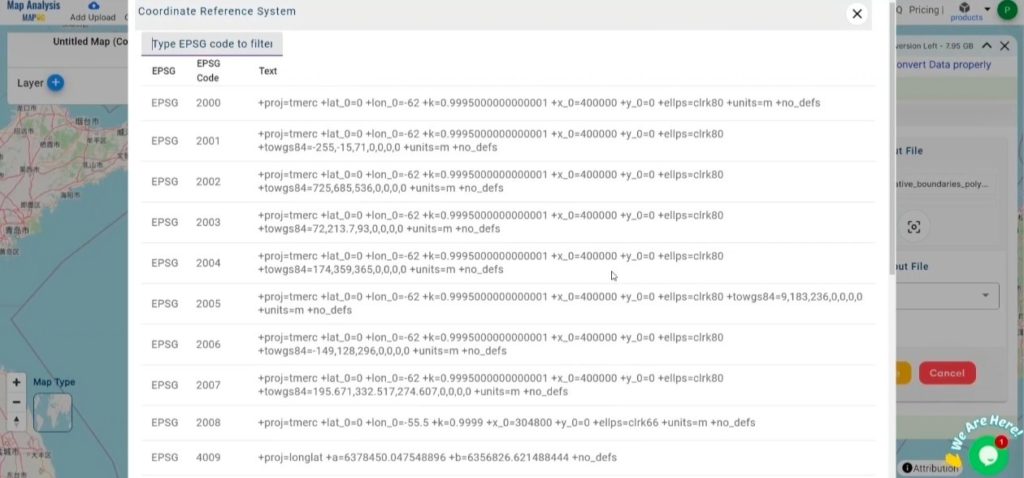
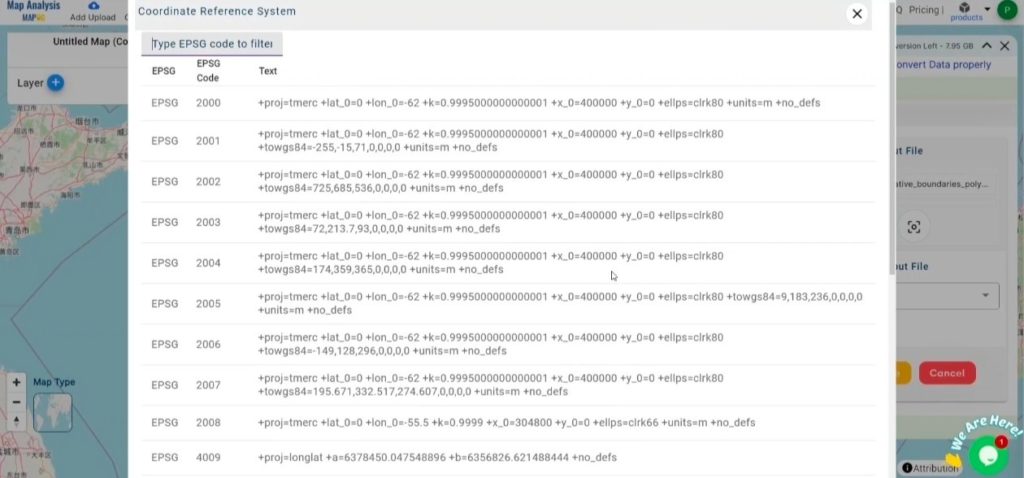
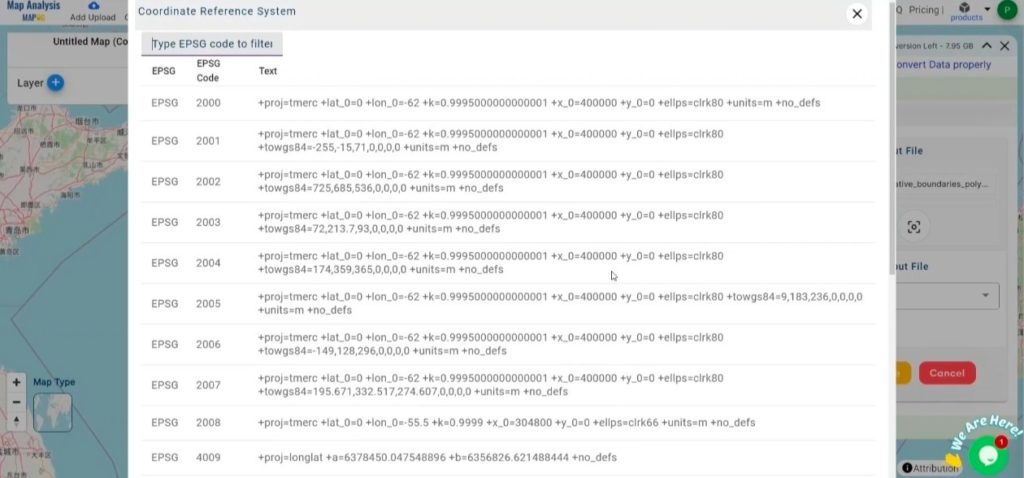
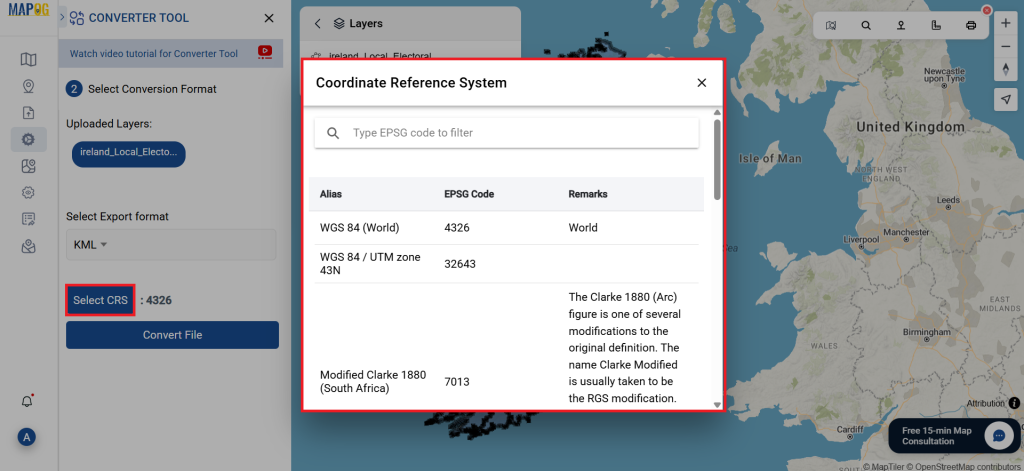
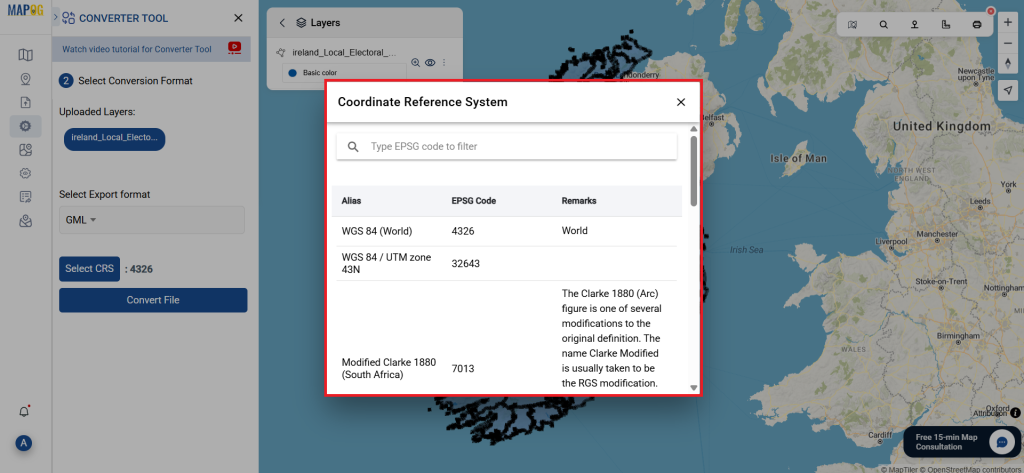
2. You can also Choose the Output Coordinate Reference System (CRS) according to your spatial analysis requirement.
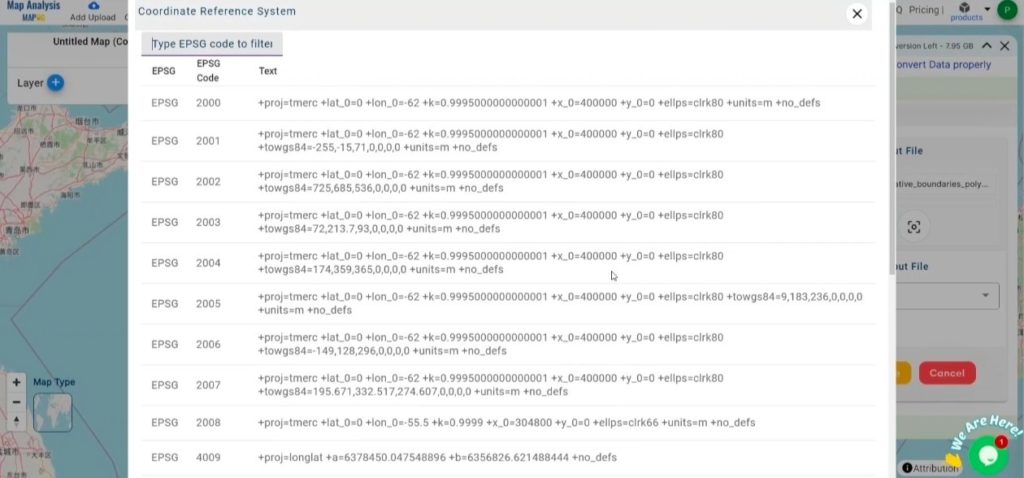
Converting GeoJSON to PDF Online
Set the CRS

Step 3: Execute the Conversion:

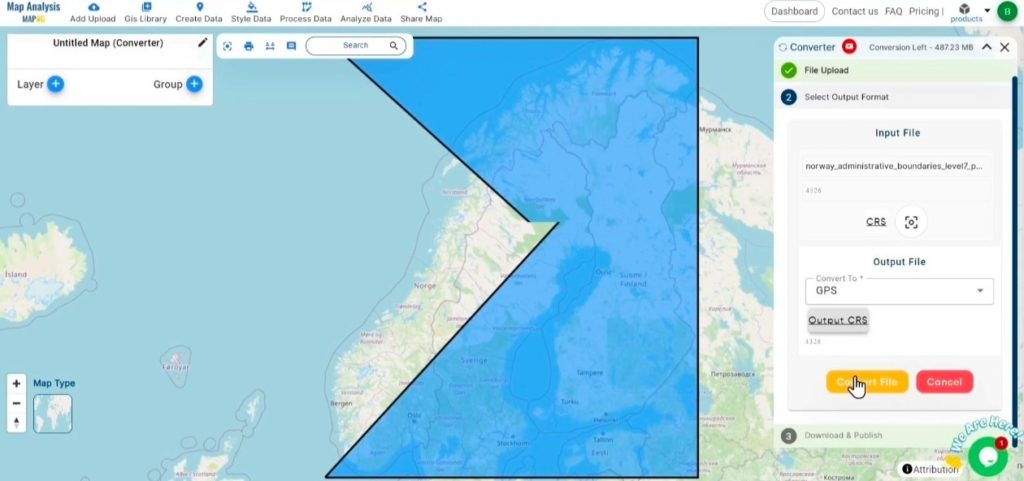
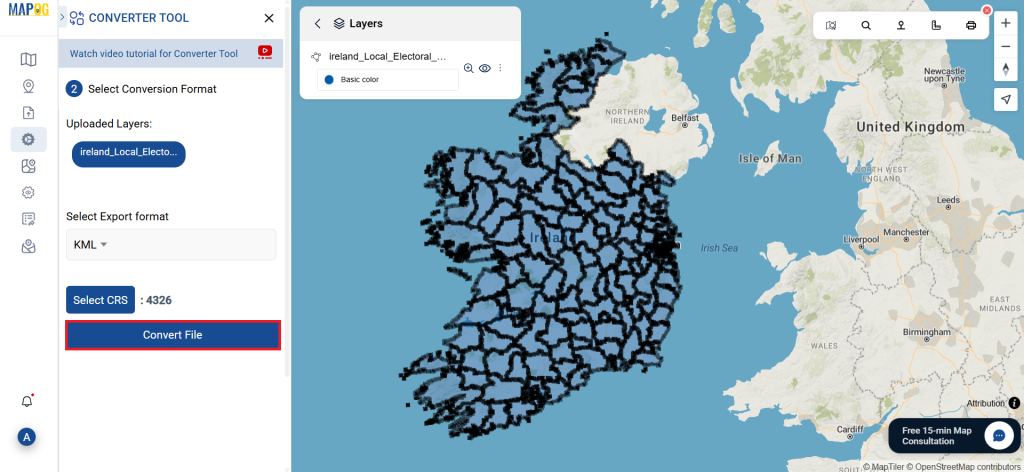
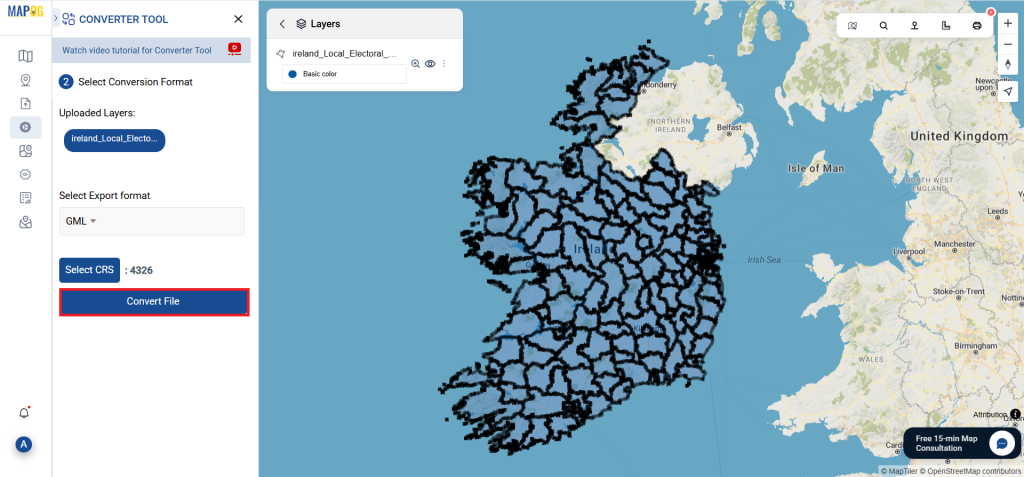
Navigate to the “Convert Files” section within the Converter Tool. Upload your GeoJSON file, and the tool will automatically handle the conversion. It will efficiently convert your GeoJSON file to PDF format, ensuring a quick and seamless process.
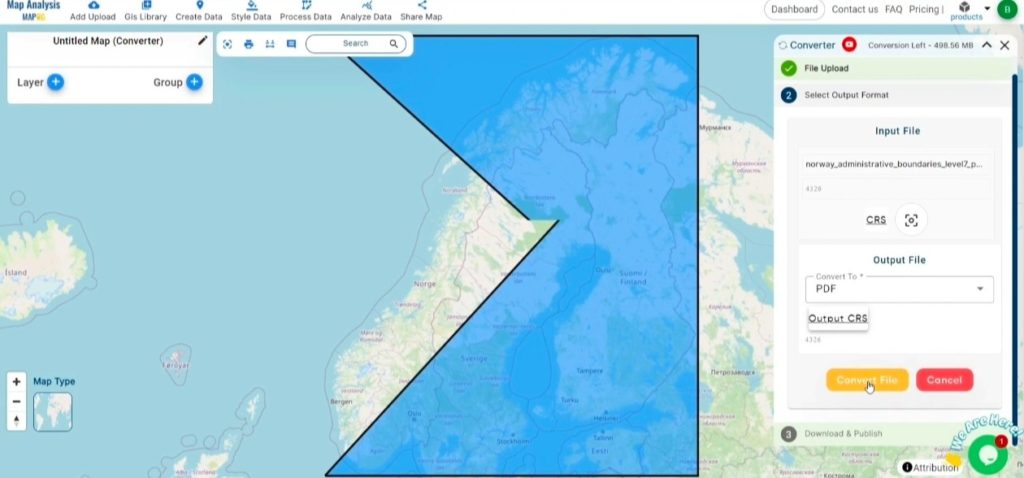
Converting GeoJSON to PDF Online
Convert the file

Step 4: Review and Download:

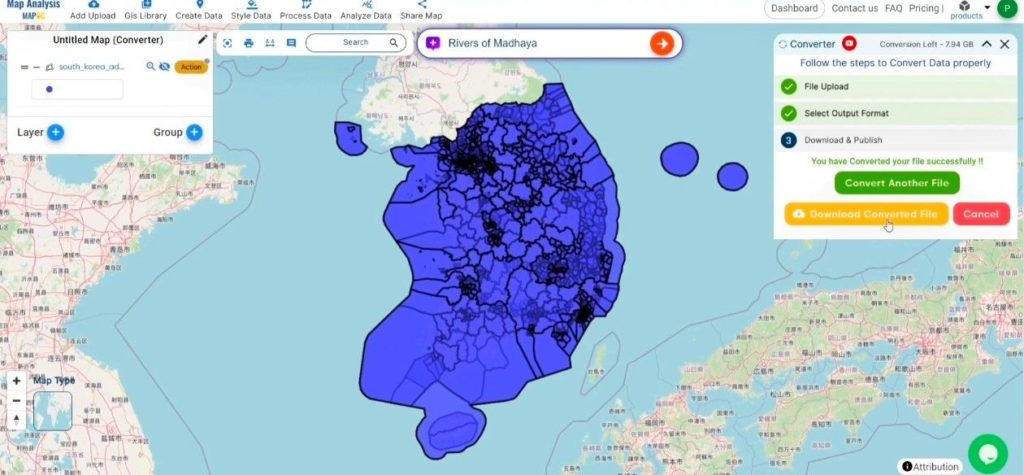
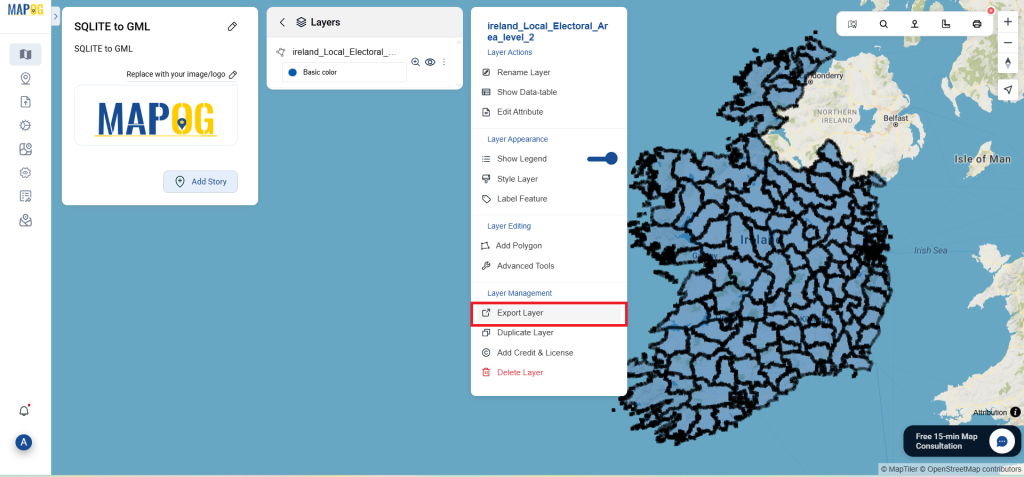
Once the conversion is finished, review your PDF file to verify that the data has been accurately converted and preserved. Confirm that the spatial details and layout are correct and meet your expectations. After ensuring the output is satisfactory, download the file. This final step guarantees a successful conversion tailored to your project requirements.
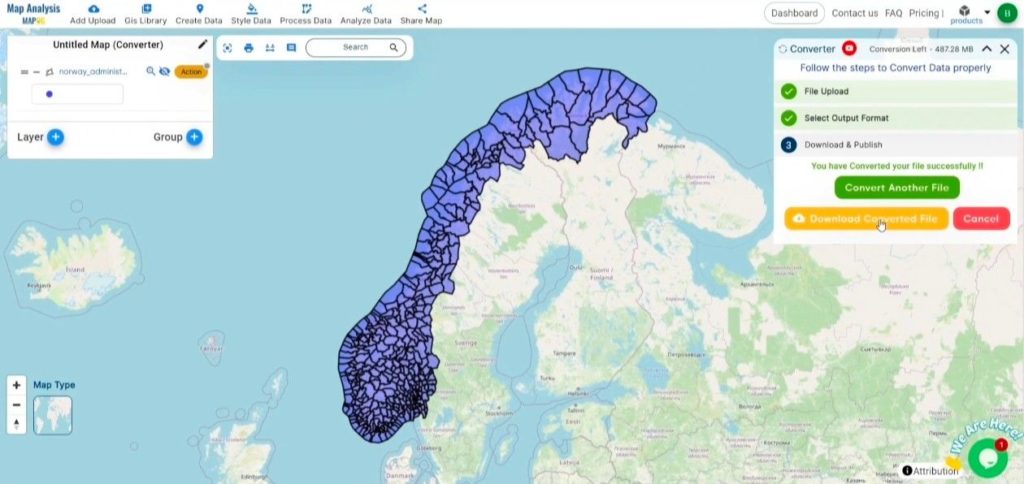
Converting GeoJSON to PDF Online
Download the file

Conclusion:

MAPOG Map Analysis offers a range of powerful tools to streamline your workflow. These include the Clip Tool for trimming datasets, the Basic Style Tool for formatting numerical data, and the Create Point Tool for adding point features to your maps. Additionally, the Create Grid Tool allows for the generation of grids using various data types, providing even more flexibility and functionality for your GIS projects.

MAPOG:

MAPOG is perfect for users who want to bring their data to life through interactive and visually engaging maps. It allows you to tell powerful stories, blending maps with multimedia elements like images and text. Whether you’re showcasing a project, presenting research, or guiding a tour, Story by MAPOG makes it easy to create shareable content.
 Other Feature Tools contain:

These blogs may also be useful for you:

Converting GeoJSON to GPX: A Step-by-Step Guide

This guide outlines an easy-to-follow process for converting GeoJSON files into GPX format using the Converter Tool within MAPOG. Whether you’re a newcomer to MAPOG or already have experience with the platform, this tutorial will guide you through the conversion process smoothly.

What is GeoJSON Data Format:

GeoJSON is a geospatial data format based on JSON (JavaScript Object Notation) used to represent geographic features such as points, lines, and polygons. It stores both spatial data (coordinates) and attribute information, making it widely used for web mapping and data exchange in GIS applications due to its simplicity and compatibility with various platforms.

                                             Online GIS Data Conversion

Converting GeoJSON Data into GPX Format:

MAPOG , Converter Tool simplifies the process of converting data between different formats, tailored to the user’s specific requirements. This functionality enhances the efficiency of adapting data for diverse GIS applications by providing seamless format transformations. For example, when converting GeoJSON data to GPX format using MAPOG’s Converter Tool, the data size is minimized while retaining critical geographic attributes. This makes it ideal for web mapping and interactive use, optimizing workflows and boosting the usability of GIS data across various platforms and applications.

                      Steps to Convert GeoJSON to GPX:

Step 1: Upload Your Data:

  1. Begin by navigating to the top menu, selecting “Process Data,” and then choosing the “Converter Tool” to initiate the conversion process.
Converting GeoJSON to GPX Online
Choose the converter tool

2. To start the conversion, upload your GeoJSON file by selecting the data you want to convert.

Converting GeoJSON to GPX Online
Upload your data

Step 2: Select the Output Format:

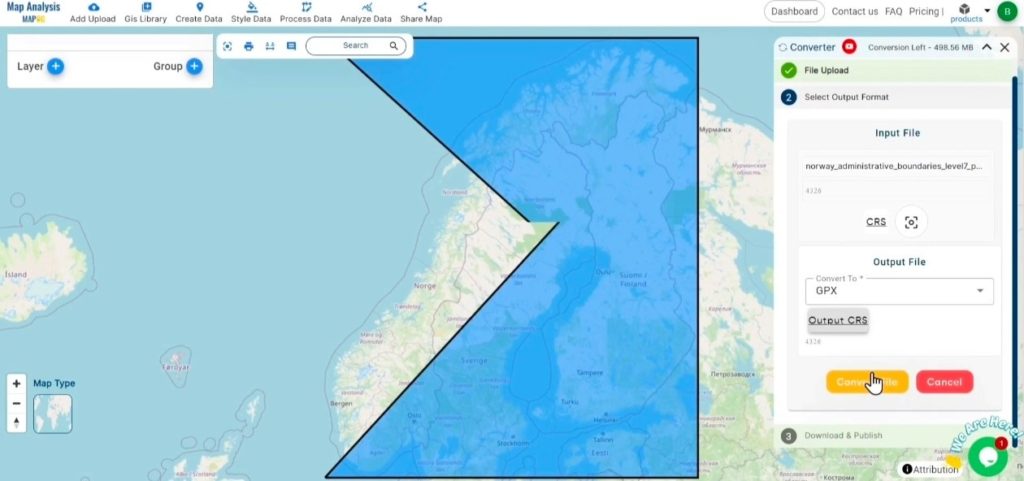
  1. In the Converter Tool, you’ll see a range of output format options. Choose GPX as the format you wish to export your data to. Although the tool offers multiple formats for conversion, this guide is specifically designed to help you convert your GeoJSON file into GPX format.
Converting GeoJSON to GPX Online
Select the format

2. You can also Choose the Output Coordinate Reference System (CRS) according to your spatial analysis requirement.

Converting GeoJSON to GPX Online
Set the CRS

Step 3: Execute the Conversion:

Head to the “Convert Files” section within the Converter Tool. Upload your GeoJSON file, and the tool will handle the conversion. It will efficiently transform your GeoJSON file into GPX format, ensuring the process is quick and easy.

Converting GeoJSON to GPX Online
Convert your data

Step 4: Review and Download:

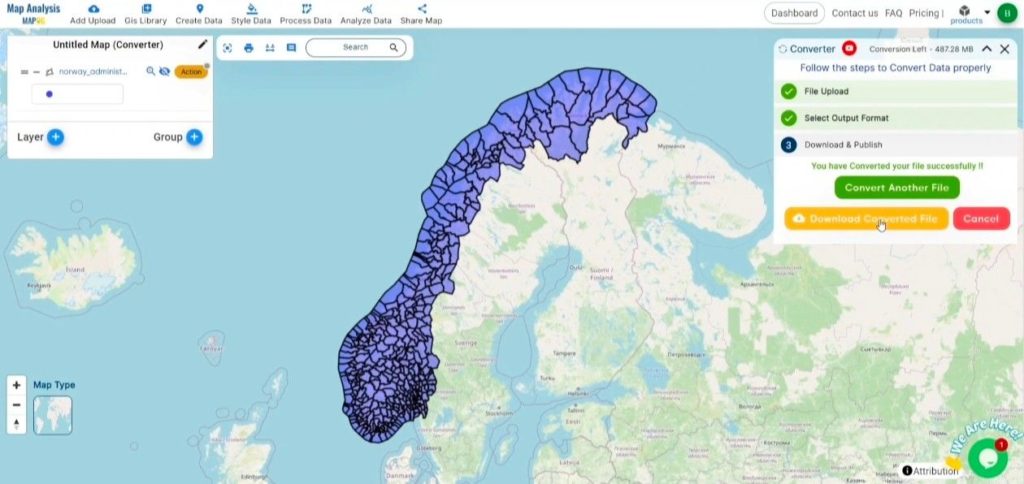
Once the conversion is finished, take a moment to examine your GPX file to confirm that the data has been accurately converted and preserved. Verify that the spatial details and layout are as expected. After ensuring the output meets your standards, go ahead and download the file. This final step ensures the conversion was successful and meets your project requirements.

Converting GeoJSON to GPX Online
Download the data

Conclusion:

MAPOG Map Analysis provides a variety of powerful tools to enhance your workflow. These tools include the Clip Tool for refining datasets, the Basic Style Tool for styling numerical data, and the Create Point Tool for adding point features to your maps. Additionally, the Create Grid Tool offers the capability to generate grids using different data types, adding flexibility and functionality to your GIS projects.

Story by MAPOG:

MAPOG is perfect for users who want to bring their data to life through interactive and visually engaging maps. It allows you to tell powerful stories, blending maps with multimedia elements like images and text. Whether you’re showcasing a project, presenting research, or guiding a tour, Story by MAPOG makes it easy to create shareable content.
 Other Feature Tools contain:

These blogs may also be useful for you:

Download School Data in Shapefile, KML, GeoJSON + 15 GIS Formats

You can easily download school data in formats like Shapefile, KML, GeoJSON, and more. Whether you’re a GIS professional, urban planner, or researcher, having accurate school data from countries like the US, France, and Japan can significantly enhance your projects.

School data is vital for projects involving educational planning, infrastructure development, or demographic analysis. In this guide, we’ll walk you through how to download school data in various GIS formats using the MAPOG GIS DATA platform—a user-friendly tool that simplifies the process of finding and converting data.

Download Schools Dataset

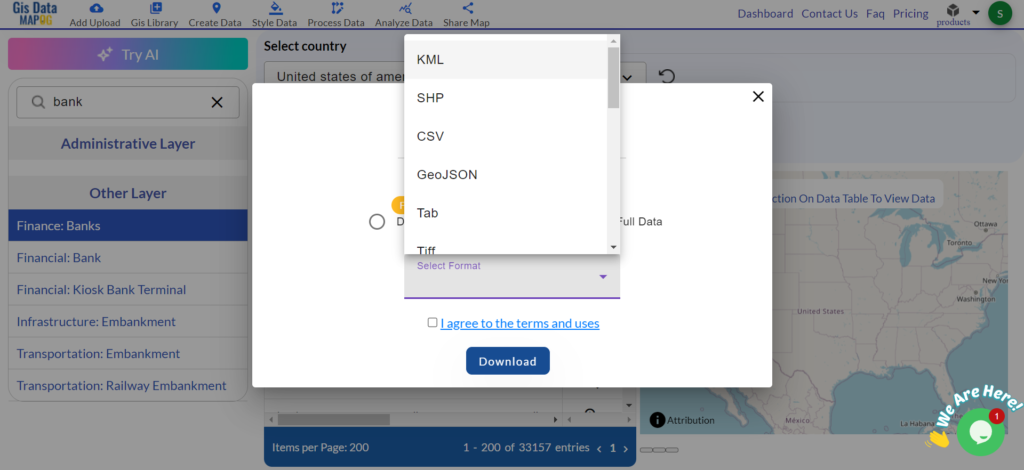
To support different project needs, we offer a variety of data formats. These include KML, SHP, CSV, GeoJSON, Tab, SQL, Tiff, GML, KMZ, GPKZ, SQLITE, Dxf, MIF, TOPOJSON, XLSX, GPX, ODS, MID, and GPS.

Steps to Download Schools Data

Step 1: Open MAPOG GISDATA and Search for the Country

Begin by accessing the MAPOG GIS DATA platform. Type the name of the country you need school data for, such as the United States, France, or Japan, into the search bar. This will help you quickly locate the relevant educational data.

Download School Data in Shapefile, KML, GeoJSON + 15 GIS Formats
Step 1: Open MAPOG GISDATA and Search for the Country
Step 2: Use the AI Search Tool to Find School Districts

MAPOG’s AI search tool helps narrow down your options. For instance, if you’re looking for school data in the USA, you can enter “California school districts” or “New York City schools.” The AI will then locate the appropriate data for you, saving time and effort.

Download School Data in Shapefile, KML, GeoJSON + 15 GIS Formats
Step 2: Use the AI Search Tool to Find School Districts
Step 3: Search for ‘School Data’ and Filter the Layers

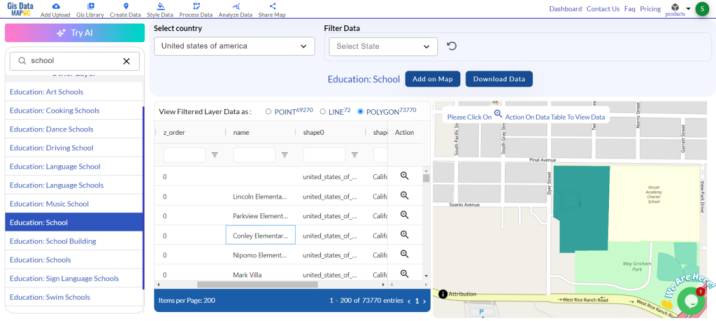
Enter “School” in the search bar to bring up data related to schools, such as locations or district boundaries. You can further refine your results using the “View Filtered Layer Data” option to focus on specific details. Select “Zoom to Action” to closely examine the data and ensure it meets your needs.

Step 3: Search for ‘School Data’ and Filter the Layers
Step 4: Add the Data to the Map for Visual Analysis

After selecting the school data, click “Add to Map.” This allows you to see the data directly on the map, where you can zoom in and explore individual schools in more detail.

Step 4: Add the Data to the Map for Visual Analysis
Step 5: Download the Data

Once you’ve reviewed the data, click “Download.” Choose your preferred format—such as Shapefile, KML, or GeoJSON—and download the data for your project.

Download School Data in Shapefile, KML, GeoJSON + 15 GIS Formats
Step 5: Download the Data

Conclusion

The MAPOG GISDATA platform makes it easy to find and download school data. Whether you’re involved in educational planning, infrastructure projects, or research, following these simple steps will help you obtain the data you need in the right format. For any assistance, feel free to reach out to us at support@mapog.com.

With MAPOG’s versatile toolkit, you can effortlessly upload vector and upload Excel or CSV data, incorporate existing layers, perform polyline splitting, use the converter for various formats, calculate isochrones, and utilize the Export Tool.

Disclaimer: The GIS data provided for download in this article was initially sourced from OpenStreetMap (OSM) and further modified to enhance its usability. Please note that the original data is licensed under the Open Database License (ODbL) by the OpenStreetMap contributors. While modifications have been made to improve the data, any use, redistribution, or modification of this data must comply with the ODbL license terms. For more information on the ODbL, please visit OpenStreetMap’s License Page.

Download Shapefile for the following:

  1. World Countries Shapefile
  2. Australia
  3. Argentina
  4. Austria
  5. Belgium
  6. Brazil
  7. Canada
  8. Denmark
  9. Fiji
  10. Finland
  11. Germany
  12. Greece
  13. India
  14. Indonesia
  15. Ireland
  16. Italy
  17. Japan
  18. Kenya
  19. Lebanon
  20. Madagascar
  21. Malaysia
  22. Mexico
  23. Mongolia
  24. Netherlands
  25. New Zealand
  26. Nigeria
  27. Papua New Guinea
  28. Philippines
  29. Poland
  30. Russia
  31. Singapore
  32. South Africa
  33. South Korea
  34. Spain
  35. Switzerland
  36. Tunisia
  37. United Kingdom Shapefile
  38. United States of America
  39. Vietnam
  40. Croatia
  41. Chile
  42. Norway
  43. Maldives
  44. Bhutan
  45. Colombia
  46. Libya
  47. Comoros
  48. Hungary
  49. Laos
  50. Estonia
  51. Iraq
  52. Portugal
  53. Azerbaijan
  54. Macedonia
  55. Romania
  56. Peru
  57. Marshall Islands
  58. Slovenia
  59. Nauru
  60. Guatemala
  61. El Salvador
  62. Afghanistan
  63. Cyprus
  64. Syria
  65. Slovakia
  66. Luxembourg
  67. Jordan
  68. Armenia
  69. Haiti And Dominican Republic
  70. Malta
  71. Djibouti
  72. East Timor
  73. Micronesia
  74. Morocco
  75. Liberia
  76. Kosovo
  77. Isle Of Man
  78. Paraguay
  79. Tokelau
  80. Palau
  81. Ile De Clipperton
  82. Mauritius
  83. Equatorial Guinea
  84. Tonga
  85. Myanmar
  86. Thailand
  87. New Caledonia
  88. Niger
  89. Nicaragua
  90. Pakistan
  91. Nepal
  92. Seychelles
  93. Democratic Republic of the Congo
  94. China
  95. Kenya
  96. Kyrgyzstan
  97. Bosnia Herzegovina
  98. Burkina Faso
  99. Canary Island
  100. Togo
  101. Israel And Palestine
  102. Algeria
  103. Suriname
  104. Angola
  105. Cape Verde
  106. Liechtenstein
  107. Taiwan
  108. Turkmenistan
  109. Tuvalu
  110. Ivory Coast
  111. Moldova
  112. Somalia
  113. Belize
  114. Swaziland
  115. Solomon Islands
  116. North Korea
  117. Sao Tome And Principe
  118. Guyana
  119. Serbia
  120. Senegal And Gambia
  121. Faroe Islands
  122. Guernsey Jersey
  123. Monaco
  124. Tajikistan
  125. Pitcairn

Disclaimer : If you find any shapefile data of country provided is incorrect do contact us or comment below, so that we will correct the same in our system as well we will try to correct the same in openstreetmap.

Convert DXF to PDF: A Step-by-Step Guide

This tutorial provides a clear and detailed walkthrough for converting a DXF file into PDF format using the Converter Tool  in MAPOG. Whether you’re a beginner or have some experience with MAPOG, this guide will help you smoothly convert your DXF files to PDF.

What is DXF Data Format:

DXF is short for Drawing Exchange Format or Drawing Interchange Format and is a type of vector file. Engineers, designers and architects often use the DXF format for 2D and 3D drawings during product design. This data format can be used in case of analyzing the maps. It can be of many types like point, line and polygon or any boundaries.

                                       Online GIS Data Conversion

Converting DXF Data into PDF Format:

MAPOG includes an advanced Converter Tool that enables users to easily switch between various data formats to meet their specific needs. This tool simplifies the process of converting data for multiple GIS applications, offering both flexibility and efficiency in handling different formats. For instance, MAPOG’s Converter Tool can convert DXF data into the PDF format, reducing file size while preserving essential geographic details. This makes the data more suitable for web-based mapping and interactive platforms, ultimately enhancing workflows and significantly improving GIS data usability.

                     Steps to Convert DXF to PDF:

Step 1: Upload the Data:

  • Navigate to the header menu, click on “Process Data,” and then choose the “Converter Tool” option to begin.
Converting DXF to PDF Online.
Choose the converter tool
  • To start the conversion, upload your DXF file by selecting the data you want to convert.
Converting DXF to PDF Online.
Upload your data

Step 2: Choose the Output Format

  • Set PDF as the desired output format for your data export. While the Converter Tool provides various format options, this guide is specifically dedicated to converting your file into the PDF format.
Converting DXF to PDF Online.
Select the format

2. You can also Choose the Output Coordinate Reference System (CRS) according to your spatial analysis requirement.
Converting DXF to PDF Online.
Choose the CRS

Step 3: Execute the Conversion:

Head over to the ‘Convert Files’ section, and allow the tool to handle the conversion process for you. Just upload your DXF file, and the Converter Tool will seamlessly transform it into PDF format, making the conversion quick and easy.

Converting DXF to PDF Online.
Convert the data

Step 4: Review and Download:

Review your converted PDF file to confirm its accuracy. After ensuring that the conversion is correct and meets your requirements, proceed to download the file. This step is crucial to validate that the conversion was successful and that your data has been accurately preserved.

Converting DXF to PDF Online.
Convert the data

Outcome: 

MAPOG Map Analysis offers a range of tools to enhance your work, including the Clip Tool for trimming datasets, the Basic Style Tool for formatting numeric data, and the Create Point Tool for adding point features to your map. Additionally, the Create Grid Tool allows you to generate grids by uploading various types of data etc.

 Other Feature Tools Include:

These blogs may also be useful for you:

Converting GeoJSON to GPS Online: A Step-by-Step Guide

This guide outlines a simple and clear process for converting GeoJSON files into GPS format using the Converter Tool  within MAPOG. Whether you’re new to MAPOG or have prior experience, this tutorial will help you navigate the conversion process smoothly.

What is GIS Data?

Geographic Information System (GIS) data contains spatial information that helps map features and locations on the Earth’s surface. It combines geographic coordinates with descriptive attributes like names, categories, and measurements, making it crucial for mapping, analysis, and visualization. GIS data is widely used in areas such as urban planning, environmental monitoring, and transportation. To explore various GIS data formats like DXF, SHP, KML, KMZ, GeoJSON, and TopoJSON, visit GIS DATA, which offers over 900 data layers from 200+ countries.

                                     Online GIS Data Conversion

Key Points for GeoJSON to GPS Conversion:

The Converter Tool in MAPOG Map Analysis provides an easy way to convert data between different formats. This allows users to upload files in one format and export them in another, such as converting GeoJSON to GPS, simplifying workflows and increasing GIS data accessibility for a wide range of projects.

                        Steps to Convert GeoJSON to GPS

Step 1: Upload Your Data:

  1. From the top menu, click on “Process Data” and select “Converter Tool” to start the conversion process.
Converting GeoJSON to GPS Online
Choose the converter tool

2. To start the conversion, upload your GeoJSON file by selecting the data you want to convert.

Converting GeoJSON to GPS Online
Upload your data

Step 2: Select the Output Format:

  1. In the Converter Tool, you’ll find several output format options. Choose GPS as the format for exporting your data. Although the tool supports multiple formats, this guide focuses specifically on converting your GeoJSON file to GPS format.
Converting GeoJSON to GPS Online
Select the format

2. You can also Choose the Output Coordinate Reference System (CRS) according to your spatial analysis requirement.
Converting GeoJSON to GPS Online
Set the CRS

Step 3: Execute the Conversion:

Navigate to the “Convert Files” section within the Converter Tool. Upload your GeoJSON file, and the tool will automatically handle the conversion. It will efficiently convert your GeoJSON file to GPS format, ensuring a quick and seamless process.

Converting GeoJSON to GPS Online
Convert your data

Step 4: Review and Download:

Once the conversion is finished, review your GPS file to verify that the data has been accurately converted and preserved. Confirm that the spatial details and layout are correct and meet your expectations. After ensuring the output is satisfactory, download the file. This final step guarantees a successful conversion tailored to your project requirements.

Converting GeoJSON to GPS Online
Download the data

Conclusion:

MAPOG Map Analysis offers a range of powerful tools to streamline your workflow. These include the Clip Tool for trimming datasets, the Basic Style Tool for formatting numerical data, and the Create Point Tool for adding point features to your maps. Additionally, the Create Grid Tool allows for the generation of grids using various data types, providing even more flexibility and functionality for your GIS projects.

 Other Feature Tools contain:

These blogs may also be useful for you:

Convert Online MIF to MapInfo File : A Comprehensive Guide

This guide provides detailed, step-by-step instructions for converting a MIF file to MapInfo File format using the Converter Tool in MAPOG. Whether you’re new to MAPOG or have some experience, this tutorial will assist you in effortlessly transforming your MIF files into MapInfo File format.
Introduction to GIS Data:

Geographic Information System (GIS) data includes spatial information representing various features and locations on the Earth’s surface. It integrates geographic coordinates with descriptive details like names, classifications, or measurements, facilitating the mapping, analysis, and visualization of spatial patterns and relationships. GIS data is vital in areas such as urban planning, environmental management, and transportation. For access to different formats like DXF, SHP, KML, KMZ, GeoJSON, or TopoJSON, explore GIS DATA, which provides a wide collection of over 900 data layers from more than 200 countries.
                                             Online GIS Data Conversion

 Important Points for Converting MIF to MapInfo File:

The Converter Tool in MAPOG Map Analysis serves as a robust solution for transforming data between various formats. It streamlines the conversion process by allowing users to input data in one format and export it in another that aligns with their specific analytical requirements, such as converting MIF to MapInfo File. This capability enhances the adaptability and application of GIS data across a wide array of projects and fields.

                      Steps to Convert MIF to MapInfo File

Step 1: Input the Data:

  1. Go to the header and click on “Process Data,” then select the “Converter Tool” option.
Converting MIF to MapInfo File Online.
Select the converter tool

2.To start the conversion, upload your MIF file by selecting the data you want to convert.

Converting MIF to MapInfo File Online.
Upload the data

Step 2: Specify the Output Format:

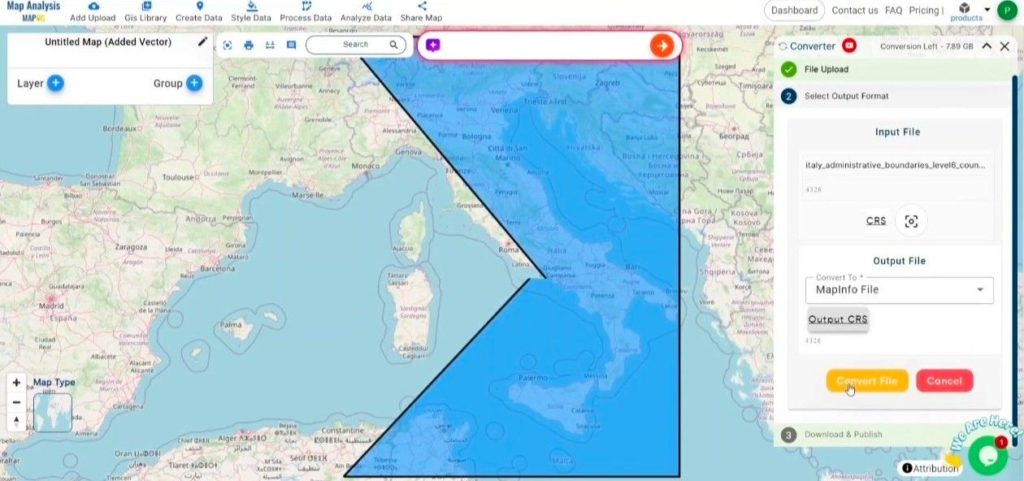
Select MapInfo File as your output format for exporting the data. Although the Converter Tool offers multiple format options, this guide is focused specifically on converting your file to the  MapInfo File format.

Converting MIF to MapInfo File Online.
Select the format

2. You can also Choose the Output Coordinate Reference System (CRS) according to your spatial analysis needs.

Converting MIF to MapInfo File Online.
Set the CRS

Step 3:Conduct the Conversion:

Click on the ‘Convert Files’ section and let the tool take care of the conversion. Simply upload your MIF file, and the Converter Tool will automatically convert it into MapInfo File format, ensuring a smooth and straightforward process.

Converting MIF to MapInfo File Online.
Convert the file

Step 4:Check and Download:

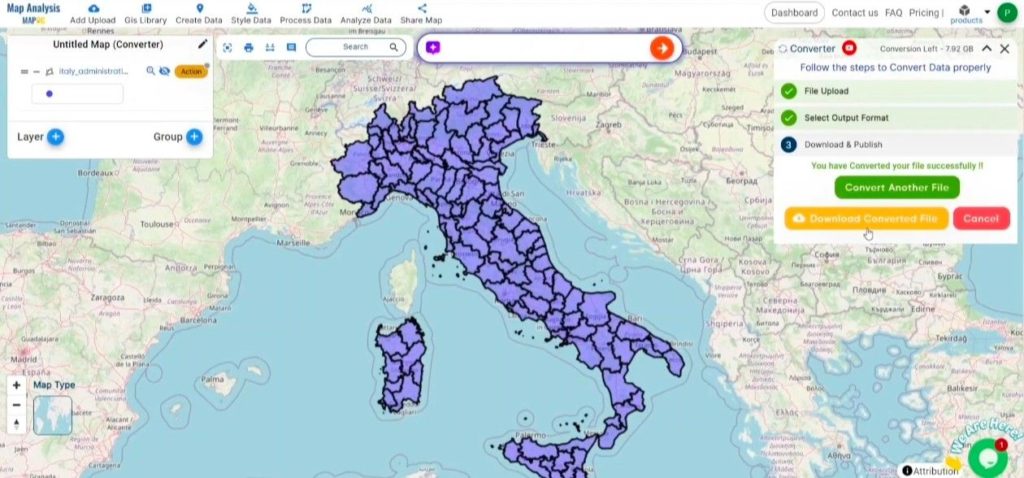
Check your converted MapInfo File to verify its accuracy. Once you’re satisfied that the conversion is correct and meets your expectations, go ahead and download the file. This step is essential to ensure the conversion was successful and your data integrity is preserved.

Converting MIF to MapInfo File Online.
Check and download

Outcome:  MAPOG Map Analysis offers a range of tools to enhance your work, including the Clip Tool for trimming datasets, the Basic Style Tool for formatting numeric data, and the Create Point Tool for adding point features to your map. Additionally, the Create Grid Tool allows you to generate grids by uploading various types of data etc.

 Other Feature Tools contain:

These blogs may also be useful for you:

Download Bank Data in Shapefile, KML, GeoJSON, and More – Filter and Download

Download and filter bank data in formats like Shapefile, KML, and GeoJSON with MAPOG for detailed mapping and analysis.

MAPOG offers a powerful tool to help you locate and download bank data. This information can be invaluable for creating maps, planning financial analyses, and exploring various banking locations. In this guide, we’ll walk you through the process of downloading bank data using MAPOG in multiple formats.

GIS Data is a specialized type of information that lets you visualize and analyze geographic locations on a map. With MAPOG, you can access GIS data that includes details about bank branches and their locations.

Download Bank GIS Data of any countries

Note:

  • All data provided by MAPOG are in GCS datum EPSG:4326 WGS84 CRS (Coordinate Reference System). 
  • Access to shapefile downloads requires logging in to the platform.

Bank data is crucial for several reasons. It helps individuals find nearby banking services and assists businesses in analyzing financial service distribution. With MAPOG GIS Data, you can download information about banks in multiple file formats, including KML, SHP, CSV, GeoJSON, Tab, SQL, Tiff, GML, KMZ, GPKZ, SQLITE, DXF, MIF, TOPOJSON, XLSX, GPX, ODS, MID, and GPS. This versatility allows you to use the data with various software and devices for diverse projects or analyses.

Step-by-step Process to Download Bank Data

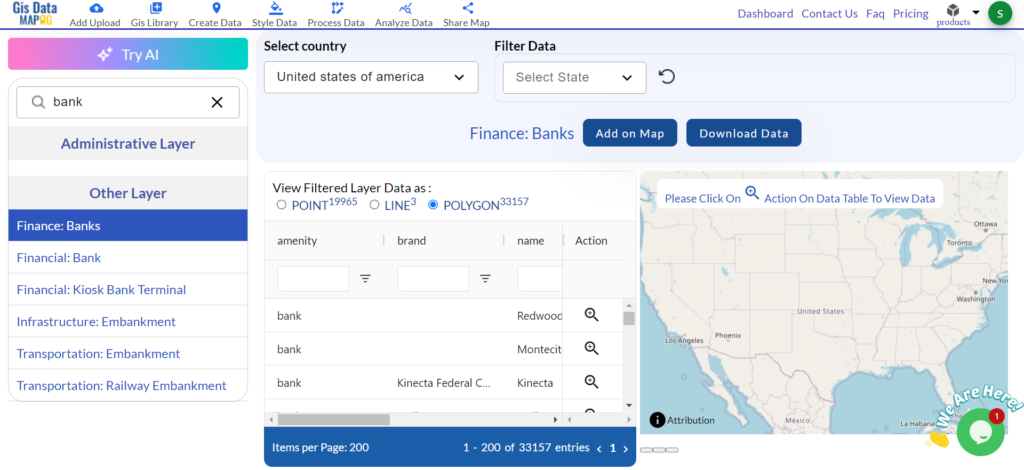
Step 1: Open GIS Data

Log in to MAPOG using your email credentials. After logging in, navigate to the GIS Data tool. You can easily find this in the top navigation menu. Look for the bank GIS data category or use the search function. For example, you can search specifically for the bank networks of countries like USA, UK, Germany, and Egypt.

Download Bank GIS Data

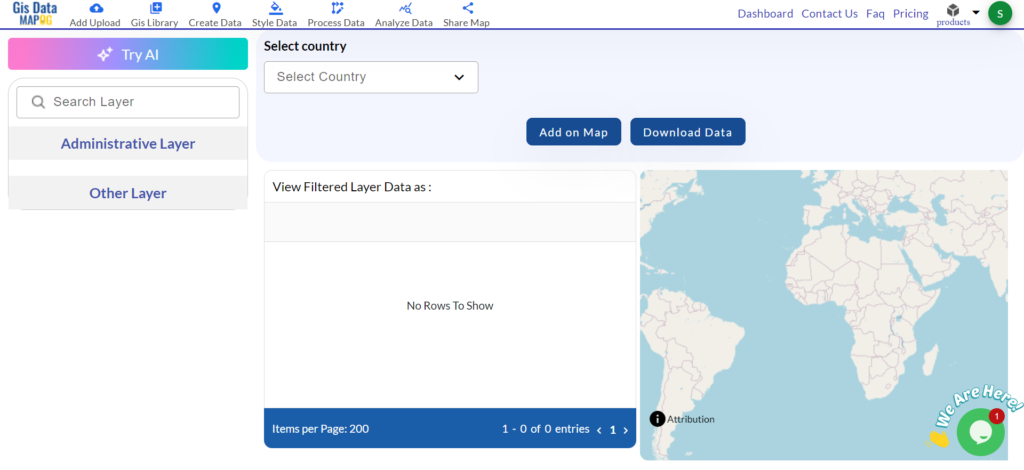
Step 2: Select the Country and Search for ‘Bank Data’

Start by selecting the country you’re interested in. Navigate through the available options and choose the specific country where you need hotel data. After selecting the country, search for the ‘Bank Data’ layer that contains the relevant information.

Select the Country and Search for ‘Bank Data’

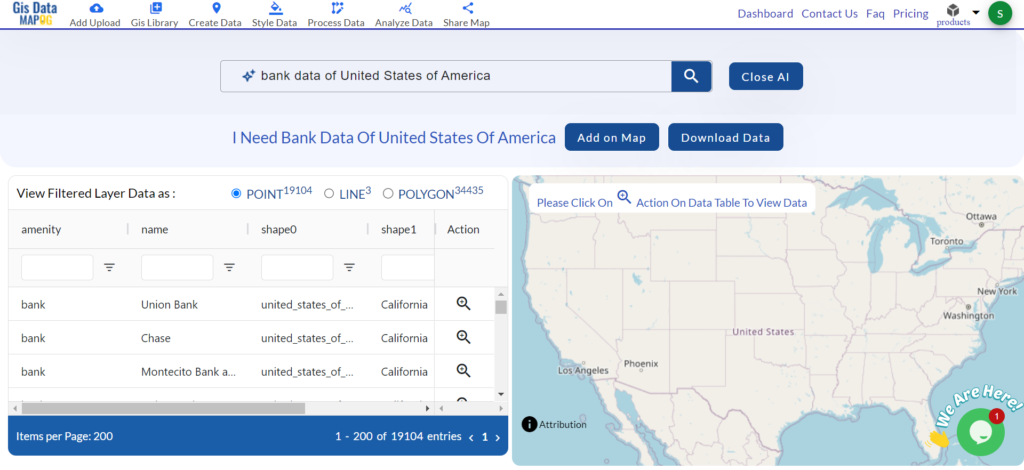
If you’re unsure which country or layer to choose, use the “Try AI” feature and It gives smart suggestions based on your needs and help you find the right data easily.

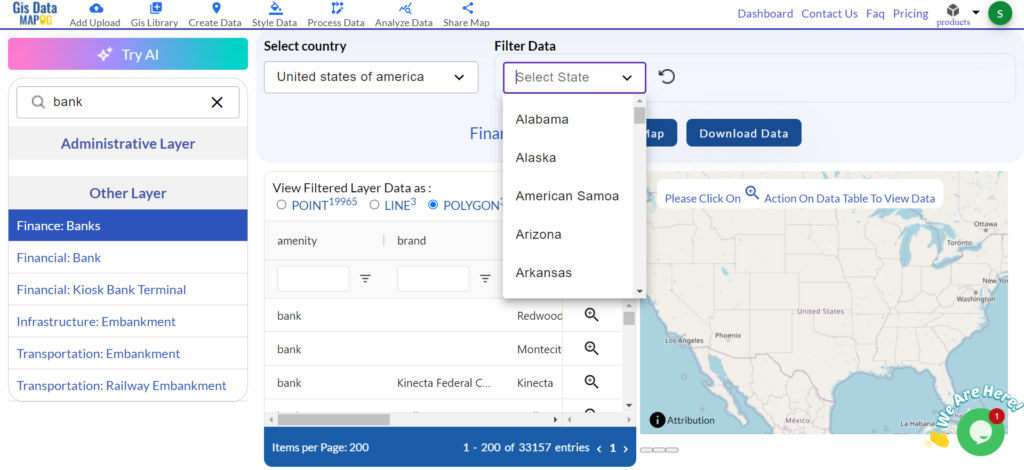
Step 3: Filter the Data

Apply the available filters to refine your search. You can select specific areas, types of banking institutions or other criteria to get the exact data you need.

Filter the Data

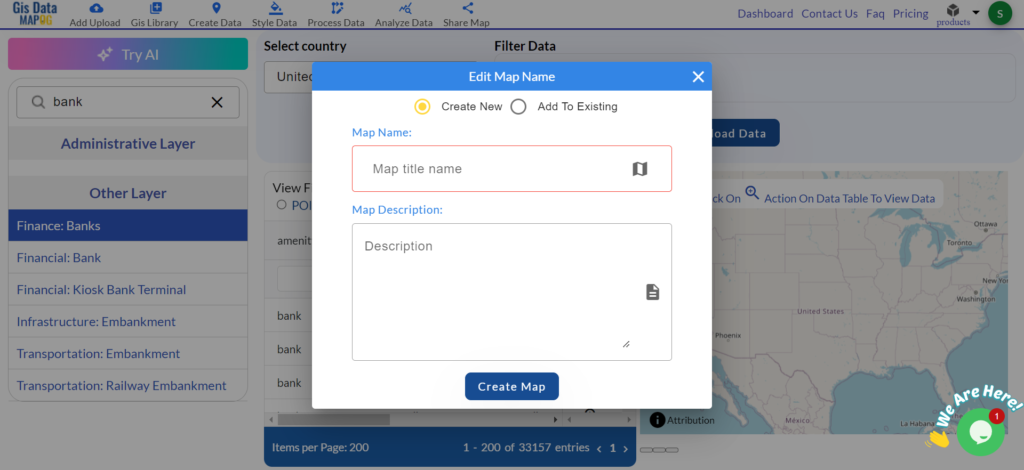
Step 4: Add to Map

After filtering the data, add it to your map and This step will show the locations of bank branches on your map, making it easier to visualize their placement.

Add to Map

Step 5: Download the Data

After reviewing the map, click the download button to download bank data. You can select from various file formats depending on your project needs.

Download the Data

Bank data consists of both point and polygon features because point data shows the exact location of each bank branch, while polygon data illustrates the boundaries or areas around banking facilities. These features provide a detailed view of bank locations and their surroundings and beneficial for creating comprehensive maps and conducting thorough analyses.

With MAPOG’s versatile toolkit, you can effortlessly upload vector and upload Excel or CSV data, incorporate existing layers, perform polyline splitting, use the converter for various formats, calculate isochrones, and utilize the Export Tool.

For more information or assistance with downloading hotel data, please contact us at support@mapog.com.

Disclaimer:

The GIS data provided for download in this article was initially sourced from OpenStreetMap (OSM) and However, it has been further modified to enhance its usability. It’s important to note that the original data is licensed under the Open Database License (ODbL) by OpenStreetMap contributors. Although modifications have been made to improve the data, any use, redistribution, or further modification must still comply with the terms of the ODbL license. For additional details, please visit OpenStreetMap’s License Page.

Convert SQLITE to KML : A Complete Guide of online GIS data converter

In this guide, it will provide step by step of how to convert SQLITE to KML format with the help of Converter Tool in MAPOG. So, both if you are a first-time user and a regular one, Converting SQLITE to KML  with MAPOG, the entire process will be explained in simple steps for you.

Key Concept to Converting Files:

The Converter Tool in MAPOG functions to transform data from one format to another like for this case convert SQLITE to KML, it’s like a magical process. You input the  data in one format, and it will provide the outputs in a different format suitable for your analysis. Additionally, GIS Data can be downloaded in various formats, making it adaptable for multiple uses.

Online GIS Data Conversion

Step 1: Upload the Data:

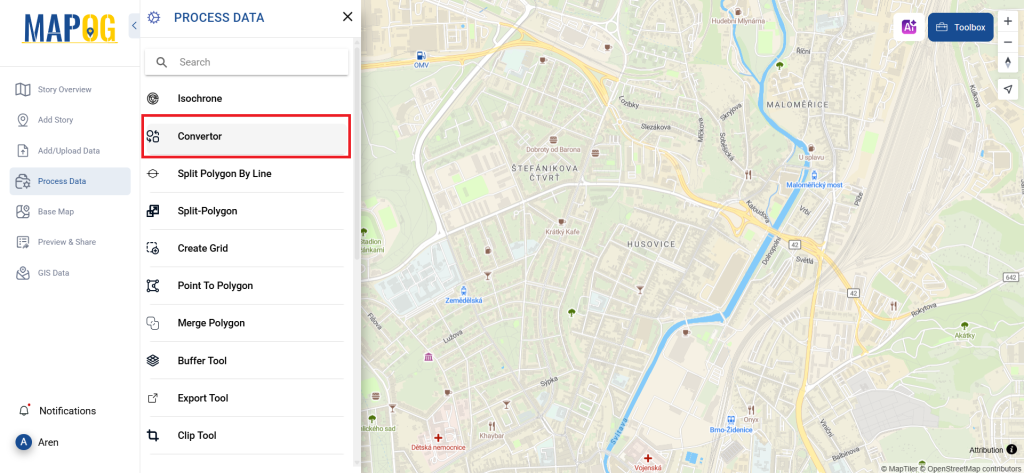
  1.  Go to “Process Data” and click on “Converter Tool” option.
SQLITE to KML

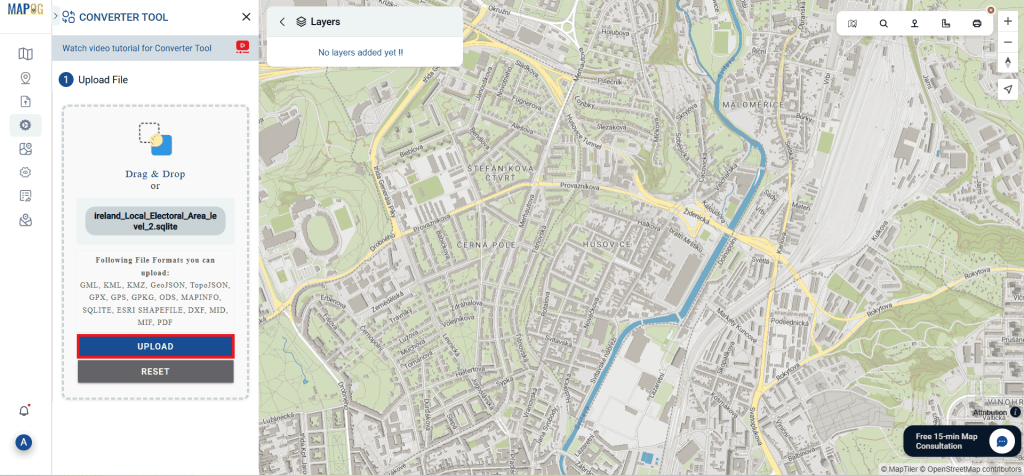
2. Upload your SQLITE file. This is your entry point where you feed in the information that needs conversion.

SQLITE to KML

Step 2: Select the Format for Conversion:

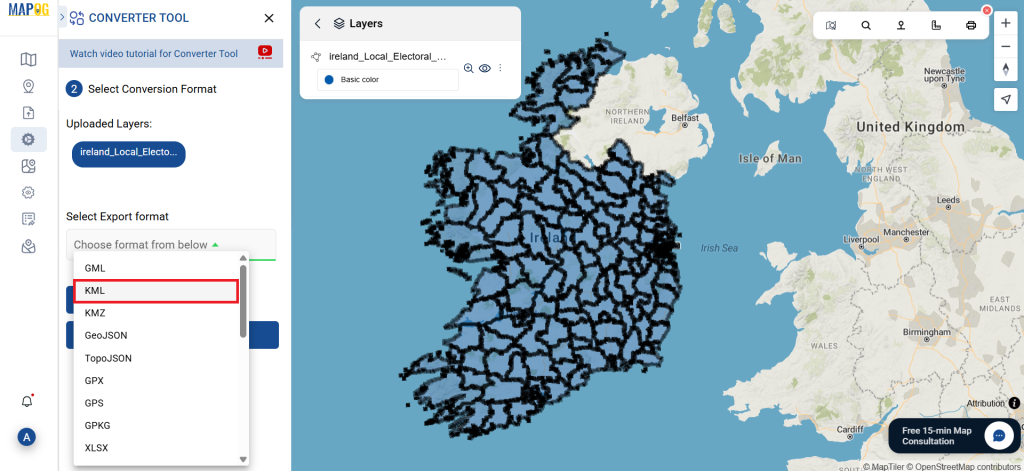
  1. Select the output format as KML if you want to expatriate only the data. The tool provides several options in arriving at the result but for this guide, we are using the option to convert the file to KML.
SQLITE to KML

2. You can also set the Output CRS as per your need.

SQLITE to KML

Step 3: Run the Conversion:

Go to ‘Convert Files’ and watch the tool at work. Working with the Converter Tool you input your data and then the tool converts it from the SQLITE format to the KML format.

SQLITE to KML

Step 4: Review and Download:

Take a moment to review your converted KML data to make sure everything looks correct. Once you’re happy with it, go ahead and download the file. This step is really important to ensure that the conversion worked properly and that all your data is intact.

SQLITE to KML

With MAPOG’s versatile toolkit, you can effortlessly upload vectors and upload Excel or CSV data, incorporate existing layers, perform polygon splitting, use the converter for various formats, calculate isochrones, and utilize the Export Tool.

Here are some other blogs you might be interested in:

Convert SQLITE to GML: A Complete Guide For Online GIS Converter

In this guide, it will provide step by step of how to convert SQLITE to GML format with the help of Converter Tool in MAPOG. So, both if you are a first-time user and a regular one, Converting SQLITE to GML  with MAPOG, the entire process will be explained in simple steps for you.

Key Concept to Converting Files:

The Converter Tool in MAPOG functions to transform data from one format to another like for this guide convert SQLITE to GML, it’s like a magical process. You input the  data in one format, and it will provide the outputs in a different format suitable for your analysis. Additionally, GIS Data can be downloaded in various formats, making it adaptable for multiple uses.

Online GIS Data Conversion

Steps to Convert SQLITE to GML:

Step 1: Upload the Data:

  1.  Go to “Process Data” and click on “Converter Tool” option.
SQLITE to GML

2. Upload your SQLITE file. This is your entry point where you feed in the information that needs conversion.

SQLITE to GML

Step 2: Select the Format for Conversion:

  1. Select the output format as GML if you want to expatriate only the data. The tool provides several options in arriving at the result but for this guide, we are using the option to convert the file to GML.
SQLITE to GML

2. You can also set the Output CRS as per your need.

SQLITE to GML

Step 3: Run the Conversion:

Go to ‘Convert Files’ and watch the tool at work. Working with the Converter Tool you input your data and then the tool converts it from the SQLITE format to the GML format.

SQLITE to GML

Step 4: Review and Download:

Take a moment to review your converted GML data to make sure everything looks correct. Once you’re happy with it, go ahead and download the file. This step is really important to ensure that the conversion worked properly and that all your data is intact.

SQLITE to GML
Some Feature tool that you can use for your further analysis:

With MAPOG’s versatile toolkit, you can effortlessly upload vectors and upload Excel or CSV data, incorporate existing layers, perform polygon splitting, use the converter for various formats, calculate isochrones, and utilize the Export Tool.

Here are some other blogs you might be interested in:

Download El Salvador Administrative Boundary Shapefiles – National , Province and More

Download El Salvador administrative boundary shapefiles El Salvador national province and more

It’s fantastic to hear that MAPOG has expanded its GIS data collection to include data for more than 100 new countries, bringing the total coverage to over 150 countries. This is undoubtedly a valuable resource for GIS enthusiasts and professionals around the world. The availability of detailed information on administrative divisions, rivers, roads, and airports can greatly enhance various geospatial projects and analyses.

The option to access the data through tools like “Download GIS Data” and “Add GIS Data” seems convenient and user-friendly. Providing data in different formats such as Shapefile, KML, GeoJSON, and CSV ensures compatibility with a wide range of GIS software and applications, making it easier for users to integrate the data into their workflows.

This article will walk you through downloading administrative-level GIS data for El Salvador using the Download GIS Data tool. Experience a seamless geospatial journey with IGISMAP as your trusted partner!

Note:

  • All data available are in GCS datum EPSG:4326 WGS84 CRS (Coordinate Reference System).
  • You need to login for downloading the shapefile.

Download El Salvador Shapefile Data

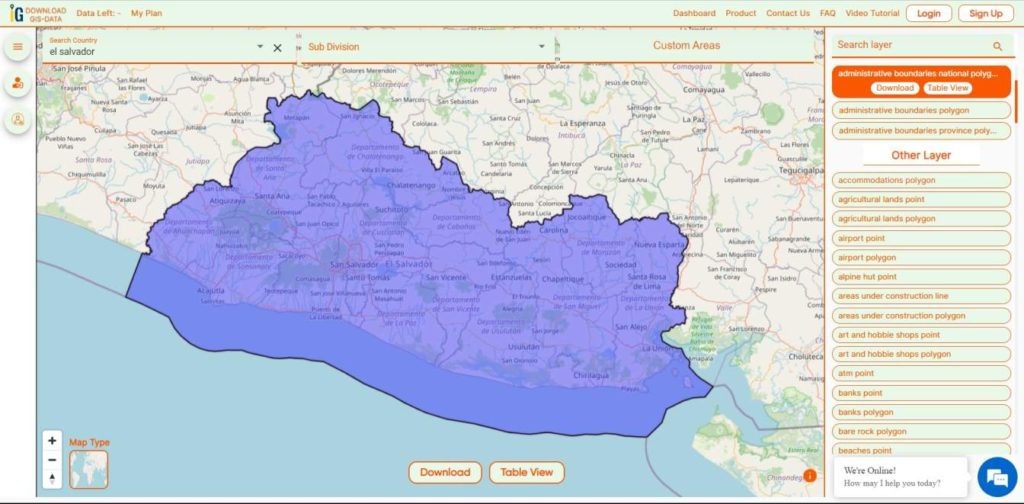
El Salvador lies in the isthmus of Central America between latitudes 13° and 15°N, and longitudes 87° and 91°W. It stretches 270 km (168 mi) from west-northwest to east-southeast and 142 km (88 mi) north to south, with a total area of 21,041 km2 (8,124 sq mi).

El Salvador National Boundary

Download El Salvador National Boundary Shapefile

Download El Salvador Province Shapefile Data

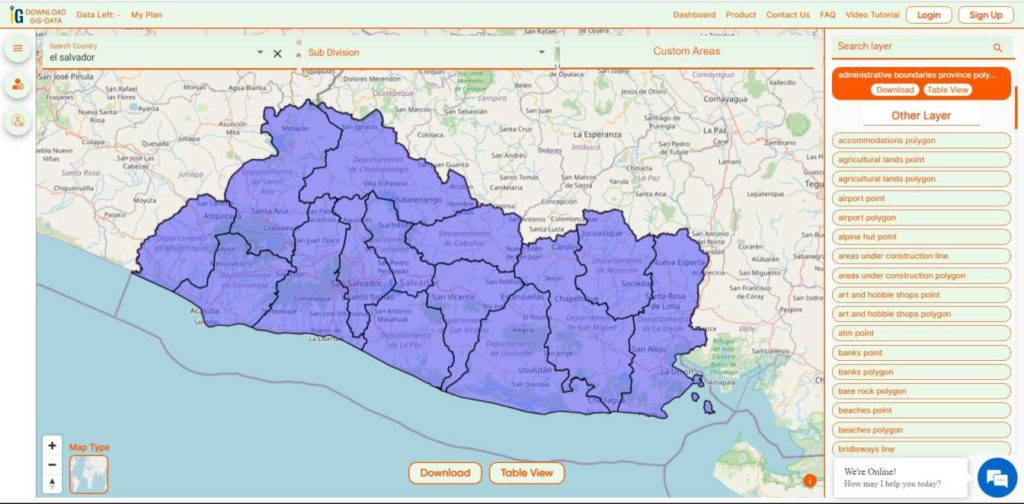
El Salvador is divided into 14 Provinces (departments) :

  • Ahuachapán
  • Cabañas
  • Chalatenango
  • Cuscatlán
  • La Libertad
  • La Paz
  • La Unión
  • Morazán
  • San Miguel
  • San Salvador
  • San Vicente
  • Santa Ana
  • Sonsonate
  • Usulután
El Salvador Provinces Boundaries

Download El Salvador Province Boundaries Shapefile

Other GIS Data:

Download Free Shapefile for the following:

  1. World Countries Shapefile
  2. Australia
  3. Argentina
  4. Austria
  5. Belgium
  6. Brazil
  7. Canada
  8. Denmark
  9. Fiji
  10. Finland
  11. Germany
  12. Greece
  13. India
  14. Indonesia
  15. Ireland
  16. Italy
  17. Japan
  18. Kenya
  19. Lebanon
  20. Madagascar
  21. Malaysia
  22. Mexico
  23. Mongolia
  24. Netherlands
  25. New Zealand
  26. Nigeria
  27. Papua New Guinea
  28. Philippines
  29. Poland
  30. Russia
  31. Singapore
  32. South Africa
  33. South Korea
  34. Spain
  35. Switzerland
  36. Tunisia
  37. United Kingdom Shapefile
  38. United States of America
  39. Vietnam
  40. Norway
  41. Chile
  42. Croatia
  43. Estonia
  44. Laos
  45. Hungary
  46. Libya
  47. Comoros
  48. Colombia
  49. Bhutan
  50. Maldives
  51. Iraq
  52. Azerbaijan
  53. Portugal
  54. Macedonia
  55. Armenia
  56. Jordan
  57. Luxembourg
  58. Slovakia
  59. Mauritania
  60. Cyprus
  61. Afghanistan
  62. El Salvador
  63. Guatemala
  64. Nauru
  65. Slovenia
  66. Marshall Islands
  67. Romania
  68. Peru
  69. Syria

Disclaimer : If you find any shapefile data of country provided is incorrect do contact us or comment below, so that we will correct the same in our system as well we will try to correct the same in OpenStreetMap.

💬 Book a Meeting