In our Previous Post QGIS Server – Installation we have talked about the installation process of QGIS Server in Ubuntu and it was easy. In previous post we get the XML file with GetCapabilities working in the browser. In the following sections, we will provide a sample configuration to set up a QGIS Server on Ubuntu with an exemplary QGIS project in QGIS project.
Let us start the process of Adding QGIS Server – Configuration and Deploying QGIS Project.
QGIS Server – Configuration and Deploying QGIS Project
To provide a new QGIS Server WMS, WFS or WCS, we have to create a QGIS project file with some data. Here, we use the ‘airport’ shapefile from the local dataset. and for adding the QGIS project with the server we go to the OWS server.
- Import layer from Layer > Add Layer >Add Vector Layer.
- Customize the layer, Define the colors and styles of the layers in QGIS and the project CRS, if not already defined.
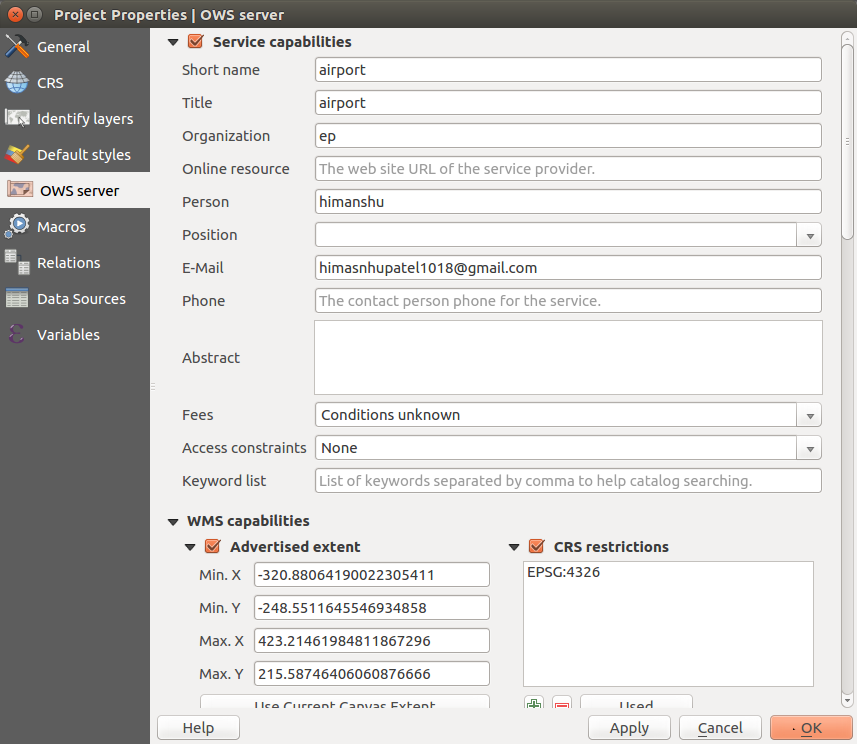
- Check the ‘Project Properties’ under the ‘Project’ menu, go to the ‘OWS server’ tab. Below is an example of of how I’ve set up mine.
 and here is the bottom portion of the Properties page.
Ensure under ‘Save Paths’ in the ‘General’ Tab it is set to ‘relative’. Note that the layers you are going to select for the WMS service are ticked under ‘Published’ in the WFS capabilities table.
 and here is the bottom portion of the Properties page.
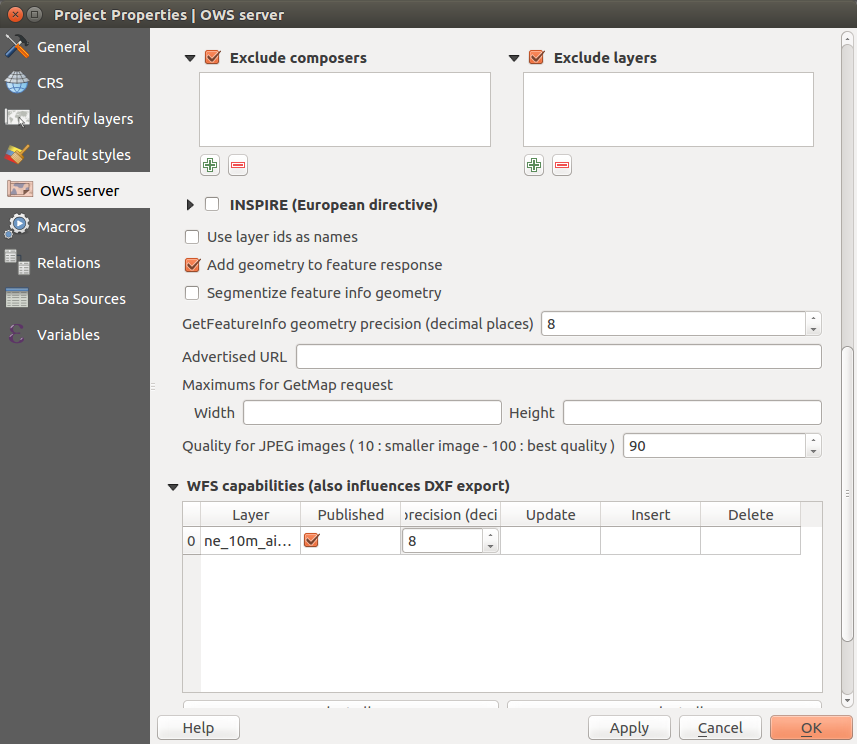
Now for going ahead we need to repeat some steps from our previous post let’s have a look:
#go to cgi-bin folder
cd /usr/lib/cgi-bin/
#create a new QGIS folder
sudo mkdir airport
cd airport
#symlink in both the 'wms_metadata.xml' and the 'qgis_mapserv.fcgi' into project folder
sudo ln -s ../qgis_mapserv.fcgi
sudo ln -s ../wms_metadata.xml
#as well as linking your 'airport.qgs' file  into the '/usr/lib/cgi-bin/airport' folder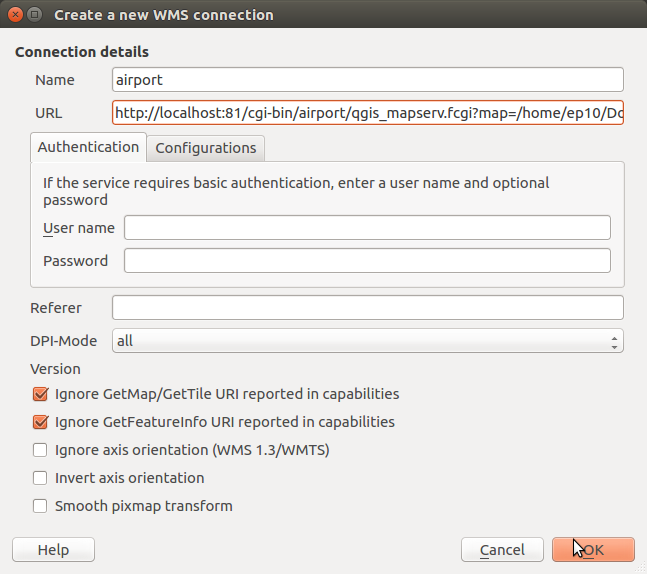
sudo ln -s /home/ep10/Documents/airports.qgs /usr/lib/cgi-bin/airport/airports.qgs- Now we move on to Adding QGIS project to server and for that Now we go to add the WMS layer in the project to connect it to server, so go to “Layer > Add Layer >Add WMS/WMTS Layer”. Now create a new connection and add your parameters for URL must be like this:
http://localhost:81/cgi-bin/airport/qgis_mapserv.fcgi?map=/home/ep10/Documents/airports.qgs&
and tick ‘ignore GetMap/GetTile URI’ and ‘ignore GetFeatureInfo URI’ boxes are ticked then ‘OK’. In your ‘airport’ project folder under ‘cgi-bin’ (/usr/lib/cgi-bin/airport/airports.qgs)
QGIS Server – Configuration and Deploying QGIS Project Ensure your url is pointing at ‘http://localhost:81/cgi-bin/airport/qgis_mapserv.fcgi?’it is better to specify the full path to the qgis project file which is stored (in my case) in a ‘airport’ folder inside the ‘cgi-bin’ folder along with any shapefiles used as the source of your wms, ‘qgis_mapserv.fcgi’ file and ‘wms_metadata.xml’ files.
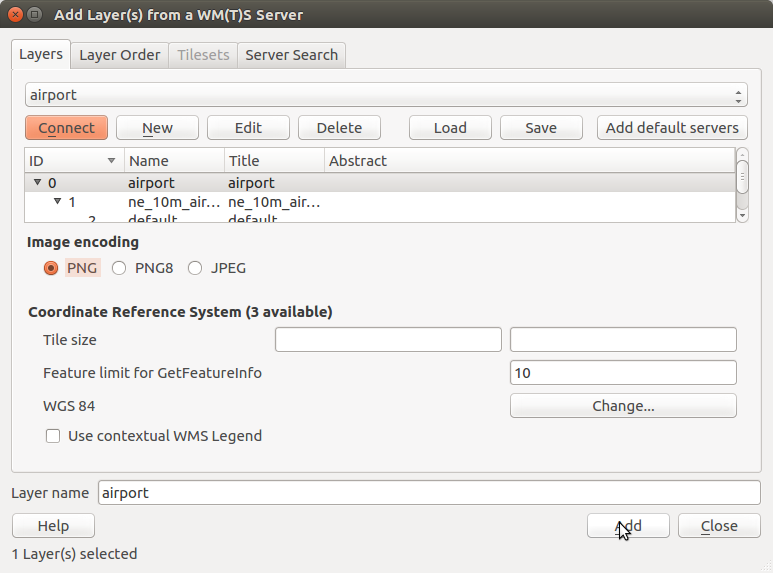
Now in ‘Add Layer’ dialog select the ‘image encoding’ to PNG as it the best format with much specific coordinates.

- Before we do go back in your QGIS project check you can add your newly created WMS layers back into QGIS as with any other WMS from a different source. When you hit the ‘connect’ button you should see a list of layers you created earlier, if not go back and check from the beginning of this post.
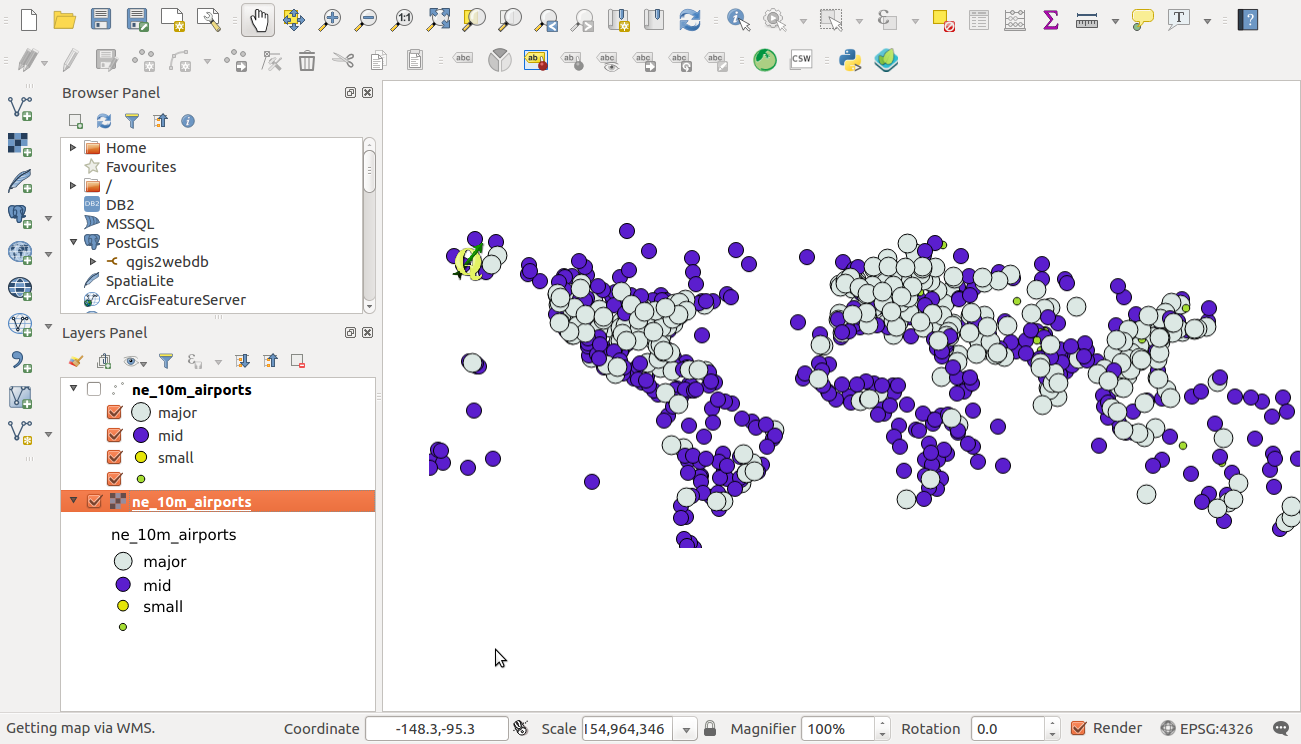
- Select a layer and click ‘Add’ and the layer(s) should appear in your layer panel as normal qgis layers.

QGIS Server – Configuration and Deploying QGIS Project - Right Click on your largest area WMS layer and go to ‘Properties’ and make a note of the bounding box co-ordinates or Layer extent.

- Now we move on to Adding QGIS project to server and for that Now we go to add the WMS layer in the project to connect it to server, so go to “Layer > Add Layer >Add WMS/WMTS Layer”. Now create a new connection and add your parameters for URL must be like this:
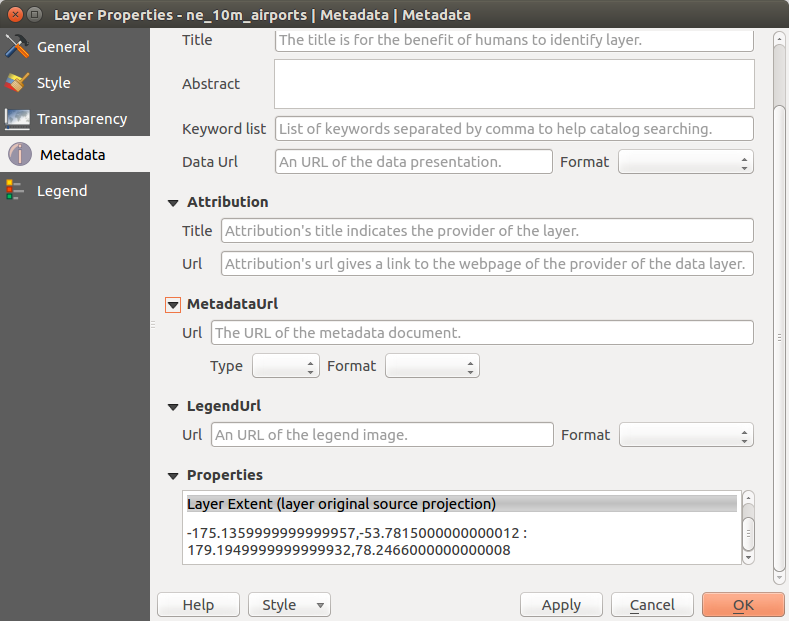
We can now use these co-ordinates in the ‘GetMap’ part in the url:-
http://localhost:81/cgi-bin/airport/qgis_mapserv.fcgi?SERVICE=WMS&VERSION=1.3.0&SRS=EPSG:4326&REQUEST=GetMap&map=/home/ep10/Documents/airports.qgs&BBOX=-175.1359999999999957,-53.7815000000000012,179.1949999999999932,78.2466000000000008&WIDTH=1500&HEIGHT=1200&LAYERS=ne_10m_airports&STYLES=,,&FORMAT=image/png
Write this above URL in your browser and then you will get a PNG image in your browser with all the attribute data that the shp file had, So the output format will be an PNG image.

http://localhost:81/cgi-bin/airport/qgis_mapserv.fcgi?
here in this part of the url locates the qgis-server executable on the apache2 host server.
SERVICE=WMS&VERSION=1.3.0&SRS=EPSG:4326&
This calls the WMS service, it’s version and the target spatial reference system as wwe are using ESPG:4326.
REQUEST=GetMap&map=/home/ep10/Documents/airports.qgs&
this REQUEST part is the request to get the ‘map’ from the source of the qgis project file that we saved after customization.
&BBOX=-175.135999,-53.781500,179.194999,78.246600&
this BBOX sets the size of the retrieved image boundary and the ‘WIDTH’ and ‘HEIGHT’ of the image area in the browser.
&LAYERS=ne_10m_airports&STYLES=,,&FORMAT=image/png
the final part is the description and display of the layers of the WMS. Note there is no ‘STYLES’ specified because it in specified the .qgs file. Finally, the output format is a png image.
We could also add more parameters and requests into the url in order to enhance the visual appearance like:
REQUEST=GetFeatureInfo – this request retrieves the underlying attributes and geometry values and pixel location.
GetLegendGraphic – this looks for the view legend information.
bgcolor – sets the background map colour.
This is how we are going to have complete process of how we are Adding QGIS Project to server and configure the server. There are many more formats in which we can get the output data which we will hope to show you in future posts.
Did you tried adding QGIS project file with QGIS server? If you are facing any issue, do let us know by commenting below with the solution.
Do you have a “best practice” recommendation for determining the aspect ratio of the BBOX? In your example above, it’s clear that using WIDTH=1500 and HEIGHT=1200 results in a distorted (stretched) image. So either WIDTH needs to be smaller or HEIGHT needs to be bigger.
There must be an “automated” way to coordinate the BBOX dimensions and image aspect ratio. But I don’t know what it is (and Google hasn’t been much help so far).