In the IGISMap tool, you can create your map with your data. You can share these maps with others in form of a web page. Your team can also do an analysis of your shared map. They can just apply their operations to analyze the map.
A shared map works like a dashboard GIS application for an organization. A person once uploads all related data to the system and creates a map. Now he/she can share this with anyone. Now these people can apply different operations and analysis tool to analyze the data. And can print the map.
Data in shared map can be updated by one who shared the map. And all changes made will be updated to everyone who has access to the map.
IGISMap generates a link for shared map, a shared map can be opened in any device and analysis operations can be performed on it.
IGISMap is simple and interactive. It does not require any high coding knowledge, person from any domain can make maps in it. A map can have 3 types of users, Admin, Developer and Business User.
IGISMap Share Map feature
Go to IGISMap home page and login or register with valid email id.
After logging in, you can use all IGISMap tools based on the plan your account is subscribed in. Your work will be saved in Maps and you can share this map with anyone as a link both publicly or privately with password security. Maps can also be attached in websites using the HTML Iframe that can be generated from the IGISMap Share Map feature itself. Lets walk through Share Map tool of IGISMap.
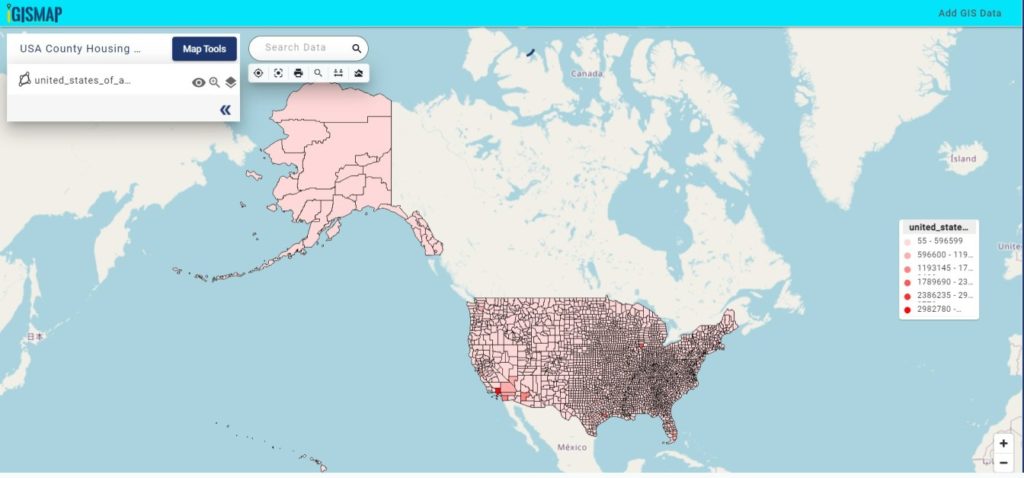
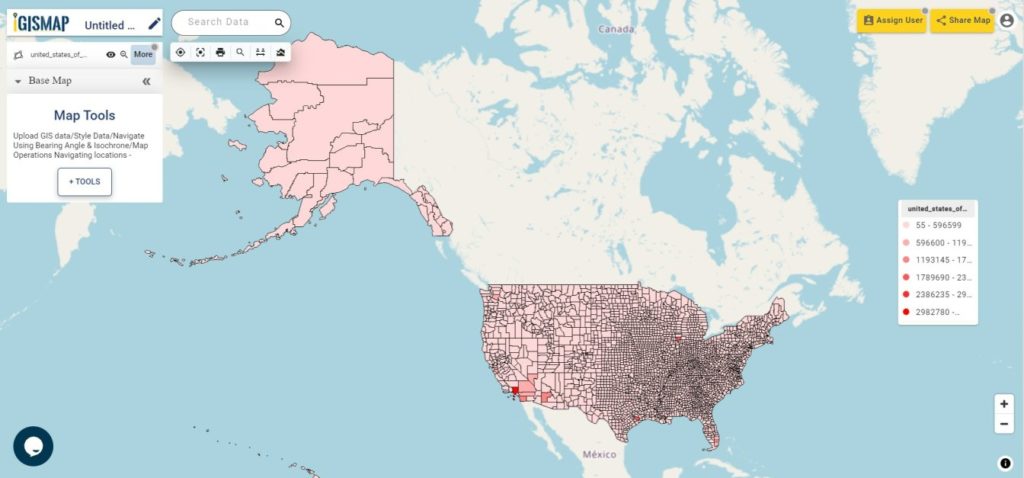
Consider you have created a map of USA county boundaries quantitatively styled based on the counts of housing units in each county in 2019.
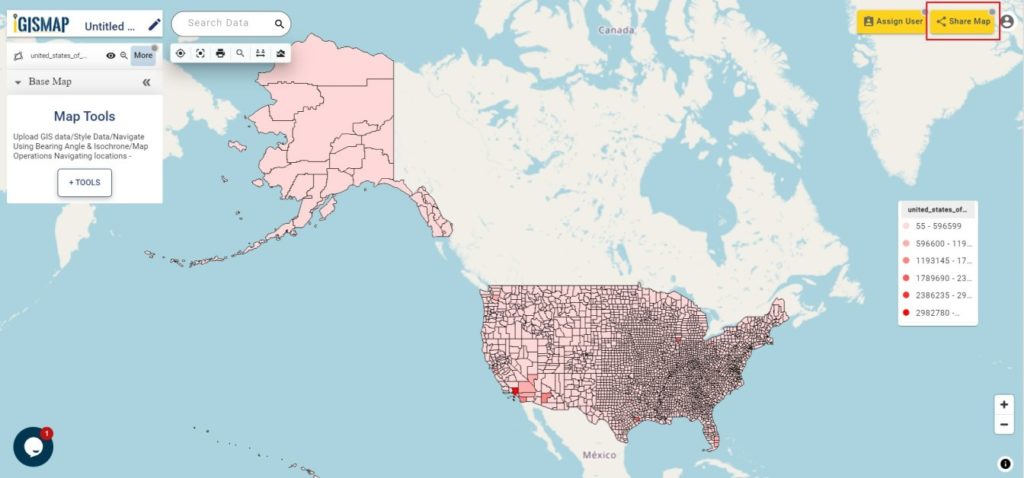
Click on Map share button in top right corner of the map
Share Map Settings
Share Map interface will open. There will be many options for you to customize view and features of the shared map. Map Operation section will open first.
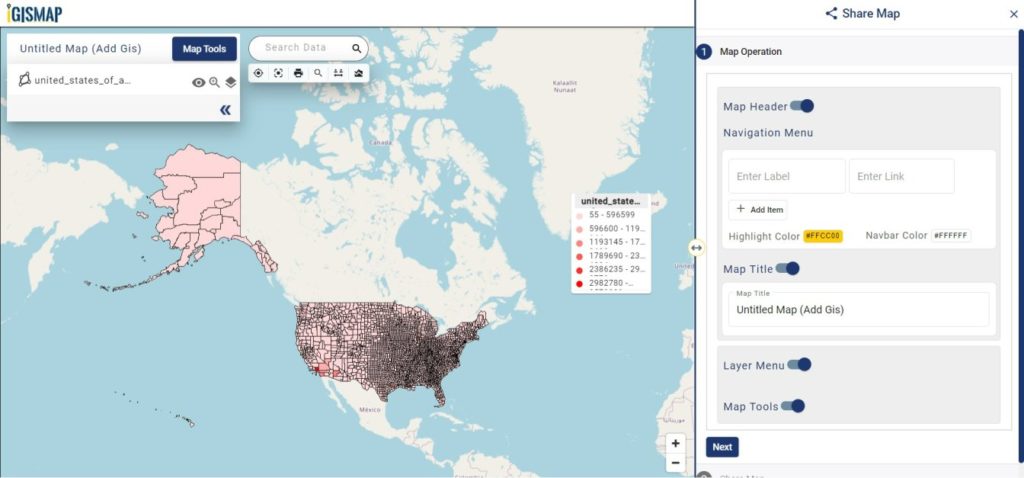
Following components can be adjusted as per the requirement to allow your team mates to view or work with the data provided in the map
Map Header – Map header will show the IGISMap logo and other navigation buttons. Navigation menu can be customized in the Navigation Menu section. Map header can enabled or disabled in the shared map
Navigation Menu – Fields are provided to enter multiple labels and corresponding link. These labels with links integrated will be available at the top map header. Clicking on the labels will direct to corresponding webpage. Option to change the color of the labels and color of the map header is also available.
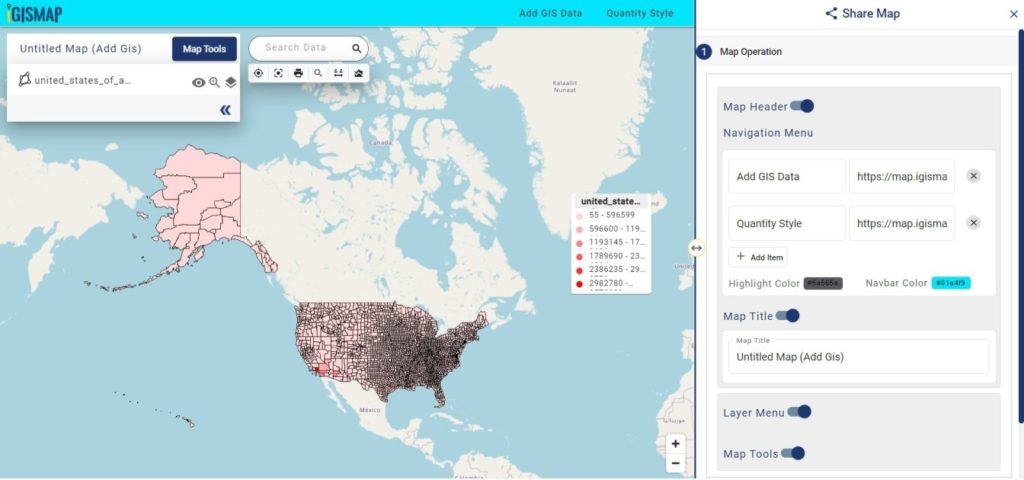
Above map is enabled with map header and other navigation menu. Navigation labels for Add GIS Data and Quantity Style tools of IGISMap are provided with links attached.
Map Title – Map title can be specified here to be made available above the layer list. This option can disabled if not needed.
Layer Menu – Layer Menu will list the layers added in the map, along with other layer options such as hide/unhide, zoom to layer, legend hide/unhide options Layer menu can also be enabled or disabled as per need.
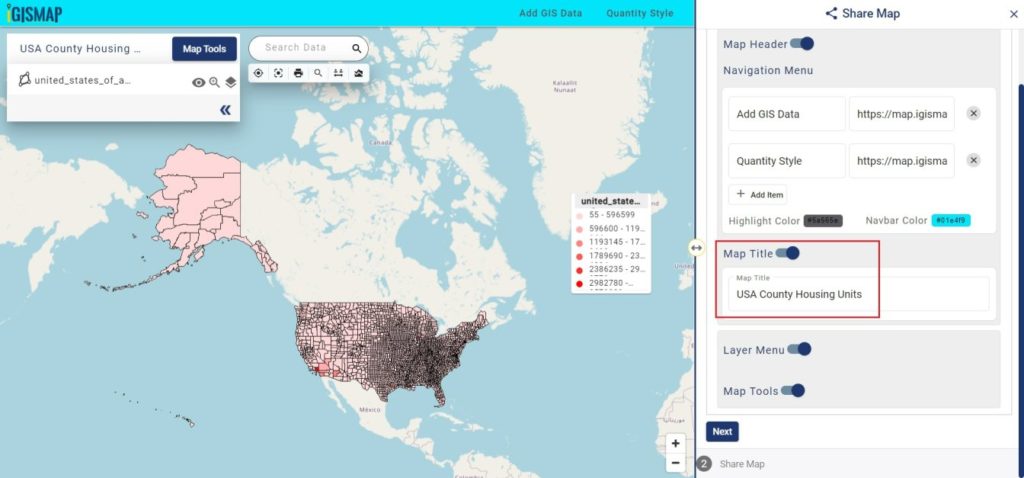
After all settings are completed and confirmed to save, click Next
Share Map
Share Map section opens with the last few options for you to confirm before sharing.
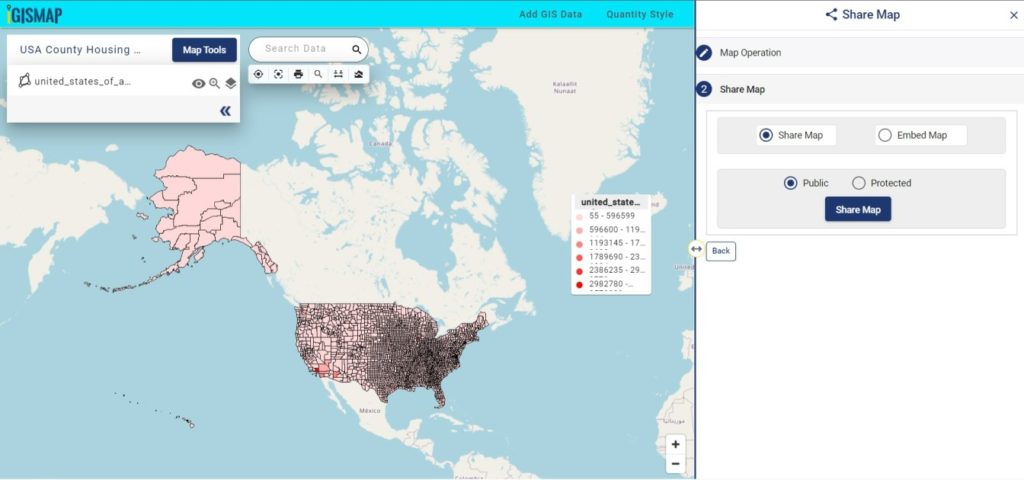
There are two options to share your map. You can share your map via link, where the person you shared with can open the link in any browser. You map can be also be embeded in any website. In these both modes of sharing, you can share publicly or protected with password.
Share Map
Choose Share Map and select Public or Protected as per requirement. Then click Share Map button. This will open a popup with the link like the following.
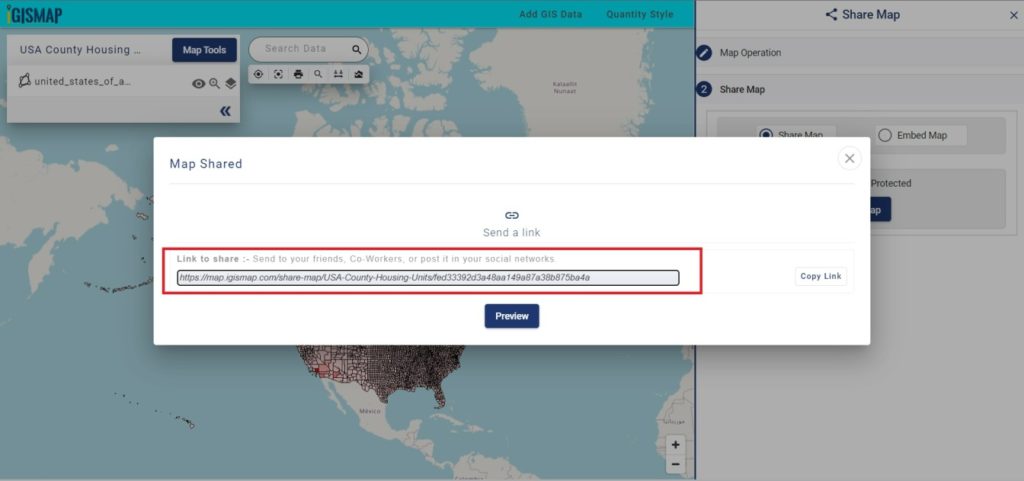
Here we have choosed Public before generating the link, thus anyone who have access to this link can open this map without password and perform allotted features.
If you choose to share your map in protected mode, select Protected after choosing Share Map. Then a field to enter password will be available, where you should set the password and click Share Map to generate the link as shown above.
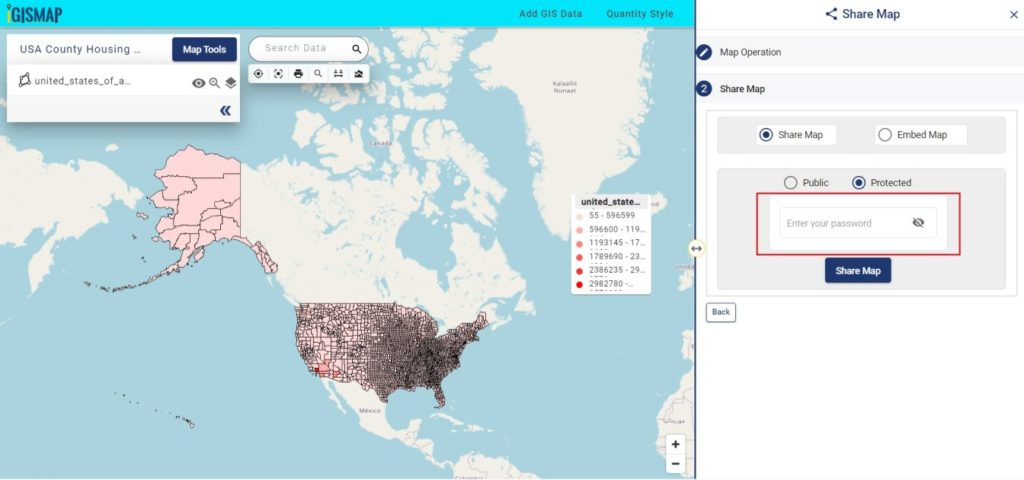
The user who you should be sharing needs your password to open the map using the shared link.
