
Here we will find out how to implement GeoServer Tiling to make wms tiles load fast.
Tile Layers from geoserver:
The need of tile layer is to speed up the rendering of data. It is similar to the Layer Preview for GeoWebCache. There are png, jpeg, geotiff many formats available to store the tiles. In all the format png is considered as fastest format to render data with geoserver.
Advantages of GeoServer tiling
Rendering is done by the client (for example, OpenLayers or leaflet), not by the server. This allows different maps/applications to style a map differently without having to reconfigure GeoServer.
The size of a vector tile is usually smaller than an image tile, resulting in faster data transfer and lower bandwidth usage.
GeoWebCache, embedded with GeoServer efficiently stores the vector tile data. Since styling is done by the client, not the server, GeoWebCache only needs to store one tile for all different styles.
Because the vector data is available on the client, very high-resolution maps can be drawn without corresponding increases in bandwidth.
The client has native access to the actual feature information (attributes and geometry), allowing for very sophisticated rendering.
For each layer, GeoServer has some information such as
1. Type: type of layer i.e. line, point or polygon layer
2. Layer name: name of the layer,
3. Disk quota: The maximum amount of disk space that can be used for this layer,
4. Disk used: The current disk space being used by tiles for this particular layer,
5. Enabled: shows whether tile caching is enabled for this layer,
6. Preview: Similar to Layer Preview, this will generate a simple OpenLayers application populated with tiles from one of the available gridset/image format combinations.
7. Action: It has two option seed/truncate or empty. Whereas seed/truncate option opens the GeoWebCache page for automatically seeding and truncating the tile cache and empty option removes all saved tiles from the cache.
Adding GeoServer Tiles
If you have already published your layer on GeoServer, and want it to be in tiles you can follow the procedure given below.
i.) First of all publish your layer with proper name and style. To know how to publish layer on GeoServer you can visit previous articles based on GeoServer.
ii.) Then go to Tile Layer option under Tile Caching. Then search your published layer in list.
iii.) Now you can open that layer as png or jpeg in preview/openLayer option or before that you can seed the layer. Seed layer is nothing but an option where you can decide the zoom level for the layer and hence number of tiles in layer.
While seeding you need to provide the given requirements mentioned below:
a) Number of threads to use:
Possible values are between 1 and 16.
b) Type of operation:
Sets the operation. There are three possible values: Seed (creates tiles, but does not overwrite existing ones), Reseed (like Seed, but overwrites existing tiles) and Truncate (deletes all tiles within the given parameters)
c) SRS (Spatial Reference System):
Specifies the projection to use when creating tiles (default values are EPSG:4326 and EPSG:900913)
d) Format:
Sets the image format of the tiles. Can be application/vnd.google-earth.kml+xml (Google Earth KML), image/gif (GIF), image/jpeg (JPEG), image/png (24 bit PNG), and image/png8 (8 bit PNG)
f) Zoom start:
Sets the minimum zoom level. Lower values indicate map views that are more zoomed out. When seeding, GeoWebCache will only create tiles for those zoom levels inclusive of this value and Zoom stop.
g) Zoom stop:
Sets the maximum zoom level. Higher values indicate map views that are more zoomed in. When seeding, GeoWebCache will only create tiles for those zoom levels inclusive of this value and Zoom start.
h) Bounding box:
(optional) Allows seeding to occur over a specified extent, instead of the full extent of the layer. This is useful if your layer contains data over a large area in GeoServer, but the application will only request tiles from a subset of that area. The four boxes correspond to Xmin, Ymin, Xmax, and Ymax.
iv.) After giving all this, you need to submit these details. After that you will be having a list containing Id, Layer, Status, Type, Estimated number of tiles, Tiles completed, Time elapsed, Time remaining and Tasks. In this list you can check the number of tiles whether it is too high or too low. It should be balanced if it is too high the data size would be high if to low then zooming will not be proper. The number of tiles depends upon zoom start and stop. If difference is very high then number of tiles will be more and vice versa, so it is advised to keep the zoom stop level less than 20.
v.) Before open this layer you should reload the configuration then open it as png and jpeg format under openLayer option.
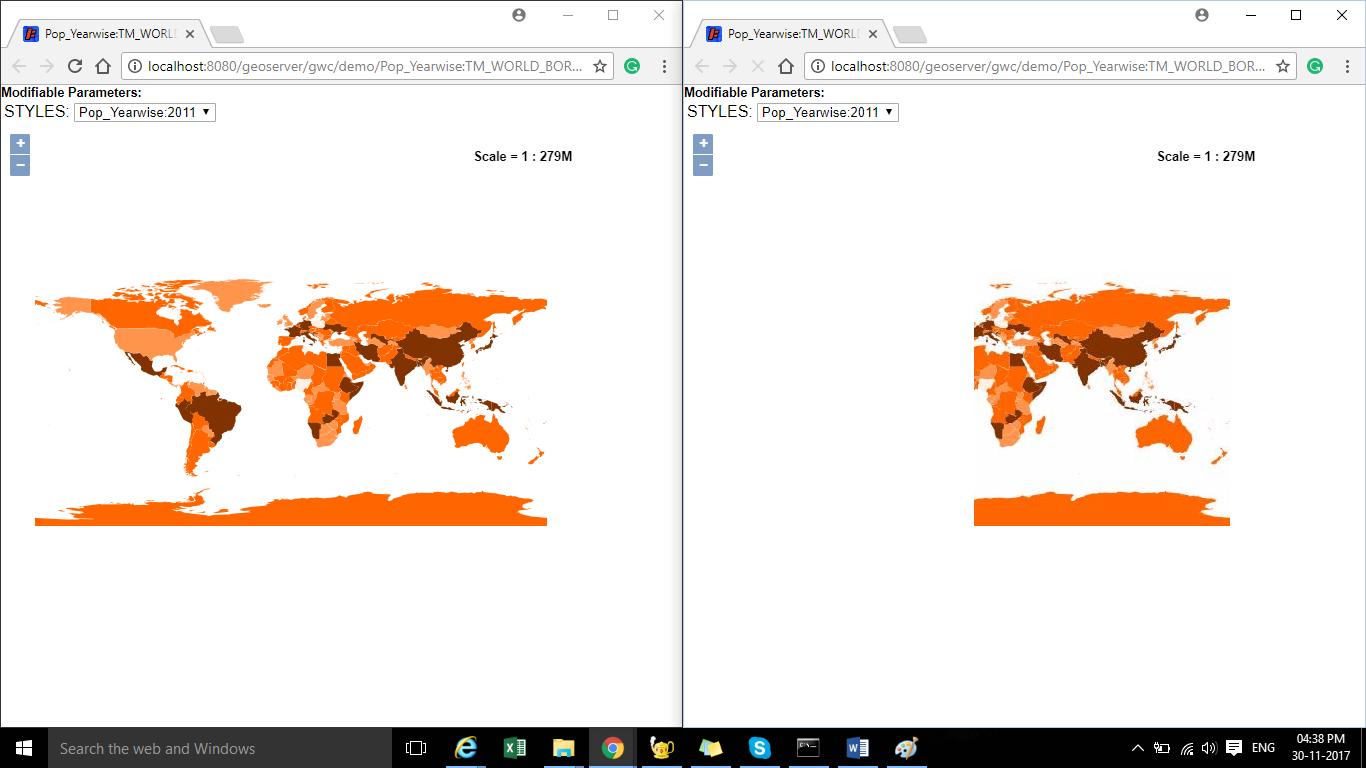
OUTPUT of GeoServer Tiling-
You must notice that png format would open fast than jpeg format.
The images given below has left side Jpeg format and right side png format. So it is clear that tile in png format render faster than jpeg or any other format.
You also can visit Install Geoserver in linux operating system, Install GeoServer in Windows operating system, Publish and style Raster data on GeoServer, Publish and style Vector data etc.
If you find any problem during implementing this tutorial, please let us know. Feel free to comment in given comment box provided below.