Download Google Earth Pro for Free – Official License

Download Google Earth Pro for Free – Official License. Google Earth is geographical information program and virtual globe software, provided by Google over the last 10 years, which is very useful tool for scientist, GIS analyst, hobbyist and for general public. Where Google Earth basic is Free, while Google previously distributing Google Earth pro version costing you around $399, providing more features than the basic version, which can now be downloaded for free getting a valid free licence.

Download Google Earth Pro for Free - Official License

Comparison list – Google Earth Basic vs Google Earth Pro version

But before downloading the Google Earth pro version which is actually free for now, we may compare Google Earth Basic version with Google Earth pro version and also list out extra features which makes your life easier going pro.

  • Google Earth provide Screen Resolution print images, while pro version of earth provides Premium high resolution images.
  • Earth enables you to import and Geolocate GIS images manually, while with pro version GIS images can be easily Geo-located Automatically.
  • Also pro version of Google earth makes you to import Super large images file for Overlays, while with basic earth would only limit you to import maximum texture size image files.
  • With all the above comparison, With Google Earth Pro you can make offline HD movies.
  • Can measure area, radius and circumference on the ground.
  • Map multiple points.
  • View demographic, parcel and traffic data layer.
  • Access to advanced importing features and map making tool.
  • Get the large data-set and batch Geocode address.
  • Spreadsheet Import: Ingest up to 2500 addresses at a time, assigning Placemarks and style templates in bulk.

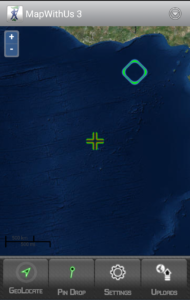
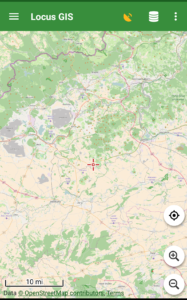
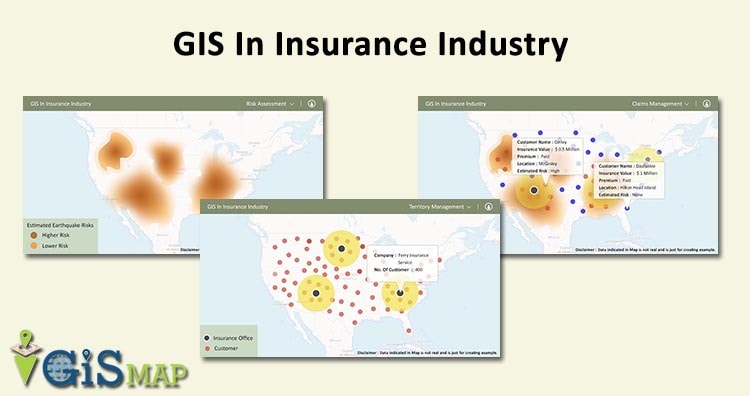
Alternative of Google Earth

Check more: No Need of Google Routing

Download Google Earth Pro for Free – Grab valid License:

You just need to navigate to the official page of Google Earth, where you have to accept the terms and condition, and allow to download the Earth on your PC, either it is Mac, or Windows or Linux. Here is the link:

After installing it, you need to fill up the pop up window form, with valid email address and a license key. License code is ‘GEPFREE’. Your old license key would continue to work, if you already had one.

Download Google Earth Pro for Free - Official License
Download Google Earth Pro for Free – Official License

You may be intersted to see some tutorials on Google Earth:

No doubt Google with all different digital products, aims to makes your life easier and comfortable. There are many organization and individual, which are using Google Earth pro to perform different analysis, planning hikes, planning a new office building, trip to the mountains and placing solar panels on rooftops. Let us discuss by commenting below, where you use Google Earth pro? And how Earth software troubleshoot your work? Do download the Earth pro and enjoy its features.

Find out your history location from Google Map – Track, Export and Delete.

Google Map tracks your history location and allows you to manage, Delete and view your old location. Where you were, last week at 9 PM? Well its not easy to remember your every move in every day life, after few days. Google may maintains and tracks all your history location if you have opted to enable your Location service from any device which is linked with your Google Account. Your every location get tracked by Google from browser or from any of the mobile devices, which actually allows to send the current location data to Google, which let you to find out your history location from Google Map.

Find out your history location from Google Map

Turn on or off location history tracking from Mobile or Browser:

Why to turn ON location tracking? There are many apps and web services which uses your location to either share or fetch the relevant data to you, which in turn increase your efficiency in some way. For Ex. “Google Now” Application. ?And Why to turn OFF location tracking? Obviously, privacy concern is the reason, as no body knows ‘how safe the data is’.

Google tracks your location from either mobile devices which are linked to your Google Account or from the browser in which you are logged in with Google Account, where you have enabled setting to track your physical location in Setting of browser.

Steps to Either turn ON or OFF your location history tracking in different devices and browser:

1.) In Browser:

  • In Chrome and Opera – Select setting and under Location tab, select the appropriate option to enable or disable tracking.
  • In Mozilla Firefox – Select Tools, and click on options. Now navigate to privacy tab and under tracking select the check box accordingly.
  • In Safari – Select setting preferences and then privacy, where you need to select the desired option.

2.) In Mobile Devices:

  • Android – Go to Google Setting -> Location -> Location history. And Turn On or Off from the given check box.

Find out your history location from Google Map

  • IOS – Open Settings > Privacy > Location Services. Toggle the button to switch on or off your location tracking for different application.

Google also provide a salient feature to predict future and know current traffic, which uses many devices location data, and on which an algorithm may run to output congestion of roads.

Track and view your history location from Google Map – Track and Export:

1.) Open up your browser and copy paste the following URL : https://maps.google.com/locationhistory.
2.) Sign-in in the current tab, with the Google Account of which your Google Device is associated with.
3.) Now choose date and period of days i.e in between 1 to 30 Day. And Select “Show Time stamps” if needed to track a particular moment of the day.

  • Note: If you want to see every minute latitude longitude points, then you may need to select “Show All points” hyperlink, which you may find at bottom left corner as indicated in the figure.
Find out your history location from Google Map

Also you can export your location data in KML format (Keyhole markup language), option can be found just below “Show Timestamp” option, which you may use either to:

Delete history location from Google Map:

Why you want to delete your location history from the website? Privacy issue is a serious concern, and you may not want any app or services to record your every move. But don’t worry, Google provided a way for this. You can Delete some part of day location or the either entire location from the Location history website. Here are the steps to delete the location history:

1.) Go to location history website, and log in from your Google Account.
2.) From the left panel of the website, you may find “Delete history from this time period” to delete your selected “time stamp” and “Delete all history” to delete entire history data from the website.

You may also delete the entire location history data from your mobile device. Just navigate to Google Setting and select location. Tap on Location history and click on “Delete Location History”.

Find out your history location from Google Map

  • Note: Once you have erased your history data, it can’t be restore. Also you may face issues with some application which uses your location data like “Google Now”.

You may also look at following features of Google Map:

Conclusion – History location from Google Map:

You can use Google history Location as an application to get to understand and analyze your traveling and location history. Google being fair to public, provided all the setting, to choose whether you want to get tracked or not. While they also mention, that they will keep the data with them as private.

Well I had kept my location service enable to let me track myself to analyze my every day location data. What you have opted for? What else you may want from this Feature? And Which kind of Analysis you are performing with the data you get from location history? Do Comment below, i would love to hear your ideas.

NOTE: If you are from Korea, Location History website may not be available.

Haversine Formula – Calculate geographic distance on earth

Haversine Formula – Calculate geographic distance on earth. If you have two different latitude – longitude values of two different point on earth, then with the help of Haversine Formula, you can easily compute the great-circle distance (The shortest distance between two points on the surface of a Sphere). The term Haversine was coined by Prof. James Inman in 1835. Haversine is very popular and frequently used formula when developing a GIS (Geographic Information System) application or analyzing path and fields.

You can use this Online Route Compass Tool, which calculates the distance based on haversine Formula and also computes the Bearing angle too :

Route Compass Online Tool to Compute Haversine Distance

Haversine formula - Calculate geographic distance on earth
Haversine formula – Calculate geographic distance on earth

Haversine formula:

Central angle Haversine can be computed, between two points with r as radius of earth, d as the distance between two points, \phi_1, \phi_2 is latitude of two points and \lambda_1, \lambda_2 is longitude of two points respectively, as:

\operatorname{haversin}\left(\frac{d}{r}\right) = \operatorname{haversin}(\phi_2 - \phi_1) + \cos(\phi_1) \cos(\phi_2)\operatorname{haversin}(\lambda_2-\lambda_1)

Haversine formula - Calculate geographic distance on earth
Haversine formula – Calculate geographic distance on earth

Law of Haversine:

To derive law of Haversine one needs to start the calculation with spherical law of cosine i.e cos a = cos b * cos c + sin b * sin c * cos A

One can derive Haversine formula to calculate distance between two as:

a = sin²(ΔlatDifference/2) + cos(lat1).cos(lt2).sin²(ΔlonDifference/2)
c = 2.atan2(√a, √(1−a))
d = R.c

where,

ΔlatDifference = lat1 – lat2 (difference of latitude)

ΔlonDifference = lon1 – lon2 (difference of longitude)

R is radius of earth i.e 6371 KM or 3961 miles

and d is the distance computed between two points.

Here is the example result delivered by Haversine Formula:

Lets take one of latitude-longitude for calculation distance,
NEBRASKA, USA (Latitude : 41.507483, longitude : -99.436554) and
KANSAS, USA (Latitude : 38.504048, Longitude : -98.315949)

Do compute the distance with the above written formula. Your answer would be 347.3 Km(kilo-meter). The snapshot demonstrate the same result with map below.

Haversine formula - Calculate geographic distance on earth
Haversine formula – Calculate geographic distance on earth

If you are getting problem in understanding Haversine formula or getting error in the result do comment below. Also if you have more relevant information about the same, do share with us by writing below.

Measure Straight line distance in Google Map

Measure Straight line distance in Google Map between two points. Straight line distance can be calculated with Haversine distance formula or Great circle distance formula. Google Map, a web mapping service application and technology, which provides and enrich a common user experience for free, like, Route planner for traveling by foot, car or public transportation with estimated travel time, Congestion description on current time or with prediction time, measure distance from one place to other either straight or route wise, see near by location and many more. You  can easily calculate straight line distance measurement, by just following simple steps.

Measure Straight line distance in Google Map:

Note: Google provides two different version of map as, Classic Google Map (now with new Google Map Lite mode version) and a newly customized Google map. For both version, different steps are to followed to calculate distance. Below are the methods for both.

measure straight line distance in Google map

New Google Map: Measure Straight line distance:

1.) Open Google Map in your browser.
2.) Right click, from your starting point on Map, and select Measure Distance options.
3.) Click on destination point to which you want to measure distance. Done.

measure straight line distance in google map

4.) Under the search box, see the calculated distance, as shown below in the figure.

How to switch between Google classic map and Google new map. Now switch to Lite Mode Google Map version.

Classic Google Map: Measure Straight line distance:

1.) Open Google map in your browser, and login with your Google all in one account.
2.) Click on Map lab link, appearing just left bottom panel.
3.) Enable “Distance Measurement tool”, and save changes.

measure straight line distance in google map

4.) Click on ruler icon which appear at the lower left hand corner of map.
5.) Click on your start point and the end point, this will give your straight line measurement, shown in the left panel as shown.

measure straight line distance in google map

Google map provides many feature, you can explore many other features as:

Hope this article helped you, to measure straight line distance, between two points. Do comment, below with your experience to calculate distance on Google Map.

Create save digitize and download kml or kmz from Google Earth

Create save digitize and download kml or kmz from Google Earth. Google earth can be named a virtual globe or map of earth, which provide high resolution view of any area in recent years or any period of time from last decades. Always its not possible to go for field survey and prepare the layers like roads, places, river, water-body , settlements etc for any GIS application as it need resources and manual work which increases cost and project duration. Why do not one use a efficient way for the creation of layers like digitize kmz from the Google earth and convert it to shape-file or use directly. You can also see for how to save, create and export kml file from Google map. To digitize and save kmz from Google earth following steps need to be followed.

Steps to Create save digitize and download  kml or kmz from Google Earth

1) Start with running the application of Google earth on desktop or laptop, wait till the globe appears in the Google earth application window.

Create save digitize and download kml or kmz from Google Earth

2) Add a folder to the My places contained by Places window of Google earth as shown in fig below.

3) Give name which you want to give to kmz in the tab opened clicking on the My place>add>folder button.Create save digitize and download kml or kmz from Google Earth

4) To plot a kmz of line type click on the Add Path button on the toolbar placed on the top of the window.Create save digitize and download kml or kmz from Google Earth

Create save digitize and download kml or kmz from Google Earth

5) Start digitizing with the left click of the mouse and scrolling the window up, down, left and right by pressing the scroll wheel and zoom in and zoom out by rotating the scroll wheel inward and outward. To undo plotted points adjoining line press right click.

6) Save every line feature in the same folder named for kmz. Name of the feature can be edited by right click on the feature in the place window and going to properties of the feature. Create save digitize and download kml or kmz from Google EarthCreate save digitize and download kml or kmz from Google Earth

7) Now after digitizing all feature save the kmz to the desired destination by right clicking on the folder in the My places.Create save digitize and download kml or kmz from Google Earth

Create save digitize and download kml or kmz from Google Earth

8) Lastly the question may arise how to digitize kmz with polygon and point feature. For polygon feature click on Add Polygon on the tool bar and for point feature click on Add Place marks on the toolbar.                                                                 Create save digitize and download kml or kmz from Google Earth

Create save digitize and download kml or kmz from Google Earth

Note: Google provides Google Earth and this kind of service for free. But i suppose, if you are going to extract and create KML file with your program in bulk, then Google may notify you for the same.

You may also look on some other tutorial:

Thus Kmz is digitized and saved from Google earth. One may convert the kmz to shp in any GIS software like ArcGIS, QGIS, Global Mapper. Do comment below if you are getting any issue in performing above steps. Also do let us know in what way and in which application you are using KML file for performing GIS operation, by putting the information in the below provided space.

Upload Excel latitude longitude in QGIS as Spatial Layer

Upload Excel latitude longitude in QGIS as Spatial Layer and save as Shapefile.  When you have collection of point data i.e latitude and longitude, stored in Excel file in different column, then you can easily view and Save it as Vector layer file in QGIS(Quantum GIS). Well after uploading Excel latitude longitude values as spatial layer,  you are only one step back, to convert the Excel data in Shapefile or KML or any vector file.

Upload Excel latitude longitude in QGIS as Spatial Layer

Before starting the exercise, you need to have a data excel file, which should be convert to Comma Delimited .csv file(Depends upon your choice, Comma delimited is common). To convert Excel file in .csv file, open the file and select save as type “CSV (Comma delimited) (*.csv)”. Name the file and save it.

  • Note: If you are using old version of QGIS then, do download and install plugin “Add delimited text layer”.  To install a plugin,
  • Go to Plugins -> Manage and install Plugins, search for “Add delimited text layer“, and install it.

Visit this page to see more tutorial in QGIS.

Steps to Upload Excel latitude longitude in QGIS as Spatial Layer

You should have an already downloaded and installed QGIS , before going through this steps. 

1.) Open up QGIS and click on layer, from menu tab and select Add delimited text layer. 

Upload Excel latitude longitude in QGIS as Spatial Layer

2.) Browse the already created .csv excel file, which has latitude and longitude coordinates.

3.) By default, if your column is named as latitude and longitude, then, X will be mapped to longitude and Y will be mapped to latitude. Select OK after mapping X and Y.

Upload Excel latitude longitude in QGIS as Spatial Layer

4.) Select the desired coordinate reference system and press OK, the file get uploaded as Spatial layer in QGIS.

Well if you want to convert this uploaded Spatial layer in Shapefile or KML or any other vector file, select on layer, and click on save as. In the open window, select the desired format in which you want to save the file. Done. I suppose this tutorial would be helpful to you. If you are facing any problem, then do comment below.

Create save Export and download KML file from Google map

Create save Export and download KML file from Google map.  Google map or Google Earth makes use of KML or keyhole markup language, to display features, which actually stores geographic features in Vector format. You can create KML file from Google map for mapping and displaying the same by again uploading the same KML file on Google map or created KML file converted from Shapefile. Before creating KML file on Google map, you should have an Google account and should be logged in wtih that. So that once KML file created, you would be able to see it in My Places of Google map after wards. You can also look link for how to create KML file from Google earth.

Create save Export and download KML file from Google map

Note: Google provides Google map and this kind of service for free. But i suppose, if you are going to extract and create KML file with your program in bulk, then Google may notify you for the same.

Create save Export and download KML file from Google map

Steps to Create save Export and download KML file from Google map

1.) Open Google map and sign in with all in one Google account.

2.) Click the setting button which appears at the bottom right corner of map as shown below (New Google map), and select My places. Or if you are using old map theme, then choose my places from top right corner.

Create save Export and download KML file from Google map

  • Update: If you are not getting my places option from here, then you click on left side Menu icon (three lines) and select your places and tap on Maps.

Create save Export and download KML file from Google map

Once you clicked your places select the Maps.

3.) Now click on Create Map (in the last with blue font) which will open new link in new tab and select Create Map again.

4.) Perform and create a map, with the help of tool bars as shown below, Which has following options i.e

  • Undo
  • Redo
  • Select item
  • Add a Marker
  • Draw a line
  • Add direction
  • Measure distance and Area.
Create save Export and download KML file from Google map

5.)Name your map, by clicking on untitled map. You can now Add layers too, i.e for Adding Markers, which will be treated as point feature, make different layer while for Adding direction or line
you can have different layer.

  • Note: You cannot have more than 3 layers for the same map project for Free. You need to go for Google map pro.
Create save Export and download KML file from Google map

Here is the look, i had created 3 layers, i.e 1st one is Point layer, 2nd is Direction layer and 3rd is Line layer, as shown above.

6.) Once you are done with creating map, click the folder icon, shown just below your title of map project and Select Export as KML. Now you can export the entire map or either of the layer by selecting the options. Done.

Create save Export and download KML file from Google map

You can now share your map you created map and can also embed it in your website. What are your plannings with the newly created KML file? Do you want to convert kml file to shapefile. Do comment below, how you use KML file so that me as well as our visitors will come to know about new technology and uses. Your valuable suggestion and questions are always welcomed by commenting below in the section provided.

Upload or Import KML file on Google map

Upload or import KML file on Google map. KML or Keyhole Markup Language is file which models and stores geographic features for display in Google Earth or Google maps. You can upload and view the KML file you already created on Google Map, to verify Whether the overlapped feature of KML uploaded has proper valid geometry or not in respect to the Google Map Feature. Before uploading the KML on Google Map, you need to have a Google account. The file uploaded will be saved to “My Places“, you don’t need to upload it twice when require. If you are not having an already built KML file, you can look at How to create KML file on Google map or How to create KML file on Google earth.

You can also try MAPOG Map Analysis Product to upload or import the KML file Online and View on map for free. Along with that you can further process the GIS Data with different operation and finally create a brief Analysis report.

Upload or Import KML file on Google map

Upload or import KML file on Google map

Here are the steps to upload or import KML file on Google map

1.) Open Google map, and sign in for all in one Google account.
2.) Move to My Places, a button on left upper side of Google map, and then select the Create with classic My Maps as shown below.

Upload or import KML file on Google map

3.) Select import option, and then browse the KML file you want to upload on Google map.

Upload KML file on Google map

4.) Done, edit the title and description. You can make the map public or private. Save the map.

Upload KML file on Google map

  • Note: You can upload KML file of Maximum size of 3MB on Google Map, as per Google instructions. While i found some lose of data while uploading KML file of greater than 2MB. Alternative to Google map is Google earth for the same.

The map saved, can be again viewed and downloaded by going to “My Places -> click on the title of map -> then the KML” option appearing just below the title of your map. You can also find the tutorial to convert KML to Shapefile and Shapefile to KML, with the help of QGIS an open source GIS tool. Want to know more technically on the KML and shapefile, i will provide you soon, related tools and coding for the same with explanation.

Geo-Referencing raster image in QGIS w.r.t. vector file

Geo-Referencing raster image in QGIS with respect to vector file. Geo referencing is the process used to provide geographical information to the raster images like cadastral maps, physical maps and satellite imagery with the help of projection or coordinate system. As an ordinary raster image formed by the number of pixel which has no particular size,  Geo-referencing gives a particular coordinate to a pixel with respect to the ground point, it represents. Thus every individual pixel get its coordinate and size.

Look for other QGIS tutorial.

There are many GIS tools which perform Geo-referencing like ArcGIS, PCI Geomatica, Erdas Imagine, QGIS etc. Here Geo-referencing is shown in QGIS:

Geo-Referencing raster image in QGIS with respect to vector file

In QGIS first start with loading the vector file in QGIS environment by click on add vector layer.

Geo-Referencing raster image in QGIS with respect to vector file
Geo-Referencing raster image in QGIS

Once the vector layer is loaded it can be given symbology by right click on the layer in the layers window. For geo-referencing the click on the georefrencer tab present at bottom of the QGIS environment window as shown below.

Geo-Referencing raster image in QGIS with respect to vector file
Geo-Referencing raster image in QGIS

This will open a new window named Georeferencer . In this window open the raster image to be referenced by click on the tab open raster layer present on the top left corner.

Geo-Referencing raster image in QGIS with respect to vector file

When raster is open in the georefrencer window to add control points according to which raster will be georefrenced click on the add point button on the tool bar. Control points are the coordinate points of the ground or the projected coordinates.

Geo-Referencing raster image in QGIS with respect to vector file
Geo-Referencing raster image in QGIS

These control points may be enter manually or from the map canvas as here reference is vector layer which is present on the map canvas. click on from map canvas on Enter map coordinates window.

Geo-Referencing raster image in QGIS with respect to vector file

This will open the map canvas or main QGIS window , select the point of reference on the vector layer.

Geo-Referencing raster image in QGIS with respect to vector file

Selection of point on vector layer will fill in the XY coordinates on the Enter map coordinates window. In this way first control point is marked.

Geo-Referencing raster image in QGIS with respect to vector file

Following same procedure select more and more points with minimum residual error which is generated by the tool and shown in the GCP table window.

Geo-Referencing raster image in QGIS with respect to vector file

Residual error is the difference between the actual coordinate of the control points and the geographic coordinate created by control points. The residuals represent the level of accuracy of the georefrenced images.

Check more :

Georeference on Map image with Geo Coordinates Control

Change projection of a georeference

These georefrenced images can be placed in the layers of any Geographic information system and can be used to locate points on the ground. Feel free to comment below, if you are having any problem to Geo-Referencing raster image  or if you want to discuss for the same topic.

Connect QGIS to oracle spatial – Quantum GIS

How to connect QGIS to oracle spatial. QGIS can now connects to oracle to view spatial data and process it, great news for an open source software believers. As a newbie to QGIS user, i can just give a way, that i connected to it.

How to connect QGIS to oracle spatial :

1.) Firstly you should have downloaded QGIS with GDAL/OGR required oracle library for bridging oracle connectivity and must have installed oracle  on your machine. If oracle library is not installed, see the following post : Install QGIS for oracle connection via OSGeo4w.

2.) After starting the QGIS application,  select Add Vector Layer as shown below:

Connect QGIS to oracle spatial

3.) A new window will pop up on clicking the above, now select Database Radio button as appeared in Source. Now in Database Type drop down box, select Oracle Spatial. If you have properly installed QGIS with the requirement stated above Oracle spatial would be present.

Connect QGIS to oracle spatial

4.) In the same Add Vector Layer window, select new button under connection label. This will open up a simple form with following Connection information to be filled, i.e, Type, Name, Host, Database, Port, Username and Password.

Here is the way to fill up the information :

a.) Type : In type select oracle spatial from drop down  box.

  Type : Oracle Spatial

Connect QGIS to oracle spatial

b.) Name : Type in any desired name you wish to give to connection

c.) Host : For finding your host name, make a query in your oracle sql plus application as written below:

SELECT UTL_INADDR.GET_HOST_ADDRESS FROM DUAL;

This will return the 32 bit address as shown below in figure:

Connect QGIS to oracle spatial

d.) Database : Write database name, i.e the name you have given while installing oracle software.

e.) Port : Enter port number i.e 1521

f.) Username : Enter username

g.) Password : Enter corresponding password of username

Connect QGIS to oracle spatial

Now select Test Connection button. This will pop up another window which gives you an information of your successful connection, as shown below.

Connect QGIS to oracle spatial
Note the string url connection to connect QGIS to oracle spatial and click OK.

5.)  Again in the vector data layer window, select the connection that you made named as Demo and click on Open button.

6.) Now select the coordinate system for your database, which will be prompted after proceeding from step 5.

Connect QGIS to oracle spatial

7.) If all steps are successfully done, you can see your spatial table, with your vector data spatial view as shown below:

Connect QGIS to oracle spatial

Feel free to comment below, if you are having any problem to connect Oracle Spatial to QGIS Quantum GIS (Geographic information System) or if you want to discuss for the same topic. You can also see QGIS tutorial further. And yes, don’t forget to subscribe and follow on twitter for getting updates related to GIS post.