Geographic Information System is a system intends to capture, Store, manage, manipulate, analyze the data.
 In this guide, it will provide step by step of how to convert SQLITE to KML format with the help of Converter Tool in MAPOG. So, both if you are a first-time user and a regular one, Converting SQLITE to KML with MAPOG, the entire process will be explained in simple steps for you.
Key Concept to Converting Files:
The Converter Tool in MAPOG functions to transform data from one format to another like for this case convert SQLITE to KML, it’s like a magical process. You input the data in one format, and it will provide the outputs in a different format suitable for your analysis. Additionally, GIS Data can be downloaded in various formats, making it adaptable for multiple uses.
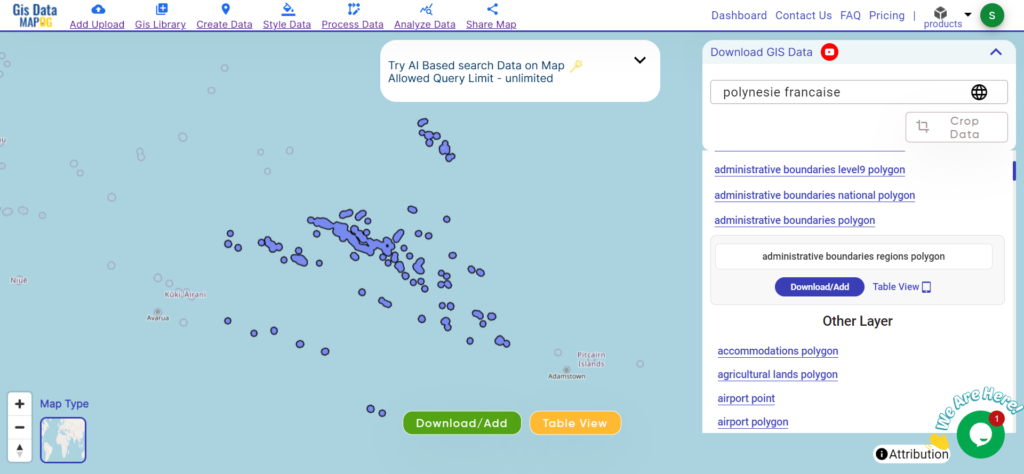
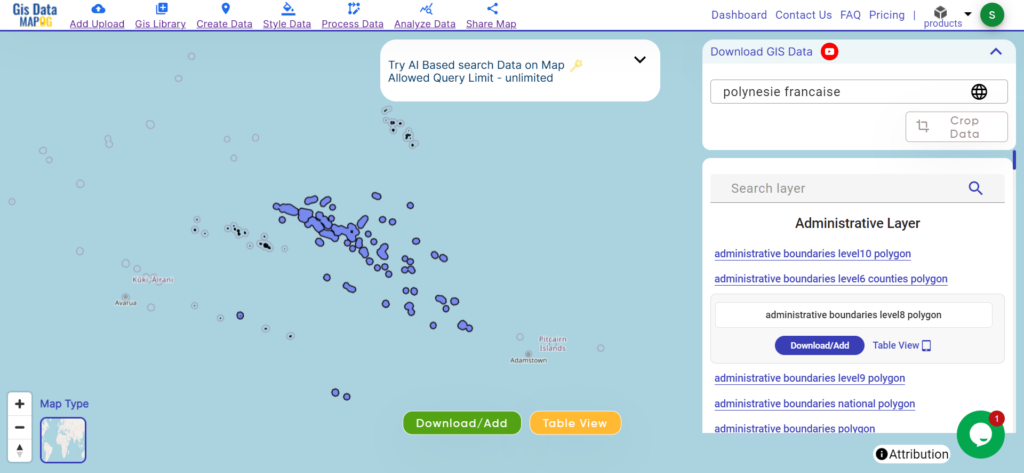
Online GIS Data Conversion
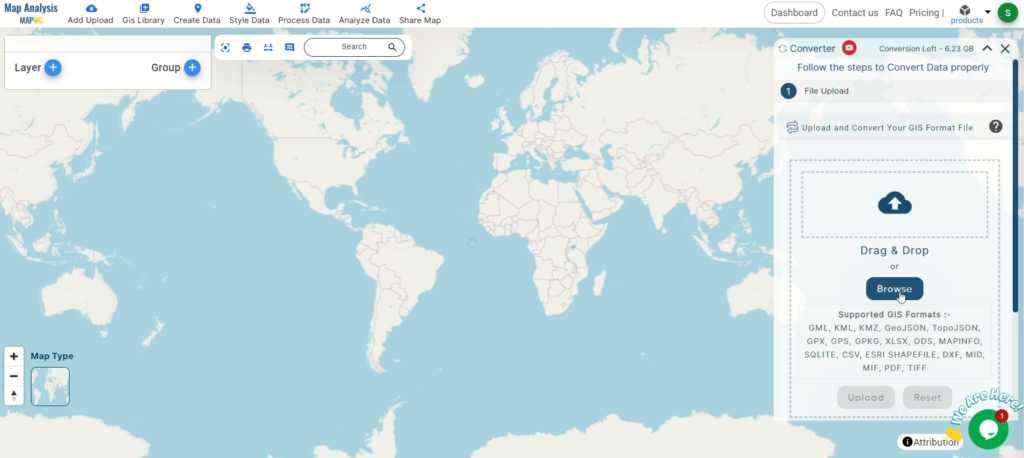
Step 1: Upload the Data:
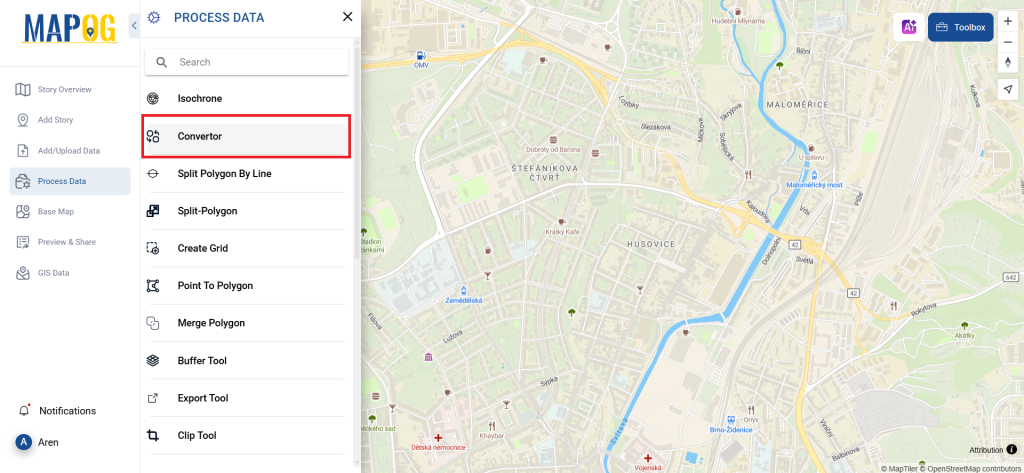
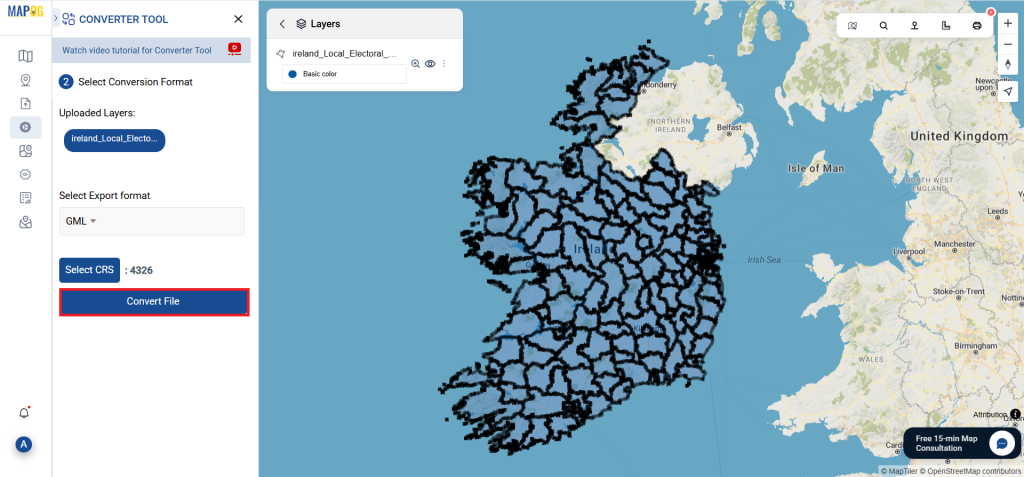
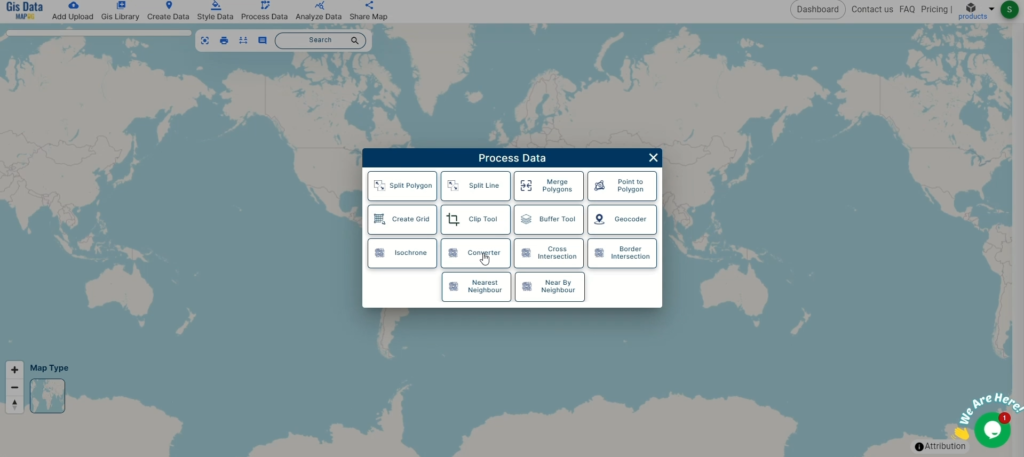
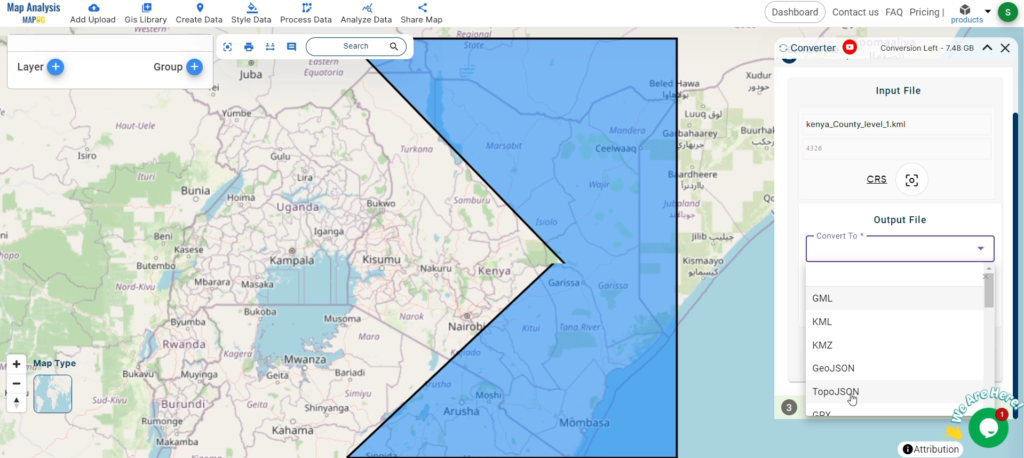
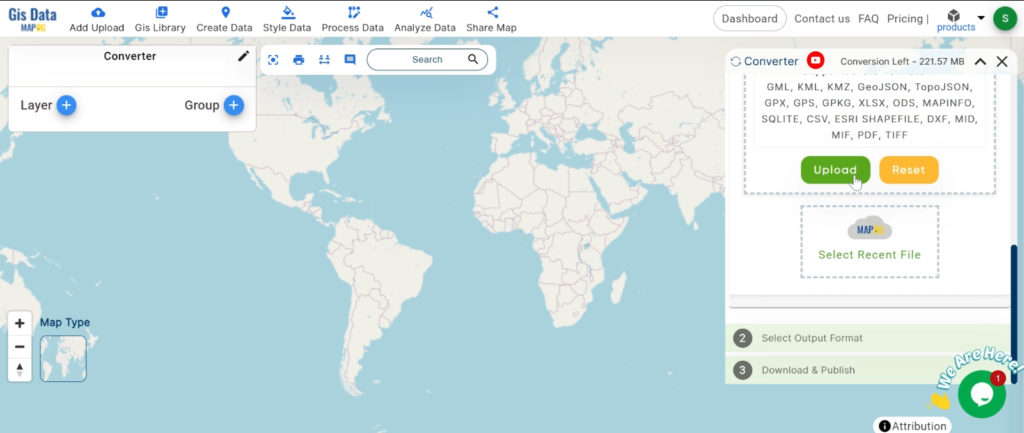
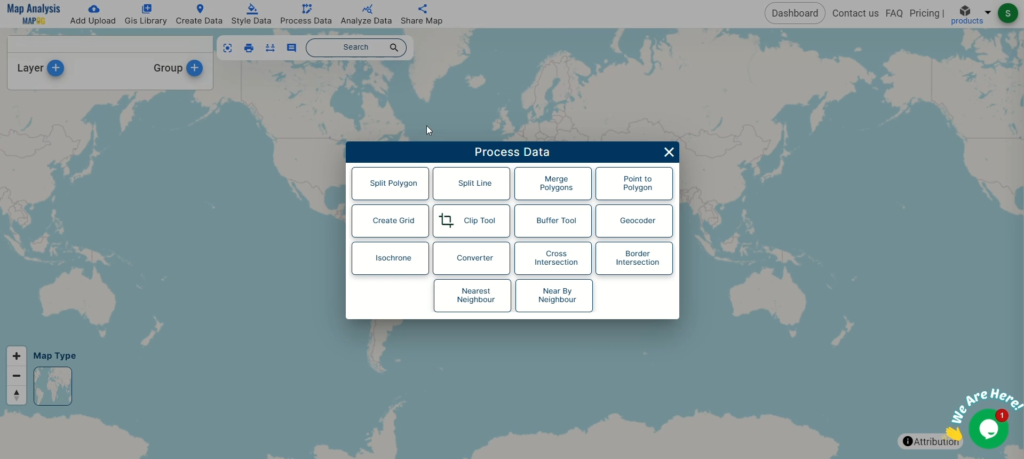
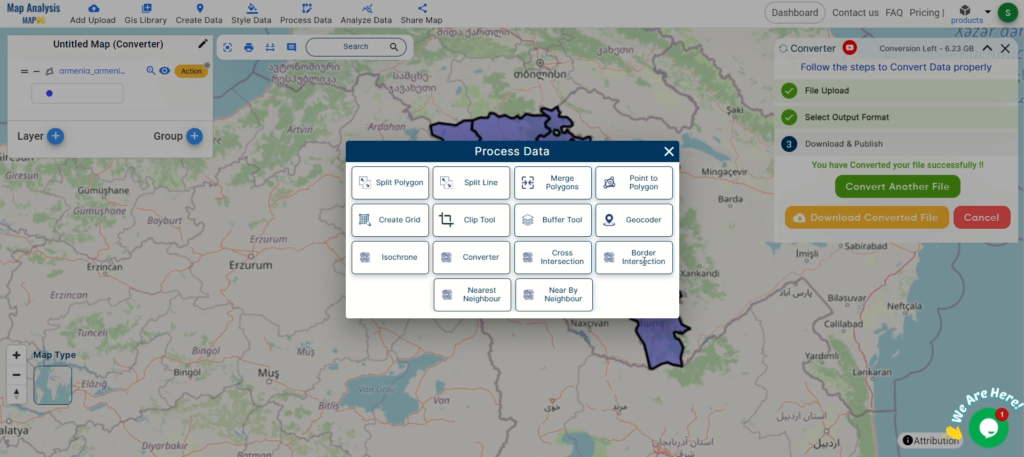
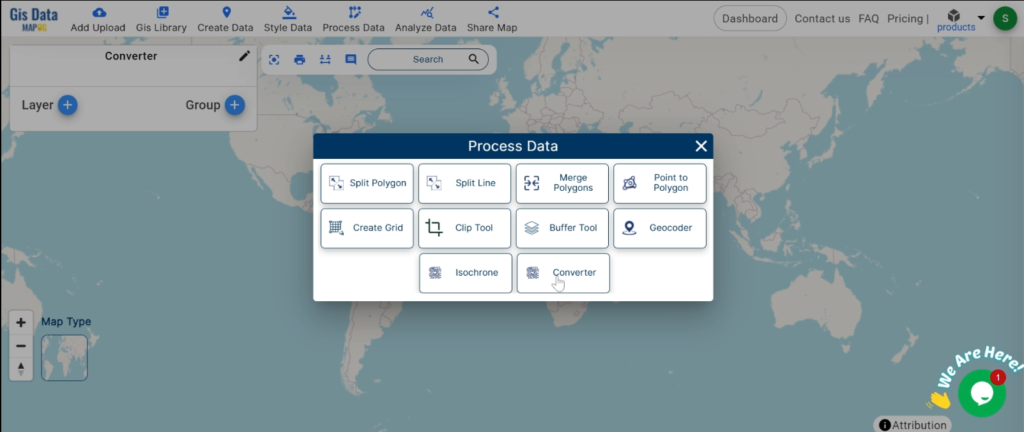
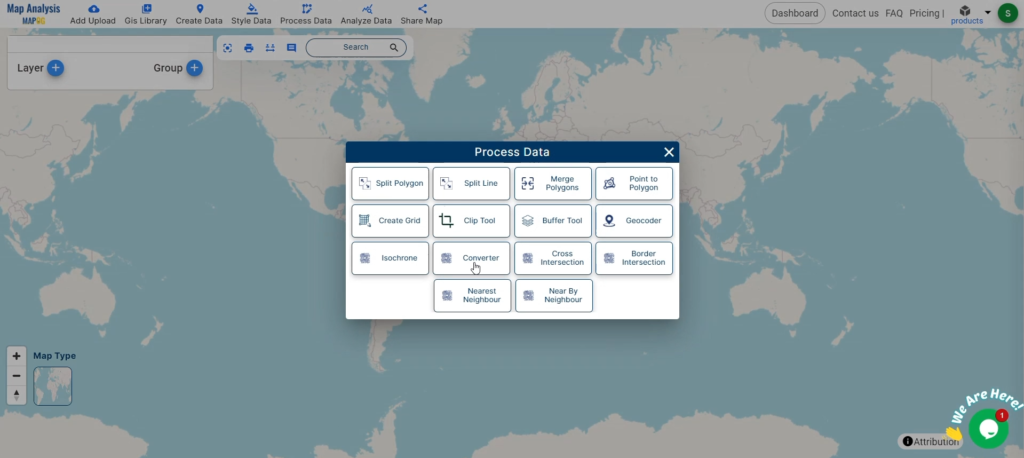
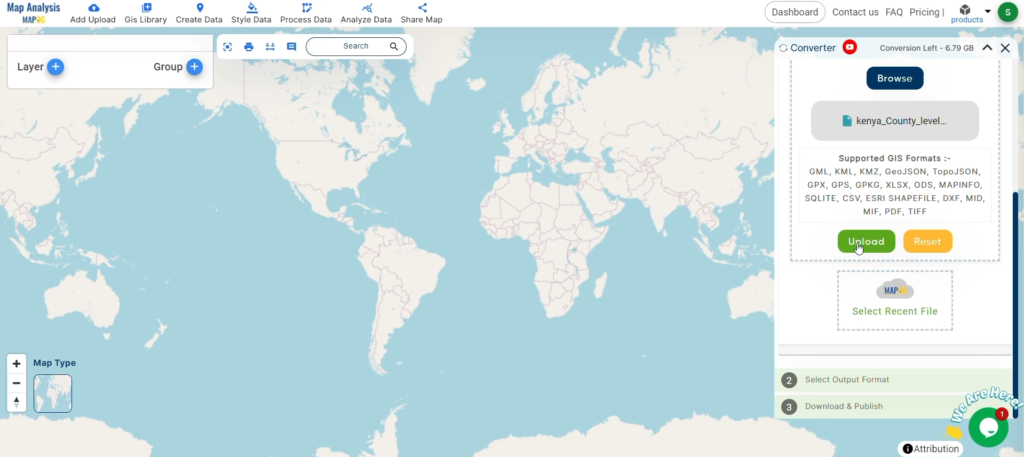
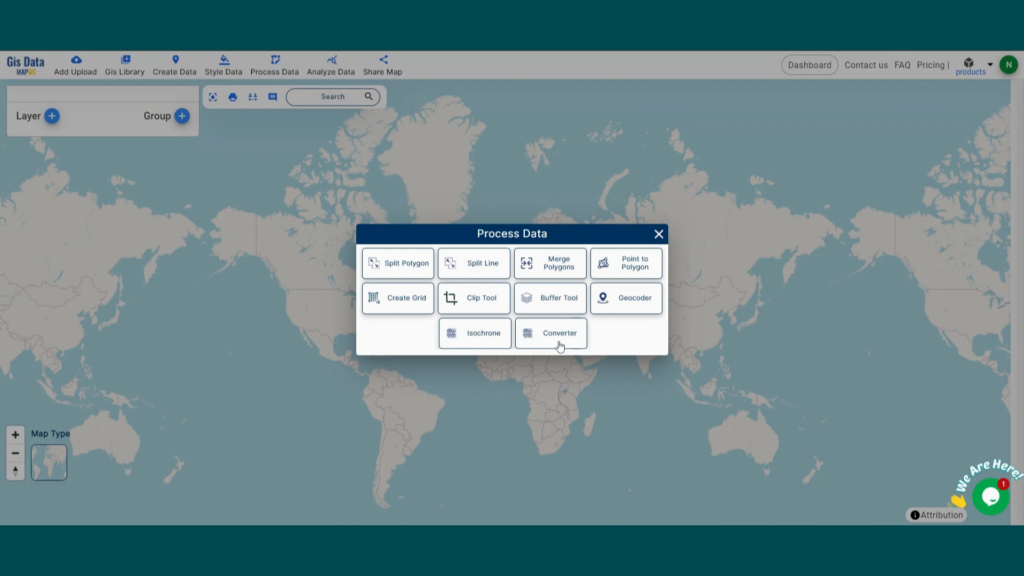
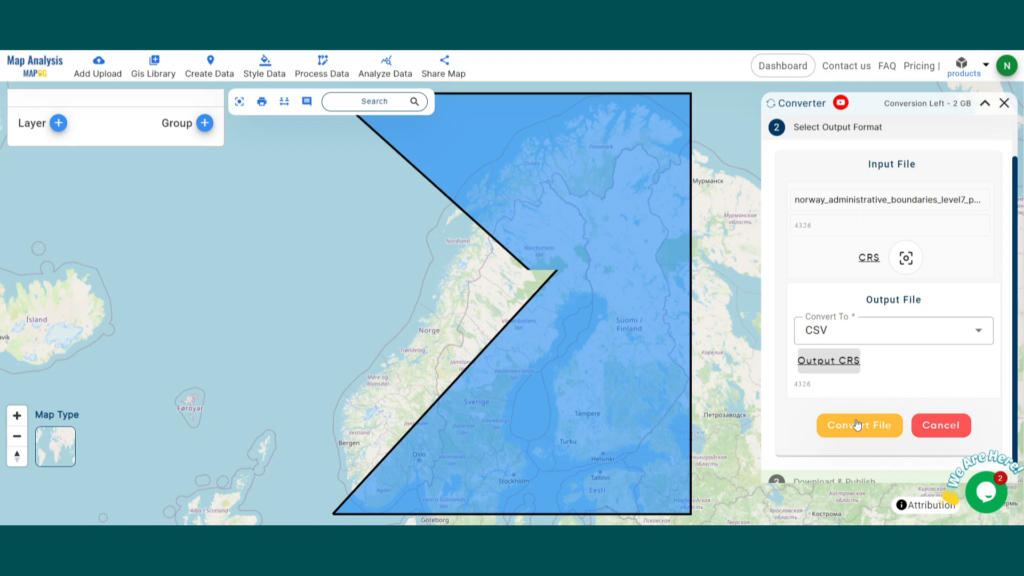
- Go to “Process Data” and click on “Converter Tool” option.

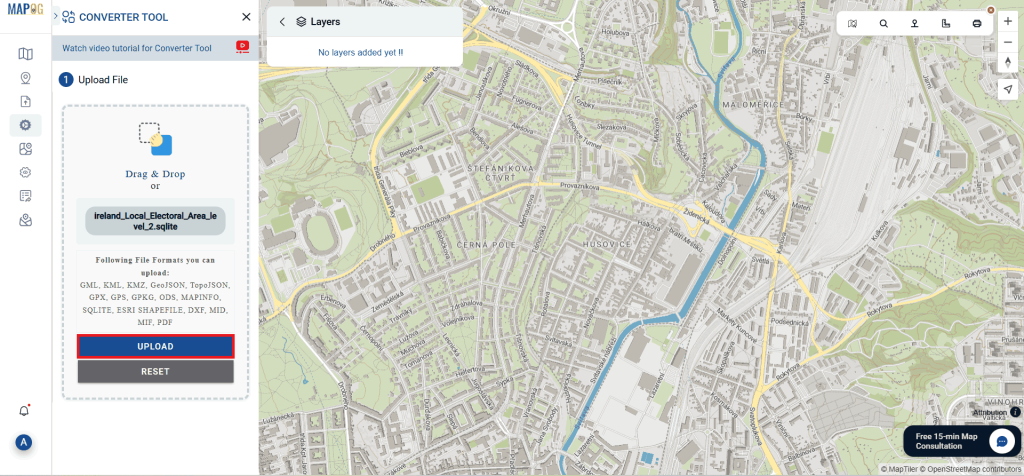
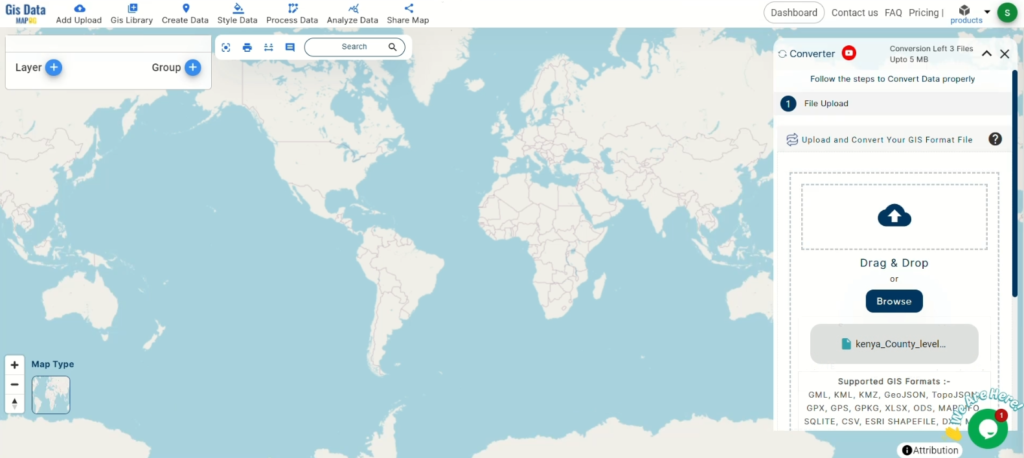
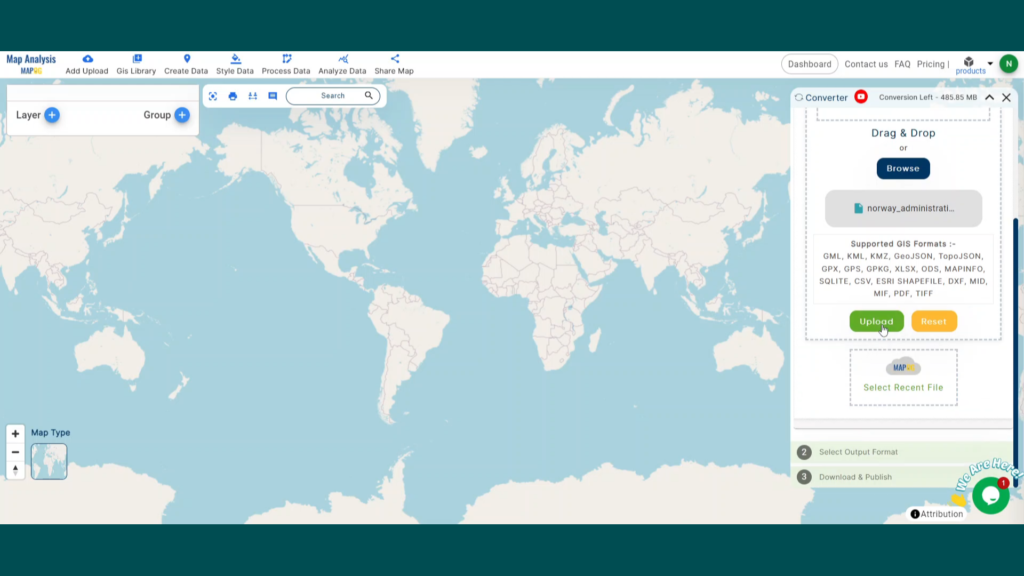
2. Upload your SQLITE file. This is your entry point where you feed in the information that needs conversion.

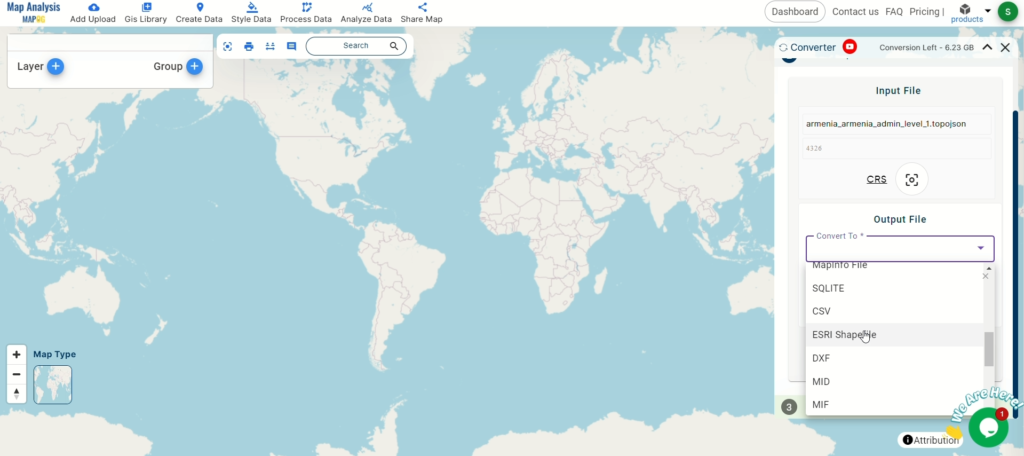
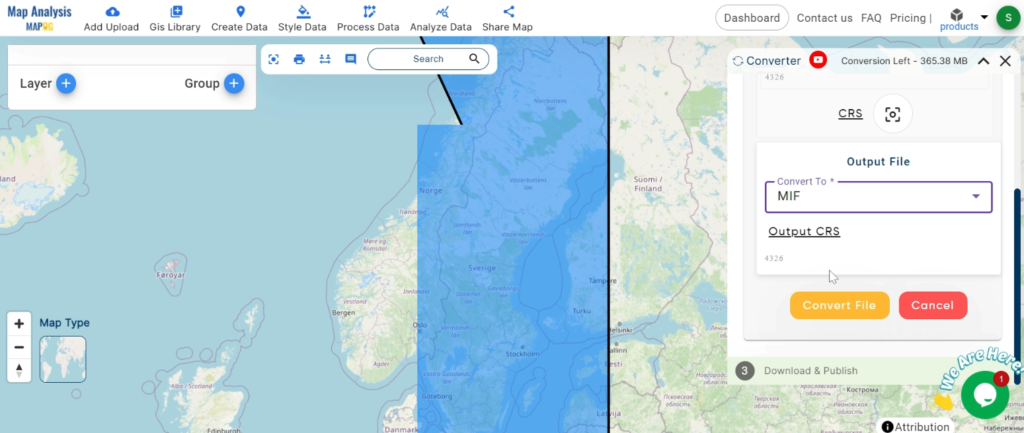
Step 2: Select the Format for Conversion:
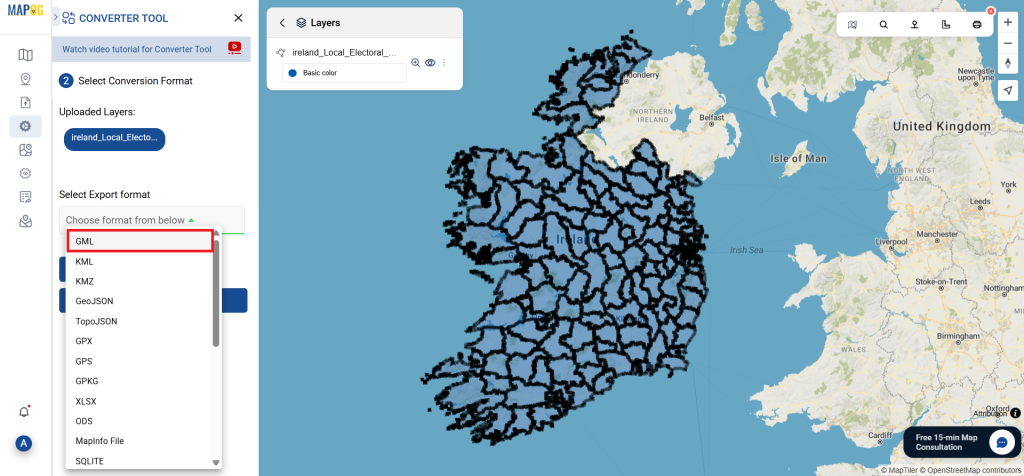
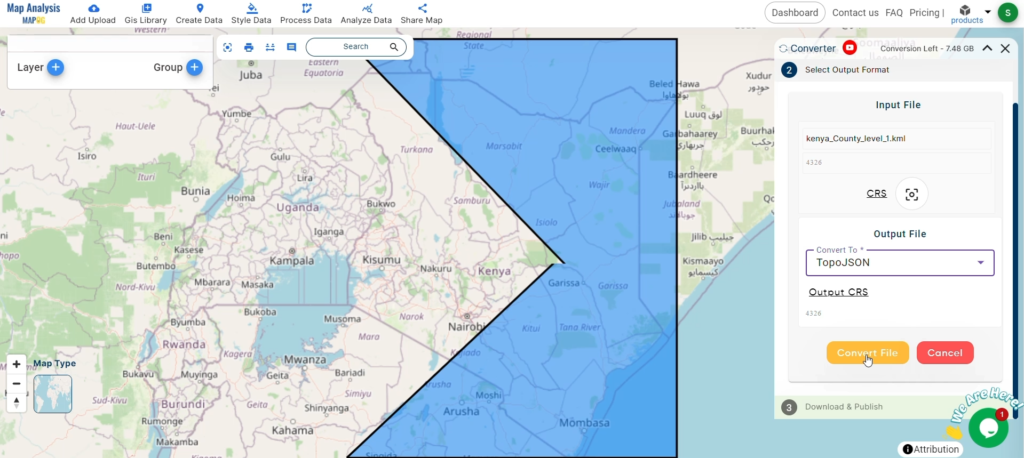
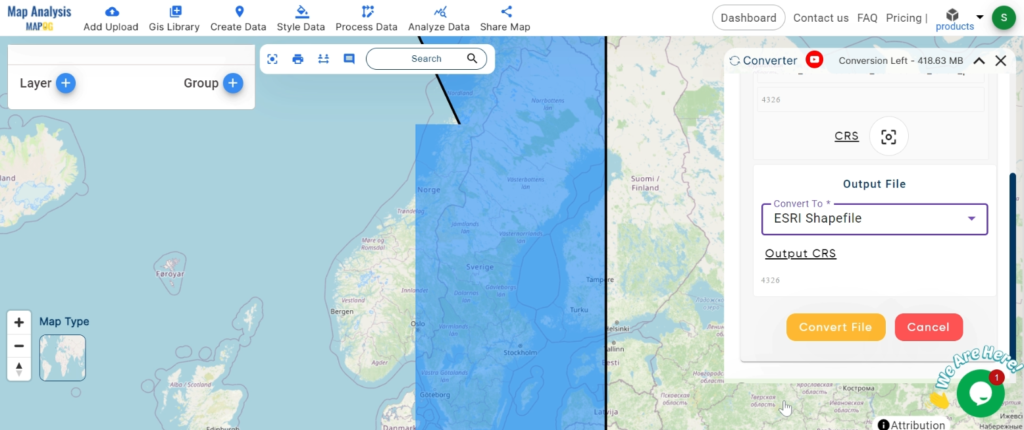
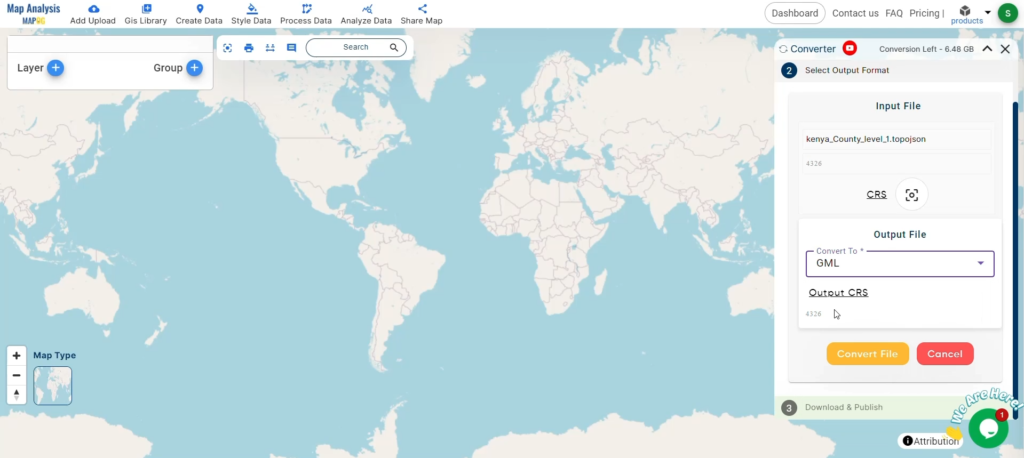
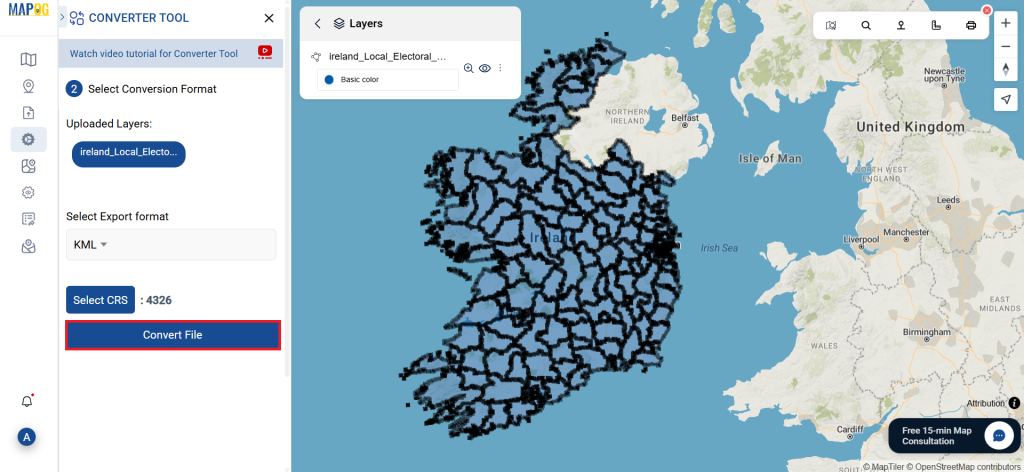
- Select the output format as KML if you want to expatriate only the data. The tool provides several options in arriving at the result but for this guide, we are using the option to convert the file to KML.
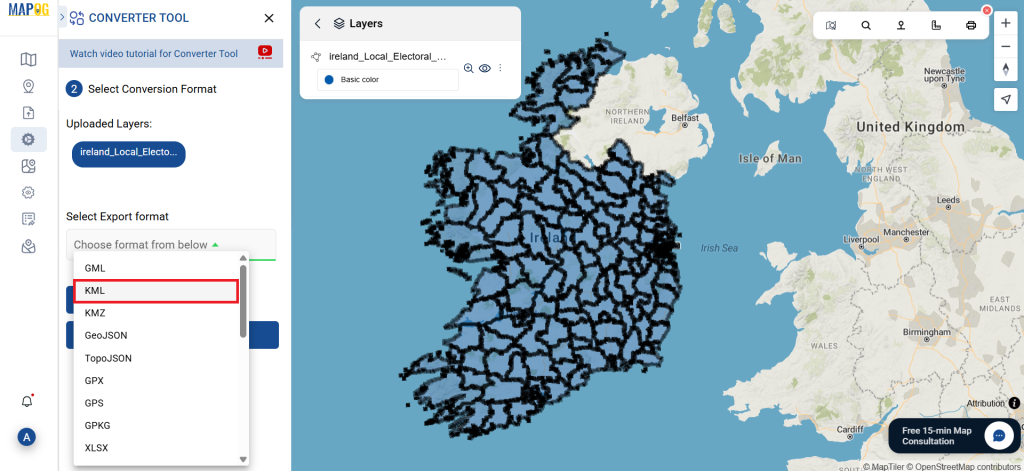
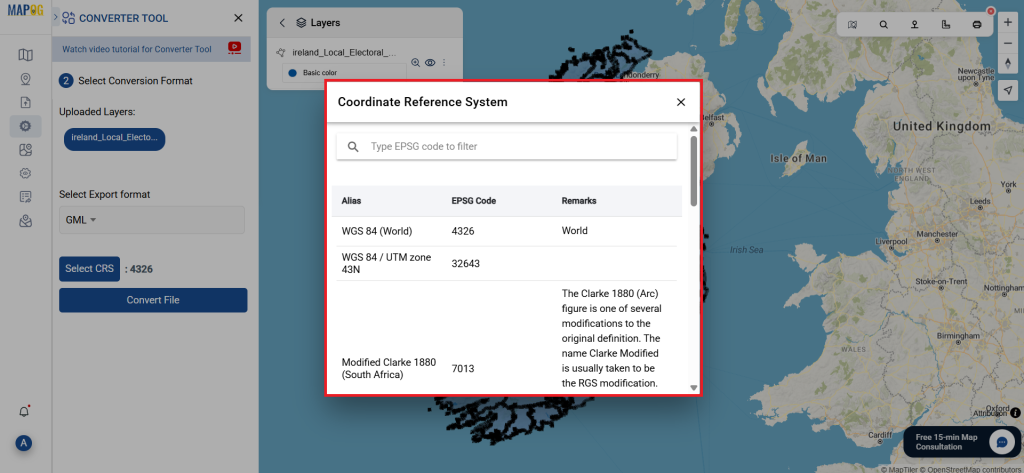
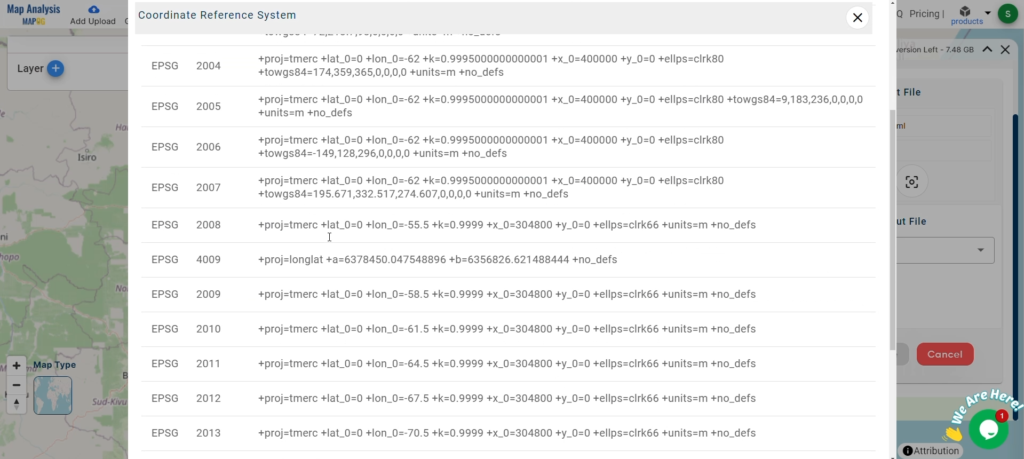
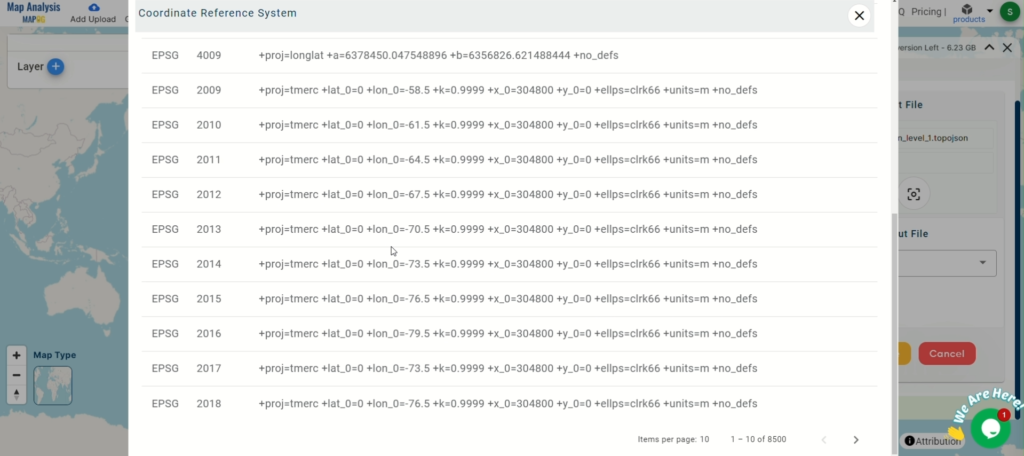
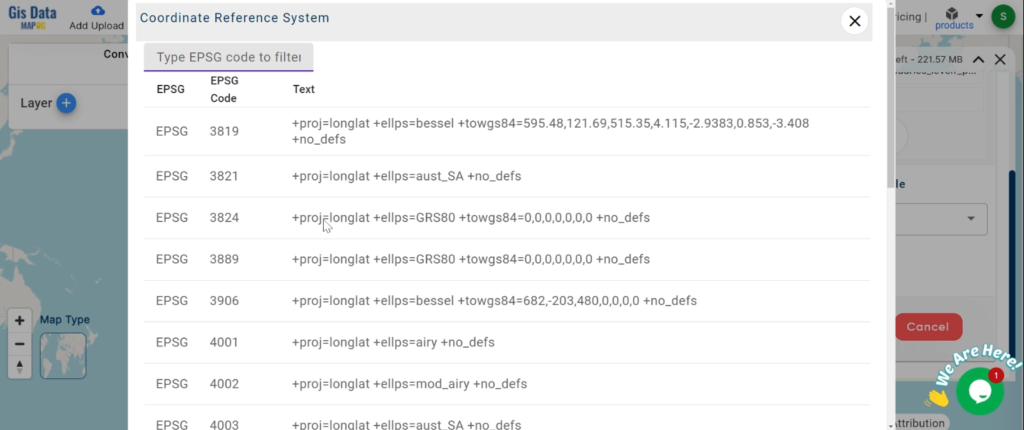
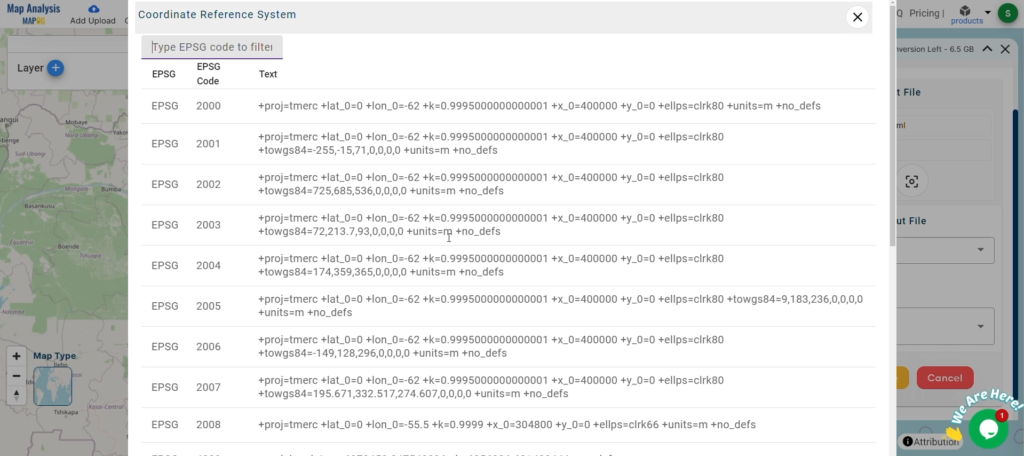
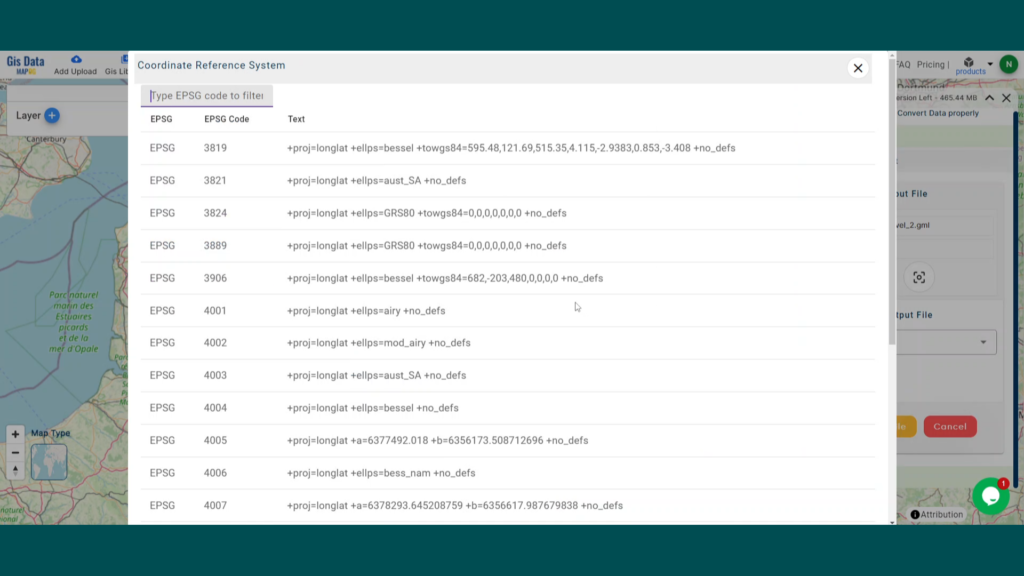
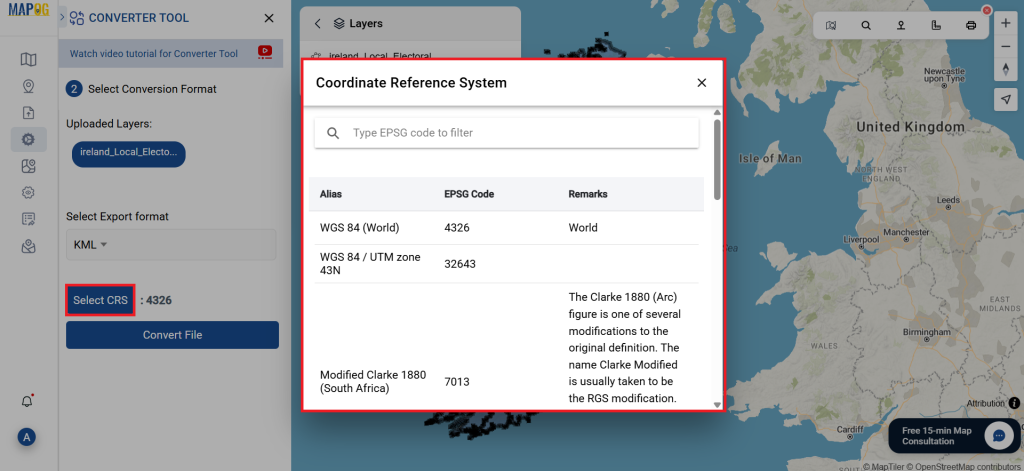
2. You can also set the Output CRS as per your need.
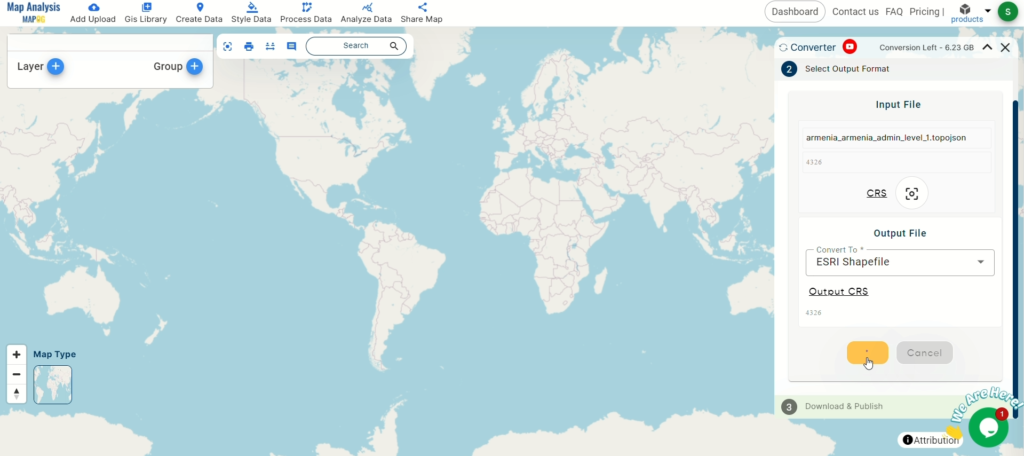
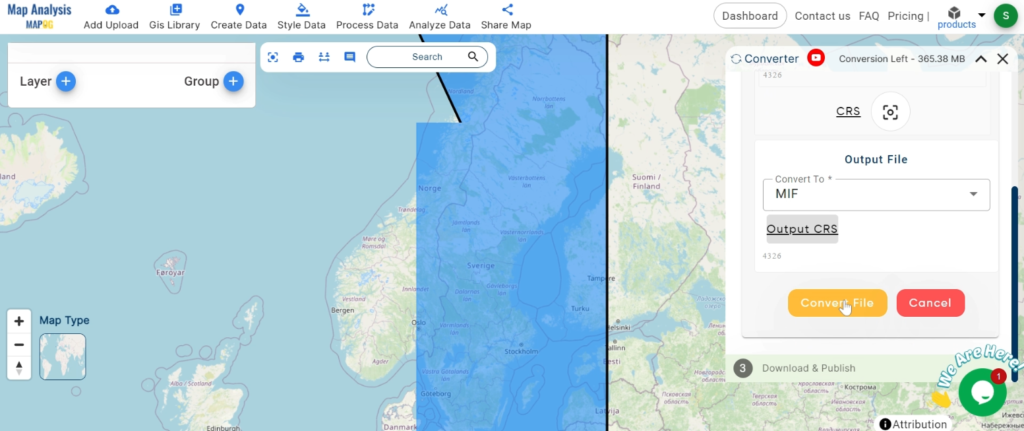
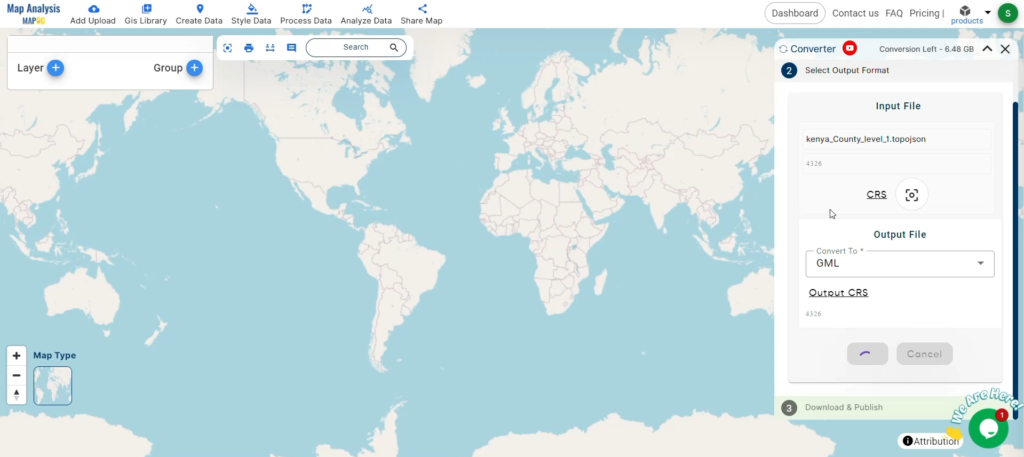
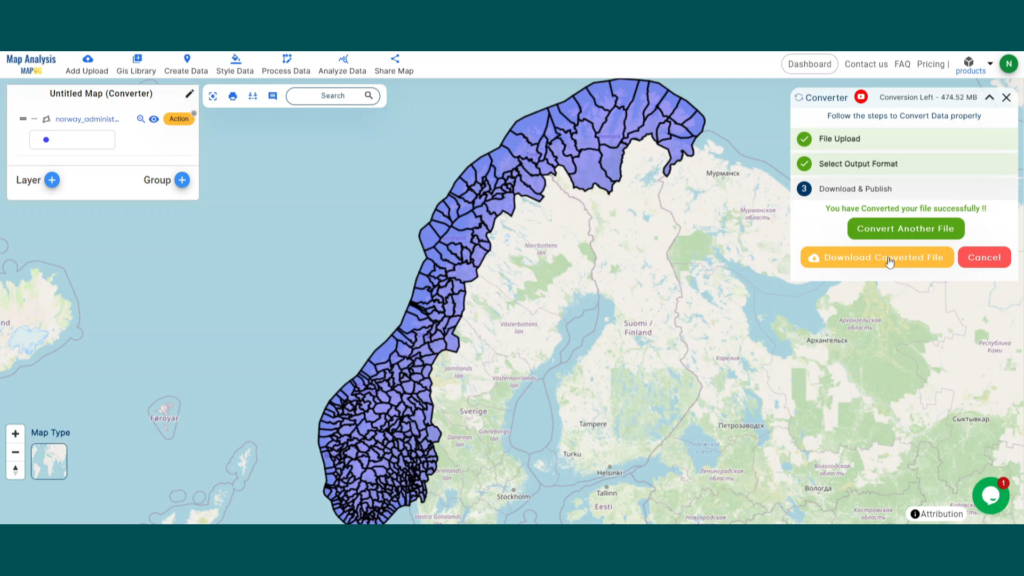
Step 3: Run the Conversion:
Go to ‘Convert Files’ and watch the tool at work. Working with the Converter Tool you input your data and then the tool converts it from the SQLITE format to the KML format.
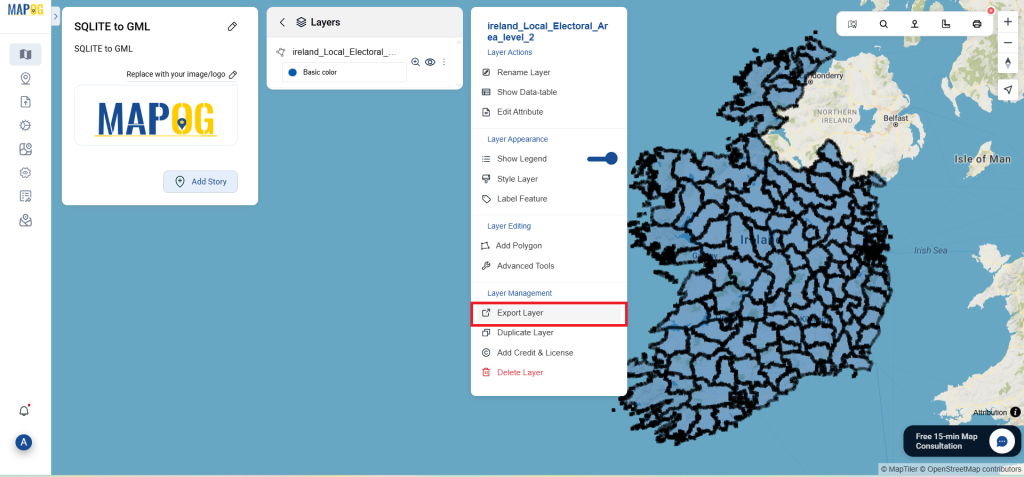
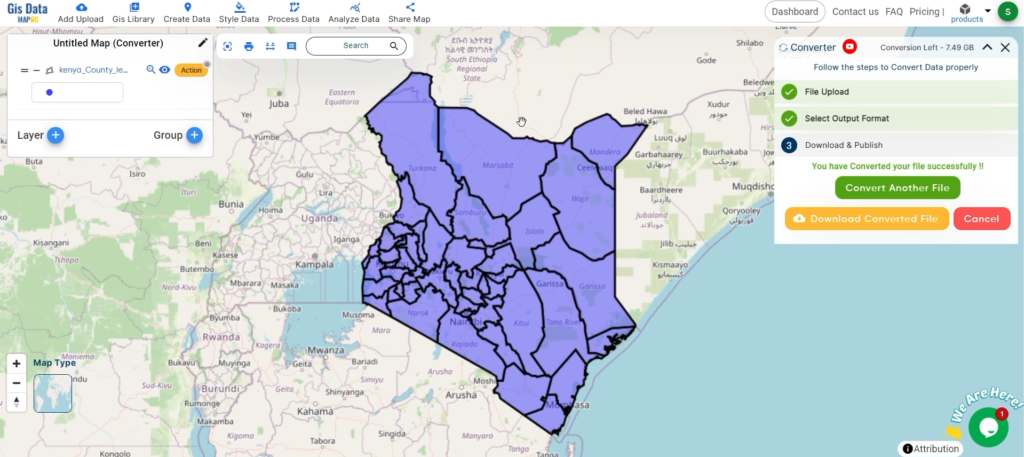
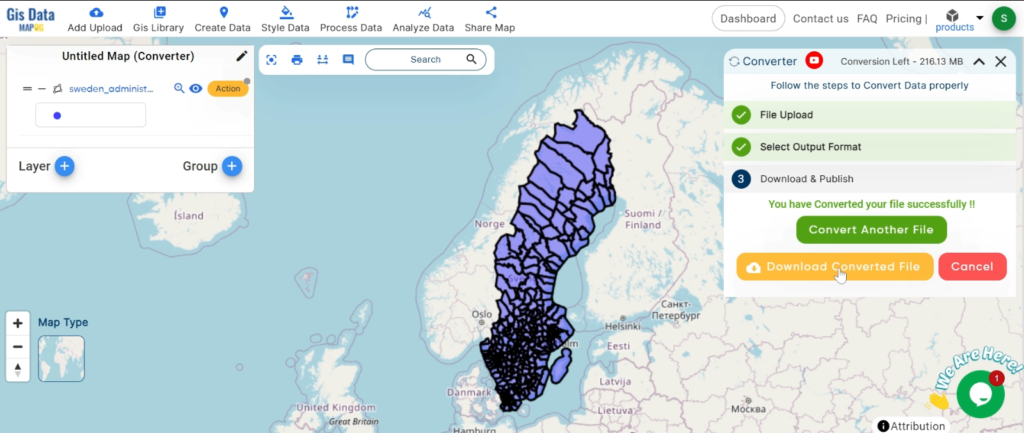
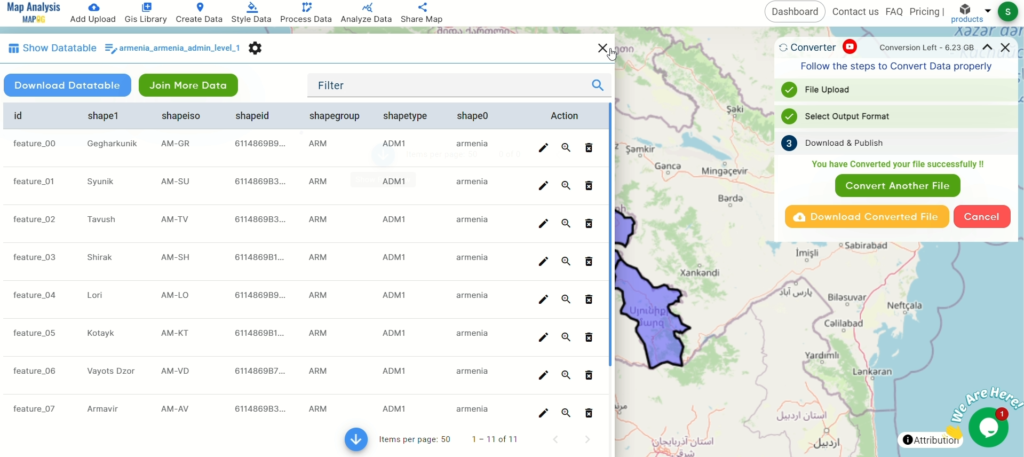
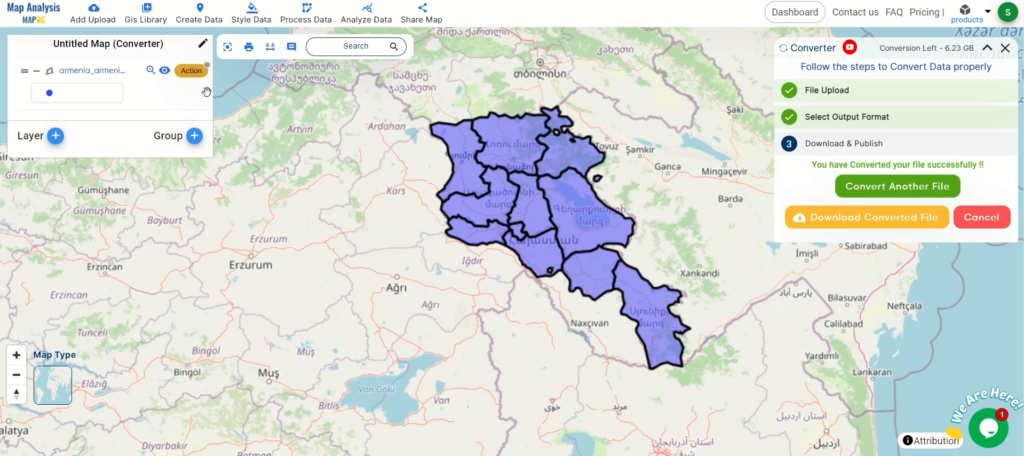
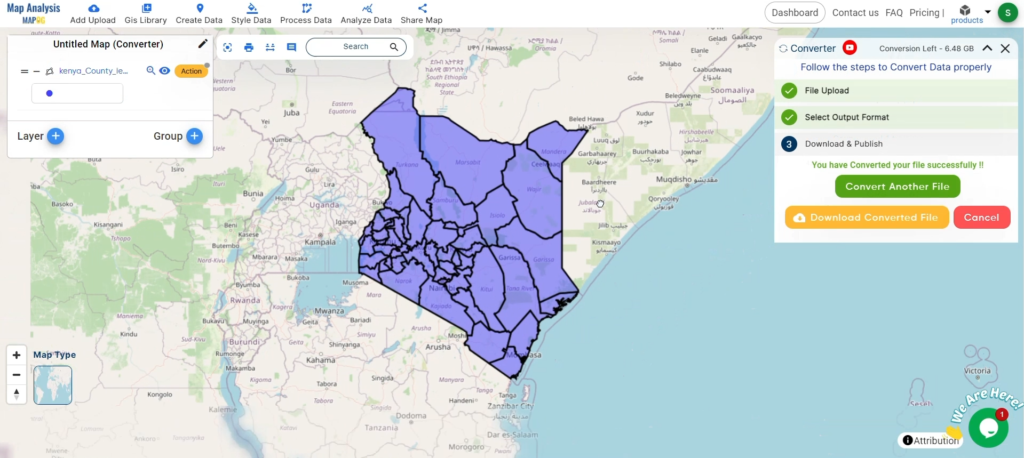
Step 4: Review and Download:
Take a moment to review your converted KML data to make sure everything looks correct. Once you’re happy with it, go ahead and download the file. This step is really important to ensure that the conversion worked properly and that all your data is intact.

With MAPOG’s versatile toolkit, you can effortlessly upload vectors and upload Excel or CSV data, incorporate existing layers, perform polygon splitting, use the converter for various formats, calculate isochrones, and utilize the Export Tool.
Here are some other blogs you might be interested in:
- Convert Online GIS data : KML to PDF file
- Converting KML to GeoTIFF , Online Gis Data Converter
- Converting KMZ to SHP : Online GIS Data Conversion
- Converting TopoJSON to SHP Online : GIS Data Converter
- Converting GeoJSON to TopoJSON with MAPOG
- Converting GeoJSON to CSV with MAPOG
- Converting KMZ to KML with MAPOG
- Converting GML to KML with MAPOG
- Convert KMZ to TopoJSON Online
- Converting KMZ to GeoJSON Online
- Convert KML to MID Online