SHP to XLSX – Convert Shapefile to Excel

Sometimes we just need to see attribute details not geometry. So instead of carrying heavy shape files we can convert them in XLSX format. XLSX file contains on attribute detail or can say non spatial data. XLSX files are light in weight. Along with shp to xlsx convert you may also check for shp to ods, shp to csv conversion which also more focuses on attribute details.

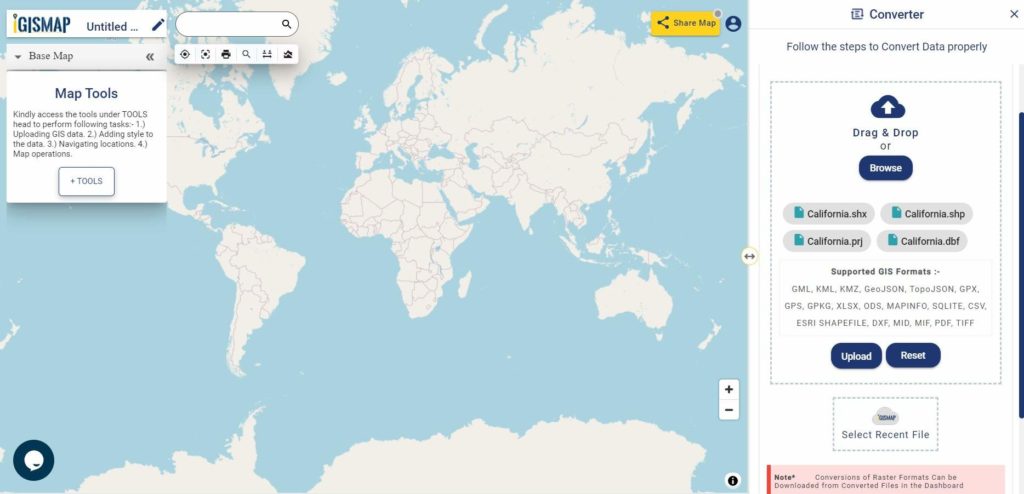
Convert SHP to XLSX using MapOG Tool for hassle free conversion

KNOW ABOUT XLSX AND SHAPEFILE format -BEFORE CONVERTING SHP TO XLSX

An XLSX file is an Excel spreadsheet created by Microsoft Excel or another spreadsheet program. It stores data in worksheets, which contain cells arranged in a grid of rows and columns, and may also contain charts, mathematical functions, styles, and formatting. XLSX files create simple or complex mathematical models.

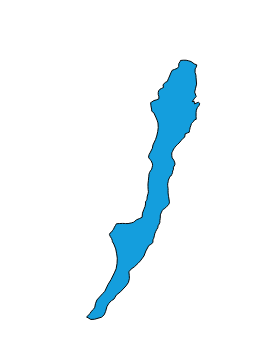
What is shapefile? Each object within a SHP file contains an individual geographic feature and its attributes.

Conversion from shapefile to XLSX using ogr2ogr utility-

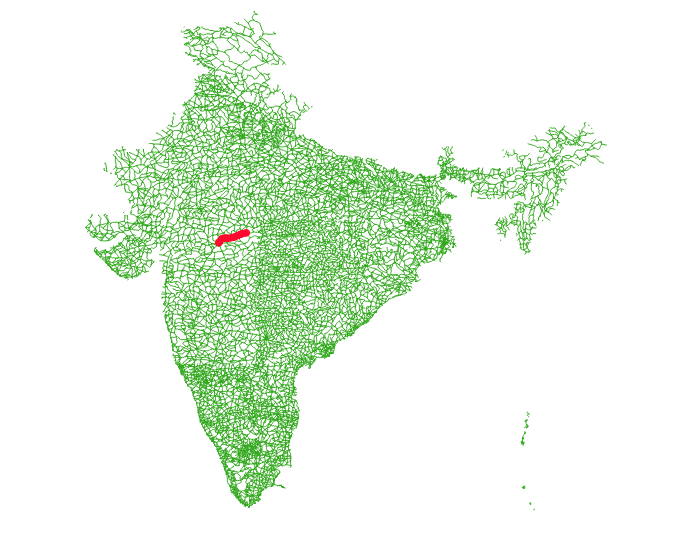
–> ogr2ogr -f XLSX output_xlsx_filename.xlsx India_raods.shp

In command -f is file format and XLSX is driver. Then you can specify the output file name with .xlsx extension and input shapefile. This command can be executed on terminal or using PHP code. Here you must look for the ogr2ogr utility in your system. If not available you can install it using given line of code.

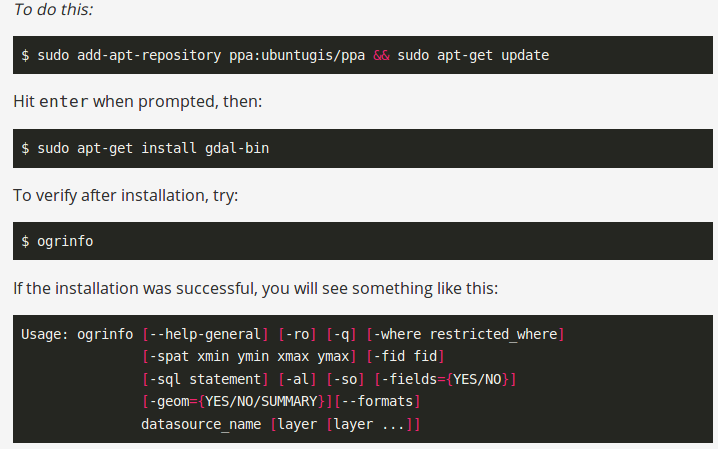
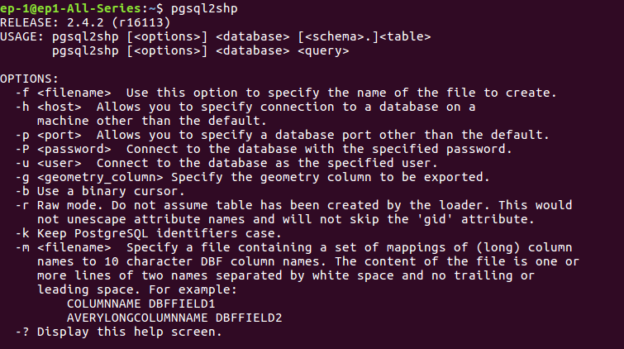
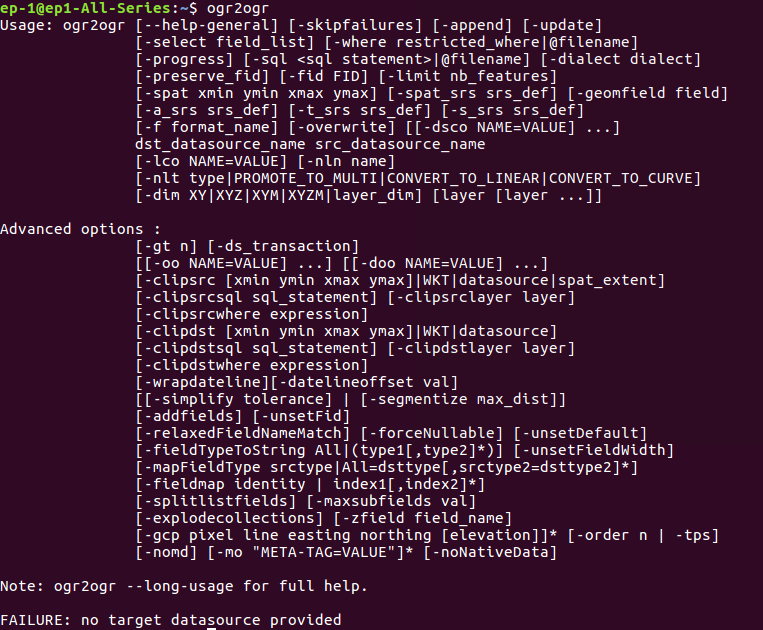
Then you can check the presence of utility by typing ogr2ogr in terminal. The output will look like-

SHP to XLSX

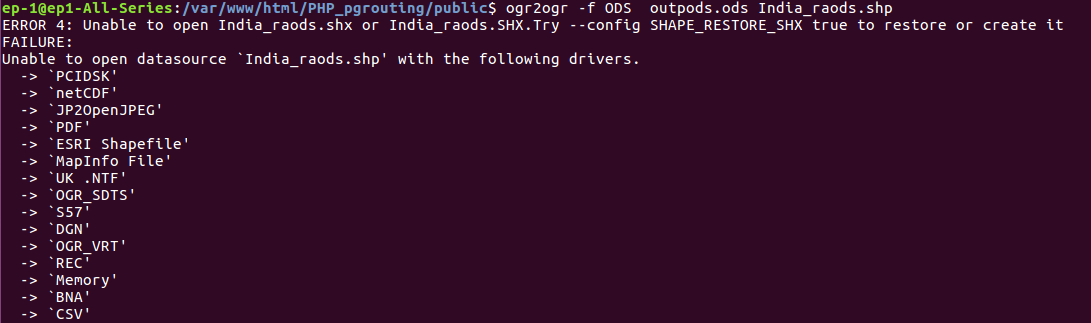
Note that while converting shapefile to XLSX, you must check for .shx file. If shx file is not available you may get following error.

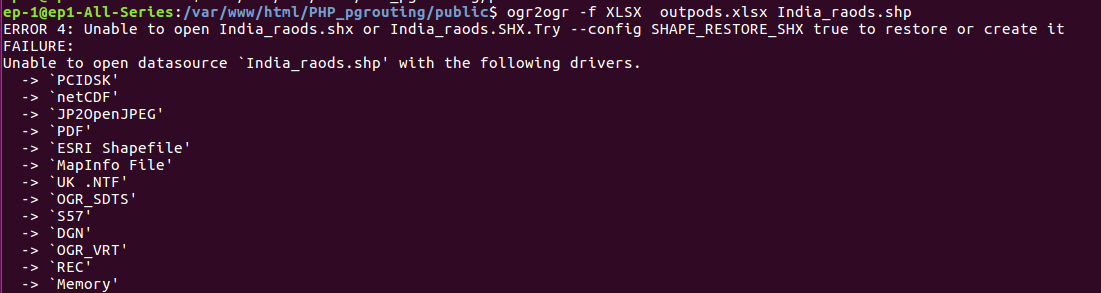
Shapefile has some supporting file like .dbf, .shx, .prj etc. So you must take all file whenever you perform conversion.

PHP CODE – SHP to XLSX

If you are aware of Shapefile Open description format, then you can easily access shapefile data through coding. As i have created one such shapefile minimum bounding box parser in c++. Below in the php code to execute ogr2ogr tool.

Here you can perform the conversion using shell_exec() method, which actually executes the command and returns string as output.

public function shptoxlsx($shpfilepath,$output) {
$query=”ogr2ogr -f XLSX $output.xlsx $shpfilepath.shp”;
shell_exec($query);
}

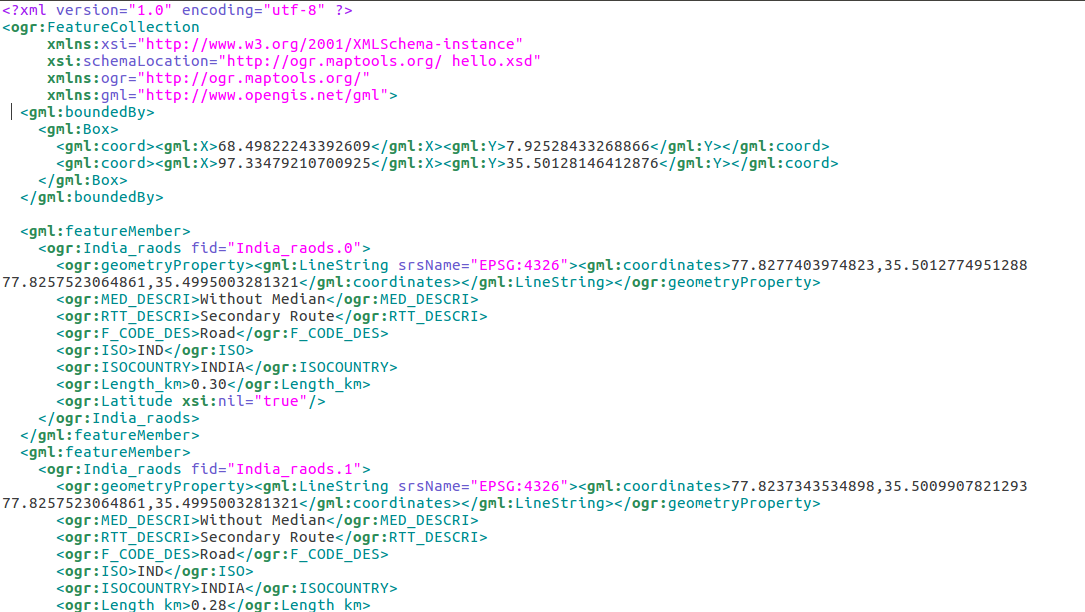
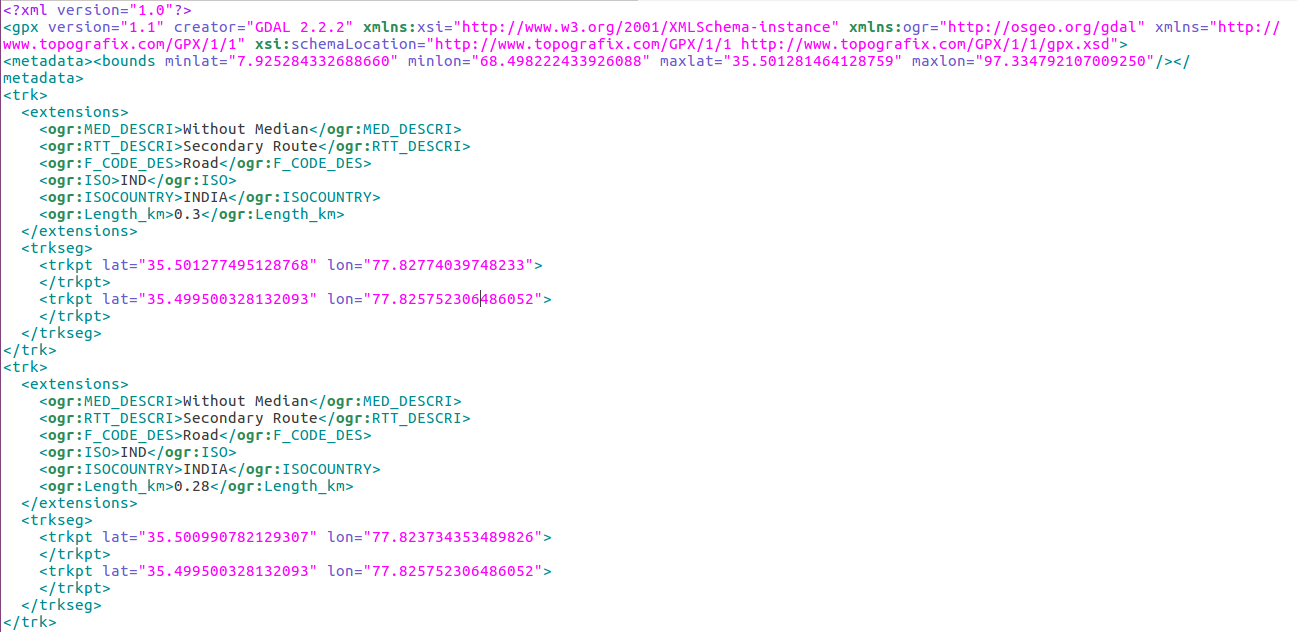
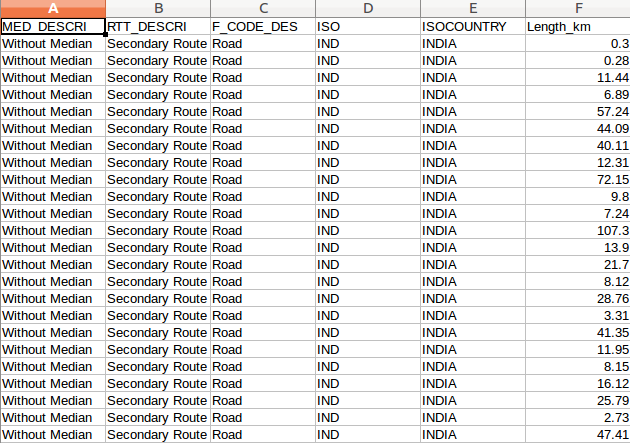
After execution of command you can check the specified folder to see generated xlsx file. The content of file will be something like-

You may also look forward to convert shapefile to GeoJSON, Shapefile to Kml, Shapefile to topojson and etc conversions.

Hope you enjoyed the article and successfully converted shape file into XLSX file. If you have any problem regarding conversion please feel free to write in comment box.

Shp to ODS – Convert Shapefile to Open Document Spreadsheet

Shape file to ODS (Open Document Spreadsheet) conversion is required when you only need non spatial information i.e. only attribute information. This conversion need ogr2ogr utility. Or you may also you any other tool to convert shp to ods easily.

Convert SHP to ODS using MapOG Tool for hassle free conversion

What is ODS (Open Document Spreadsheet) and Shapefile-Shp to ODS CONVERT

An ODS (Open Document Spreadsheet) file is a spreadsheet. It stores data in cells that are organized into rows and columns. ODS files are formatted using the OASIS Open Document XML-based standard. Whereas shape files are collection of geometry with non spatial data as attributes.

To install ogr2ogr utility you can follow the given lines of command.

Then check for presence of ogr2ogr utility by typing ogr2ogr in your terminal.

Conversion- Shapefile shp to ODS (Open Document  Spreadsheet) using Ogr2ogr utility-

Now the conversion command can be executed,

–> ogr2ogr -f ODS output_ods_fileName.ods  India_raods.shp

Here, in the command -f is the option for file format.

Note that while converting shx file should be present in same folder where shp file is kept. Otherwise you will get error like-

All the supported file (.shx, .prj and .dbf etc.) should be kept together while performing any conversion.

Code- Convert shp to ods

You can use any programming language to convert between shapefile to ods, if you know the format of shapefile and ods file. I have created one such minimum example of code to find the minimum bounding box of shapefile with c++ programming lanauage. Below is the php code.

public function shptoods($shpfilepath,$output) {
$query=”ogr2ogr -f ODS $output.ods $shpfilepath.shp”;
shell_exec($query);
}

The generated output can be seen in the same folder, where shapefile is kept. Output will look as-

Shapefile Shp to ODS- OpenDocument Spreadsheet

You may also be interested in knowing how to convert shapefile to kml, shp to gml, shapefile to csv, shapefile to geojson, shapefile to topojson etc.

Hope this post is helpful for you to convert shp to ods document. If you find any difficulty in implementing the conversion of shapefile to open document spreadsheet, let you know by commenting below in the box provided.

SHP to GML – Convert Shapefile to Geography Markup Language

Shape file shp to GML conversion is required when you carry data from one place to another. Shapefiles are heavy as compared with GML (Geography Markup Language). On the other hand we can say that GML makes you able to do many of the same things that you would do with heavyweight desktop GIS files.

For a more in-depth guide on this topic, be sure to check out our accompanying video tutorial, where we walk you through each step visually and provide practical demonstrations.

Convert SHP to KML using MapOG Tool Converter

GML (Geography Markup Language) is about describing kinds of geographic objects. This is XML based language that contain two part- the schema that describes the document and the instance document that contains the actual data. GML schema allows users and developers to describe generic geographic data sets that contain points, lines and polygons. Using this schema user can differentiate between geometry primitives.

GMl format composed of geometry property and attribute detail in feature member tag. Here geometry defines which primitive is available in data. Whether it is point, line or polygon. These can be multilinestring or multipolygon. The given line of GMl defines the lineString, contains attributes as MED_DESCRI, RTT_DESCRI, F_CODE_DES, ISO and ISO_country in ogr tag. The srsName(Spatial reference system name) is given is file for each geometry as EPSG number.

LineString as Example of GML file Describing feature – Know Before performing shp to gml convert

<gml:featureMember>
 <ogr:India_raods fid="India_raods.0">
 <ogr:geometryProperty><gml:LineString srsName="EPSG:4326"><gml:coordinates>77.8277403974823,35.5012774951288 77.8257523064861,35.4995003281321</gml:coordinates></gml:LineString></ogr:geometryProperty>
 <ogr:MED_DESCRI>Without Median</ogr:MED_DESCRI>
 <ogr:RTT_DESCRI>Secondary Route</ogr:RTT_DESCRI>
 <ogr:F_CODE_DES>Road</ogr:F_CODE_DES>
 <ogr:ISO>IND</ogr:ISO>
 <ogr:ISOCOUNTRY>INDIA</ogr:ISOCOUNTRY>
 <ogr:Length_km>0.30</ogr:Length_km>
 </ogr:India_raods>
 </gml:featureMember>

This also contains the bounding box of whole data with four corner latitude longitude.

<gml:boundedBy>
 <gml:Box>
 <gml:coord><gml:X>68.49822243392609</gml:X><gml:Y>7.92528433268866</gml:Y></gml:coord>
 <gml:coord><gml:X>97.33479210700925</gml:X><gml:Y>35.50128146412876</gml:Y></gml:coord>
 </gml:Box>
 </gml:boundedBy>

Convert shapefile Shp to GML (Geography Markup Language) using Ogr2Ogr –

For converting shapefile in GML format you need to have ogr2ogr utility in your system. If this is not available you can follow the given procedure.

Convert Shapefile shp to GML – Geography Markup Language

After installing, you can check the availability of ogr2ogr in terminal by typing ogr2ogr, then you will be able to see the following result.

Command Line conversion – shp to gml-

Now, to convert Shapefile to GML you need to execute the following command-

In this command -f is the output file format i.e. GML then specify the output file name with .gml extension and after that input shapefile name with .shp extension.
Note- while executing this command you must check for .shx file, which contains the positional index for geometry objects.

Code- Convert shp to GML

If you want the conversion using programing or don’t want to use terminal then this can also be done using PHP. You can create a function that defined this command as string and can give this string in shell_exec() method to execute. Shell_exec() actually execute the command and returns output as string.

public function shptogml($shpfilepath,$output){
$query=”ogr2ogr -f GML $output.gml $shpfilepath”;
print_r($query);
shell_exec($query);
}

The GML output file will be something like this-

Change coordinate system of GML file from shp-

Many of times, we need the output file in other coordinate system. For this we can use options of ogr2ogr utility. It has

-t_srs srs_def:

Reproject/transform to this SRS on output

-s_srs srs_def:

Override source SRS

So using these option, we can get the data in required coordinate system. So for this you can write the query as-

–> ogr2ogr -f GML -t_srs EPSG:32643 (new EPSG) -s_srs EPSG:4326 (old EPSG) newGmlFile.gml InputFile.shp

You also can visit Shapefile to GeoJSON, Shapefile to KML, Shapefile to TopoJSON, Shapfile to geopackage etc.

If you face any problem during implementing this tutorial, please let us know. Feel free to comment in given comment box.

SHP to GPX / GPS – Convert Shapefile to Global Positioning System

Shapefile shp can be converted into GPS ( Global Positioning System) using ogr2ogr utility. The GPS data is best option when routes and tracks are required in XML format. Here we will check how to convert shapefile shp to GPX / GPS.

Convert Shp to GPX – Using IGIS Map Tool

Go to MapOG Conversion Tool . Login with registered id and password or if you are new then register with valid email id. Then tap on Switch To button select conversion in the drop down list.

Upload your file from system or drive or from drop box. After uploading the file choose the output format. And in the last click on Convert File button. You will be directed to the map where converted file is published.

Download the converted SHP to GPX file from the download icon. For detailed conversion watch the video provided below.

Details for GPX/GPS (GPS Exchange Format) and Shapefile Format Before Converting Shapefile to GPX GPS data-

GPX (GPS Exchange Format) is a light-weight XML data format for the interchange of GPS data (waypoints, routes, and tracks) between applications and Web services on the Internet. Shapefile is collection of geometry with attributes mainly comprised of three files .shp for which stores geometry, .shx which stores index and .dbf which stores data of respective attributes.

The example is given below for linestring feature of gpx version. Here metadata contains the bounding box with min (lat,long) and max (lat, long). The tag trk defines the tracks, which contains extension tag, trkseg tag and trkpt tag. Here extension tag contains all the attributes in ogr tag with values. Trkseg tag is the track segment, which is composed of track points with latitude longitude.

<gpx version=”1.1″ creator=”GDAL 2.2.2″ xmlns:xsi=”http://www.w3.org/2001/XMLSchema-instance” xmlns:ogr=”http://osgeo.org/gdal” xmlns=”http://www.topografix.com/GPX/1/1″ xsi:schemaLocation=”http://www.topografix.com/GPX/1/1 http://www.topografix.com/GPX/1/1/gpx.xsd”>
<metadata><bounds minlat=”7.925284332688660″ minlon=”68.498222433926088″ maxlat=”35.501281464128759″ maxlon=”97.334792107009250″/></metadata>
<trk>
<extensions>
<ogr:MED_DESCRI>Without Median</ogr:MED_DESCRI>
<ogr:RTT_DESCRI>Secondary Route</ogr:RTT_DESCRI>
<ogr:F_CODE_DES>Road</ogr:F_CODE_DES>
<ogr:ISO>IND</ogr:ISO>
<ogr:ISOCOUNTRY>INDIA</ogr:ISOCOUNTRY>
<ogr:Length_km>0.3</ogr:Length_km>
</extensions>
<trkseg>
<trkpt lat=”35.501277495128768″ lon=”77.82774039748233″>
</trkpt>
<trkpt lat=”35.499500328132093″ lon=”77.825752306486052″>
</trkpt>
</trkseg>
</trk>

Convert- Shapefile shp to GPX / GPS- Global Positioning System

Convert shp to GPX /GPS using ogr2ogr utility-

Ogr2ogr utility has some options some of them are give below,

-dsco NAME=VALUE:

Dataset creation option (format specific)

-nlt type:

Define the geometry type for the created layer. One of NONE, GEOMETRY, POINT, LINESTRING, POLYGON, GEOMETRYCOLLECTION, MULTIPOINT, MULTIPOLYGON or MULTILINESTRING.

-f option:

format_name

GPX_USE_EXTENSIONS:

By default, the GPX driver will discard attribute fields that do not match the GPX XML definition (name, cmt, etc.).

If GPX_USE_EXTENSIONS=YES is specified, extra fields will be written inside the <extensions> tag.

–> ogr2ogr -f “GPX” -dsco GPX_USE_EXTENSIONS=YES output_gpx.gpx India_raods.shp -nlt MULTILINESTRING

If you don’t have ogr2ogr utility in your system please execute the given commands to install ogr2ogr,

Check the presence of utility by typing ogr2ogr in command prompt-

Code to Convert GPX GPS from Shp

The conversion thing can be done in PHP using shell_exec() method, given below-

public function shptogpx ($shpfilepath,$output,$type) {
$query=”ogr2ogr -f GPX -dsco GPX_USE_EXTENSIONS=YES $output.gps $shpfilepath.shp -nlt $type”;
shell_exec($query);
}

Change coordinate system of GPS/GPX file-

Changing coordinate system using ogr2ogr is a one of the simple task. It has various option, here two are given, which will help to convert the coordinate system into desired one.

-t_srs srs_def:

Reproject/transform to this SRS on output

-s_srs srs_def:

Override source SRS

So using these option, we can get the data in required coordinate system. So for this you can write the query as-

–> ogr2ogr -f GPX -t_srs EPSG:32643 (new EPSG) -s_srs EPSG:4326 (old EPSG) -dsco GPX_USE_EXTENSIONS=YES newGPX_File.gpx  InputFile.shp -nlt MULTILINESTRING

You also can visit Shapefile to GeoJSON, Shapefile to KML, Shapefile to TopoJSON, Shapfile to geopackage, Shapefile to MapInfoFile etc.

If you find any problem during implementing this tutorial, please let us know. Feel free to comment in given comment box.

Convert Shapefile to GeoPackage – GPKG

GeoPackage is an open, standards-based, platform-independent, portable, self-describing, compact format for transferring geospatial information. Whereas shapefile is collection of geometry with attribute detail. Here in this article, we will check how to convert Shapefile to GeoPackage or GPKG GIS format.

Online Tool To Convert Shapefile to GeoPackage file

The GeoPackage Encoding Standard describes a set of conventions for storing the following within an SQLite database:

1. Vector features
2. Tile matrix sets of imagery and raster maps at various scales
3. Attributes (non-spatial data)
4. Extension

Convert Shapefile to GeoPackage – GPKG

You can open the gpkg (GeoPackage) file in QGIS software and see some of the general properties of gpkg (GeoPackage) file-

1. Storage type of this layer
–> GPKG
2. Description of this provider
–> OGR data provider (compiled against GDAL/OGR library version 2.2.2, running against GDAL/OGR library version 2.2.2)
3. Source for this layer
–> /var/www/html/PHP_pgrouting/public/outputllll.gpkg
4. Geometry type of the features in this layer
–> Line
5. The number of features in this layer
–> 19148
6. Capabilities of this layer
–> Add Features, Delete Features, Change Attribute Values, Add Attributes, Delete Attributes, Fast Access to Features at ID, Change Geometries, Presimplify Geometries, Presimplify Geometries with Validity Check
7. Extents
–> In layer spatial reference system units
xMin,yMin 68.4982,7.92528 : xMax,yMax 97.3348,35.5013
8. Layer Spatial Reference System
–> +proj=longlat +datum=WGS84 +no_defs

Convert Shapefile to GeoPackage – GPKG  using OGR2OGR-

The command has some options, which can be seen by typing ogr2ogr in terminal. If this gives you error that means you don’t have ogr2ogr utility in your system. To install that you can follow the statements given below-

If Ogr2ogr utility is available, you will see the following result.

The command is given as-

–> ogr2ogr -f GPKG outp_gpkg.gpkg India_raods.shp

The command contains Utility name, option for file format, name for format, output file with .gpkg extension and input shape file.

To install ogr2ogr utility-

Convert Shapefile to GeoPackage – GPKG

To check  if ogr2ogr utility is working properly or not-

Online Tool To Convert Shapefile to GeoPackage file

PHP Code to Convert Shapefile to GeoPackage – GPKG-

Using shell_exec() method, you can run the command in PHP. This return output as string.

public function shptogpkg($shpfilepath,$output) {
$query=”ogr2ogr -f GPKG $output.gpkg $shpfilepath.shp”;
shell_exec($query);
}

The output file can be open in QGIS software. I have converted Road File of one such country. Here is the output look in QGIS tool after Converting Shapefile to GeoPackage.

Change Coordinate system of Output-

Many of times, we need the output file in other coordinate system. For this we can use options of ogr2ogr utility. It has

-a_srs srs_def:

Assign an output SRS

-t_srs srs_def:

Reproject/transform to this SRS on output

-s_srs srs_def:

Override source SRS

So using these option we can get the data in required coordinate system. So for this you can write the query as-

—> ogr2ogr -f GPKG -s_srs EPSG:4326 -t_srs EPSG:32643 Output_file_name.gpkg Input_file_name.shp

Here define old EPSG (European Petroleum Survey Group) in -s_srs option and new in -t_srs option.

You may also Check Shapefile to GeoJSON, Shapefile to KML, Shapefile to TopoJSON, etc conversion.

Let me know if you find any problem in converting Shapefile to GeoPackage file, by commenting below in the box provided.

Earthquake Map – Create EarthQuake Map GIS

An earthquake (also known as a quake, tremor or temblor) is the shaking of the surface of the Earth, resulting from the sudden release of energy in the Earth’s lithosphere that creates seismic waves. Earthquakes can range in size from those that are so weak that they cannot be felt to those violent enough to toss people around and destroy whole cities. The seismic or seismic activity of an area refers to the frequency, type and size of earthquakes experienced over a period of time.

Earthquake is a nature’s most unpredictable and one of her most devastating natural disasters. When high intensity earthquakes strike they can cause thousands of deaths and billions of dollars in damaged property. For decades, experts have studied major earthquakes; most have focused on fatalities and destruction in terms of the primary effects, the shaking unleashed.
At the Earth’s surface, earthquakes manifest themselves by shaking and sometimes displacement of the ground. When the epicenter of a large earthquake is located offshore, the seabed may be displaced sufficiently to cause a tsunami. Earthquakes can also trigger landslides, and occasionally volcanic activity.

Worldwide, at least 133 earthquakes occurred in 2011, during which people died, were injured or lost their homes or which caused immense damage to property.
The intensity value of earthquake is divided in 9 parts as given below

About Demo-

Earthquake information of Padang, Indonesia is shown using raster Geo-tiff file. Padang is the capital of the province of West Sumatra in Indonesia. The intensity of earthquake on map can be represent by color variation from dark to light shade. Here dark shade shows high shocks and light color medium and low shocks. These intensity value can be extract from layer using Grey band information.

Data Preparation:

This demo shows the raster overlay on map with the help of Leaflet JavaScript library. Here raster data is in Geo Tiff format and is published on Geo server. For this demo we have downloaded data from http://geonode.inasafe.org/layers/geonode:padang_eq_2009_wgs84 website. It is a raster data containing single Grey band. In this demo we render raster data on map and shown the value of earthquake intensity using pop-up on marker.

Raster data on GeoServer and styling:

GeoServer is an open source server for sharing geospatial data in both vector and raster format. It is designed to host major data sources, which can easily render on maps.
To Download and install GeoServer please follow the last article. Then login to the GeoServer and publish data on the Geoserver and get the link from layer preview section. You can visit the articles to know how to publish and style the GeoTiff file on Geoserver.

Render Raster on Map:

Before rendering tiles on map, you need to create a division in html that will contain map. You also can set its view by providing center latitude and longitude with zoom level.

var map = L.map(‘map’).setView([-1.03705, 99.64336],8);
var searchLayer ;
L.tileLayer(‘http://{s}.tile.osm.org/{z}/{x}/{y}.png’, {
attribution: ‘&copy; <a href=”http://osm.org/copyright”>OpenStreetMap</a> contributors’
}).addTo(map);

To render this data on map, we need to get the data from GeoServer, which can be done by using leaflet javascript library. In the Leaflet library we have Leaflet-WMS plugin.
What is WMS service: WMS (web map service), is a way of publishing maps. This format is similar to map tiles. A WMS image is defined by the coordinates.

For styling purpose we have used geoserver styling option, where you can style your data according to your attributes or bands etc.

NamedLayer – name of the layer.

<FeatureTypeStyle>
<Rule>
<Name> RUle style </Name>
<Title>Opaque Raster</Title>
<Abstract>A raster with 100% opacity</Abstract>
<RasterSymbolizer>
<Opacity>1.0</Opacity>
<ChannelSelection>
<GrayChannel>
<SourceChannelName>1</SourceChannelName>
</GrayChannel>
</ChannelSelection>
<ColorMap extended=”true”>
<ColorMapEntry color=”#00FA08″ quantity=”0″/>
<ColorMapEntry color=”#F6FA00″ quantity=”2″/>
<ColorMapEntry color=”#FA9F00″ quantity=”3″/>
<ColorMapEntry color=”#FA4C00″ quantity=”6″ />
<ColorMapEntry color=”#A21612″ quantity=”9″/>
</ColorMap>
</RasterSymbolizer>
</Rule>
</FeatureTypeStyle>

L.tileLayer.wms:

It provides a simple interface for loading tiles from a WMS service. This facility is given in Leaflet javascript library we just need to add its plugin. Here we also need to provide layer name, format of layer and make transparent as true.

var raster = L.tileLayer.wms(‘http://139.59.42.235:8080/geoserver/portfolio/wms?’, {
layers: ‘padang_eq_2009_wgs84’,
format: ‘image/png’,
transparent: true
}).addTo(map);

Intensity of earthquake is denoted by color ramp. To know the value of earthquake intensity at particular location, we can place the marker and can read the popup. Delete button is given to delete all markers.

function showGetFeatureInfo(latlng, layer){
var prop = layer.features[0].properties;
var mark=L.marker([latlng.lat,latlng.lng]).addTo(map);
var gray=prop[‘GRAY_INDEX’];
mark.bindPopup(“Earthquake Value: “+gray.toString());
}

Convert Shapefile to CSV

Sometimes shapefile becomes bulky to carry from one place to another. As it contains various files as .shp, .prj, .shx, .dbf etc. On the other side CSV contains every detail in one file. So CSV can be considered as a good option when you don’t need to render data on map as polygon or polyline or point. There are various options to create CSV from a shapefile either offline or online.

CSV is comma separated value file which is one of the alternative method for storing spatial data in spreadsheet format. You can also upload the Excel file and convert it into spatial data via QGIS tool. There are also other online tools available which can directly convert the Shapefile to CSV. We will show you how easy and useful is IGISMAP for the conversion process. Following are the methods to convert Shapefile to CSV using IGISMAP Converter tool.

IGISMAP (now MAPOG) to Convert Shapefile to CSV

Go to MapOG Converter Tool Shapefile to CSV, after logging in with your registered email and password. If you are a new user, click the Sign Up button in the Login popup and register to IGISMAP by filling the details.

There are three main steps for using GIS Converter:

  • Upload the data
  • Choose the format to which it should be converted
  • Download the converted file.

Step one is to upload your Shapefile which you want to convert. You can upload the file from your system or select from the Recent Files.

Upload Shapefile

Here we using the KML file of California state boundary.

Step two is to select choose the output format of the converted file, in this case its CSV. You can also set the Coordinate Reference System of your preference. As a default CRS will set to WGS 84 (World) [EPSG:4326]. Click on the Convert File button.

Select CSV as Output Format

Your Shapefile will then get converted to CSV file after a few seconds and will be published in the map canvas. You can download the CSV file of California state boundary by clicking the Download Converted File button.

Download and Publish CSV File

The output CSV file is generated with location information represented in WKT format under the field named ‘WKT’.

You can also choose to style the layer or continue with further conversion process by clicking the Convert Another File button.

Shapefile to CSV conversion – OFF-Line (command line) Tool

For using off-line command in your system you need to install ogr2ogr. There is very simple command to convert shapefile to csv file if you dont want to install a bulky GIS tool like QGIS or ArcGIS.

I am giving a way to install GDAL on ubuntu, while the process is almost similar to install the GDAL tool in Windows, Mac or other Linux system.

For installing GDAL for Ubuntu please follow the given commands.

Shapefile to CSV conversion

After installing you can check the availability of ogr2ogr by typing ogr2ogr on terminal.

After that you can follow the command to convert the shapefile to csv (comma separated value format file)

–> ogr2ogr -f CSV output_file_name.csv input_shp_name.shp -lco GEOMETRY=AS_WKT

The same work can be done in code-igniter or using PHP. For that you need to execute this command in shell_exec() method, which takes the command in string format and returns the output in string.

–>  $shpToCSV=”ogr2ogr -f CSV $out.csv $shp.shp -lco GEOMETRY=AS_WKT”;
–>  shell_exec($shpToCSV);

These statements are written in PHP. $ signifies the variable. Here input and output is taken from user and command is written in double quotes to convert in string. Then it is given to shell_exec() method.

Shapefile to CSV conversion – With QGIS Open source Software

If you don’t need to install any library or run online tools as you already have installed GIS software. You can convert shapefile in CSV using GIS software also. You just need to open the shapefile as vector layer and save it as CSV. For adding the vector layer tyou need to go to Layer->add vector layer and browse the shapefile. After the right click on shapefile title and save it as csv. you can also save some selected part.

You may also look on other Conversion of Files like Shapefile to KML or Shapefile to GeoJSON or GeoJSON to TopoJSON etc.

In this way you can convert shapefile in CSV format. Hope you find tutorial of shapefile to CSV conversion is helpful for you. If you find any problem in converting GIS data in CSV format, do comment below with the problem statement. Also if you know any other tool for converting shapefile, do provide your suggestion in the provided box below.

Split Sub Divide polygon layer using QGIS – Shapefile, kml, GeoJson

Sub divide or split polygon in multiple parts. QGIS is a special spatial tool, which easily operate with GIS data files such as shapefile, kml or geojson. You might find many cases, where you need to split up polygon or diivde polygon in different parts. For instance, lets suppose we have  administrative boundary shapefile of US and have an image file of sub administrative part, and we need an output shapefile of sub administrative part. For making this possible we need to divide or split up the polygon with the tool.  Here in this article, we are splitting up the existing polygon shapefile data file.

You can also try Online Split Tool To split the polygon in equal parts with MAPOG

Pre Requisite for Split Sub Divide polygon layer using QGIS

I will use digitizing tool plug-in to split the polygon into multiple polygons. I have already written about digitize in QGIS, but to be specific to split of polygon this article would demonstrate you in more detail. Following are the pre requirement to perform split operation:

1.) QGIS Software as tool

2.) Polygon Shapefile as Data

3.) Installed plugin Digitizing tools : This plug-in can be install by navigate yourself to plug-in tab->Manage and install plug-in->Digitizing Tool->install.

Split Sub Divide polygon layer using QGIS : Steps

For example we need to subdivide the below polygon in two different polygons:

Split or Sub Divide polygon layer using QGIS

To achieve our target we need to implement following steps:

1. Add your polygon shape file to canvas.

2. For spliting up polygon we first need to convert polygon shapefile to polyline shapefile. To convert polygon to polyline, QGIS provides a direct way to do the same. Just select Vector tab from the menu, and navigate to Geometry tools options and Select Polygon to line, as shown in figure:

Select the polygon layer and run this tool. the output layer will be line Shapefile as shown below.

3. Now we need to Edit the output line shapefile.  This can be done by enabling editing option. Then draw the line in the way you want to split your polygon data.

Split or Sub Divide polygon layer using QGIS

At the time of adding lines you need to join vertices for proper topology for that you can use the snapping tool.

4. Now line and polygon files are available. Now turn on both layers in canvas and select polygon shape file, then the line. Then enable editing for polygon shapefile you will see the digitizing tools in toolbar.

Split or Sub Divide polygon layer using QGIS

After that select “Split selected feature with selected line from another layer” tool. Note that the polygon and line both should be selected to run this tool.

5. Repeat this step to make more divisions. The output file would be as shown below

Split or Sub Divide polygon layer using QGIS

7. Now correct attribute table as all the split polygons will have same entries in attribute table.

In this way you can split the polygon into multiple polygon entity. If you find any problem in Split Sub Divide polygon – Shapefile, kml, GeoJson data, then do comment below with the problem statement, so that we can look for solution together. Or if you know any other method to split the polygon do let us know by commenting below in the box provided.

Import Shapefile in Postgresql – shp2pgsql

Import Shapefile in Postgresql directly by command line tool. Shapefile is a data vector file, which stores GeoSpatial Data. PostGreSql Database support Spatial or GIS data. As shapefile is just a representation of Geo Data, while postgresql is database which support many GIS functionalities as like finding nearest neighbour, distance calculation from one point to another etc. This makes developer to think for importing the shapefile data in postgresql and view attributes. Similarly you may also check for exporting shapefile from postgresql database.

Prior to import Shapefile in Postgresql, we first need to install postgresql and PostGIS. Also for running a command line tool to import shapefile you should check if shp2pgsql is available in your system and is installed.  What does shp2pgsql command does? shp2pgsql is a command line tool, which helps in to convert or import single or multiple shapefiles into postgresql or postgis database tables.

If you are linux or ubuntu system, you can check the same by running shp2pgsql command in terminal after navigating to “/usr/lib/postgresql” path. If shp2pgsql is not installed, you should first download the same from the authentic website and then try to follow out the steps provided below.

Import Shapefile in Postgresql

For inserting shapefile to postgis, we first need to have one shapefile. If you don’t have any such shapefile, you may download the shapefile for free as suggested in the linked post. For instance to demonstrate import shapefile in postgresql, I have downloaded United state administrative boundary shape file. Now this unzip the folder. You can choose any other shape file which contain atleast this 3 files i.e .dbf , .shp, and .shx.

Creating database and table in postgresql before inserting the shapefile

Creating Database

Now to import shape file you first need to create database and table. Now lets create one database using given command as:

sudo -u postgres createdb -O DATABASE_USER DATABASE_NAME

now test created database is working properly by executing the given command

psql -h localhost -U DATABASE_USER DATABASE_NAME

for the given command output should be

psql (9.6.2)

SSL connection (protocol: TLSv1.2, cipher: ECDHE-RSA-AES256-GCM-SHA384, bits: 256, compression: off)

Create Table

Now create the table, you need to write. The structure of table should be in this format, which should have a geom as Geometry column atleast.

CREATE TABLE TABLE_name(gid integer, code smallint, name varchar(32), shape_leng numeric, shape_area numeric,  geom geometry);

Here is one such sample

CREATE TABLE nybb(gid integer,code smallint, name varchar(32),shape_leng numeric,shape_area numeric,geom geometry)

shp2pgsql command to import shapefile

Now you are ready to add you shapefile. Just navigate yourself to unzipped folder and execute the given command

shp2pgsql -I -s 2263 SHAPEFILE.shp DATATABLE | psql -U DATABASE_USER -d DATABASE_NAME

for example :

shp2pgsql -I -s 2263 nybb.shp nybb | psql -U hello -d gisdata

here 2263 is spatial reference system or coordinate system of the shape file.

Nybb.shp is the shapefile, nybb is the database table name, hello is the database user which is replace byDATABASE_USER and gisdata is the database.

Know the details of shapefile inserted in postgresql or postgis

Lets get connect with postgresql database. Command for the following as shown:

psql -h localhost -U DATABASE_USER DATABASE_NAME

This will navigate you in database you created. Now to know the attributes details of the table you can run following query:

select * from TABLE_NAME

This will show all rows and column in table format. While I have faced few problems while importing shapefile and checking the shapefile table in postgresql. Lets now look over the problem and solution for the same, if you are also facing the same.

Problems and solution encountered in implementing Import shapefile in postgresql

Problem 1 : While running query or fetching shapefile table in postgresql I got the following error:

psql: FATAL: Peer authentication failed for user “postgres”

Solution 1 : For solving this you need to open and edit pg_hba.conf, where you need to replace all peer with md5.

Md5: The password-based authentication methods are md5 and password. These methods operate similarly except for the way that the password is send across the connection, namely MD5-hashed and clear-text respectively.

If you are at all concerned about password “sniffing” attacks then md5 is preferred. Plain password should always be avoided if possible. However, md5 cannot be used with the db_user_namespace feature.

Peer: The peer authentication method works by obtaining the client’s operating system user name from the kernel and using it as the allowed database user name (with optional user name mapping). This method is only support on local connections.

Problem 2: Unable to open nybb.shp or nybb.SHP or nybb.shp: dbf file (.dbf) can not be open.

Solution : You may also face problem as state above.

To solve this, you must take care that you should add shapefile in a zip folder or in the folder where your shapefile is kept.

I hope this post might helped you in easily uploading or import shapefile in postgresql. If you still find any problem in doing so, do comment below with the problem, so that we can discuss and look together over the solution.

Export shapefile from postgreSQL – pgsql2shp – Command line or Php

Is your GIS data stored in postgreSQL Database? Are you looking to export that postgreSQL data in shapefile and further use in different way. It is directly possible with Pgsql2shp command which is directly available with postgreSQL system. In this article you will directly understand the way to export Shapefile from postgreSQL with pgsql2shp tool.

Pgsql2shp (postgis to shapefile dumper) is command that provides shapefile and takes query as input. The geometry column should be present when running the postgis query.
You need to download zip file to run pgsql2shp. You can download pgsql2shp tool from any authentic website for mac, ubuntu or linux system or windows.

Similarly you can import the shapefile in postgresql using the command line tool shp2pgsql. 

Export shapefile from postgreSQL – pgsql2shp

Here we will check pgsql2shp tool that can be used either with command line or with php language. Similarly you may connect to postgresql with server side language and use pgsql2shp.

With Command line – Export shapefile from postgreSQL

After downloading the tool file, navigate from command line to that particular folder. You may type this command to get the help description and options of the tool —

pgsql2shp

The general syntax for the command pgsql2shp is:

pgsql2shp [options] database [schema.]table
pgsql2shp [options] database query

To export a full table from postgis to shapefile:

pgsql2shp  -u <username> -h <hostname> -P <password> -p 5434 -u postgres -f <file path to save shape file> <table_name>

To export a query data from postgis to shapefile

pgsql2shp -f <file path to save shape file> -u <username> -h <hostname> -P <password> <database Name> “query to be executed”

There are many option,which are listed below-
OPTIONS
The command line options are:

-f <filename>
Write the output to a particular filename.

-h <host>
The database host to connect to.

-p <port>
The port to connect to on the database host.

-P <password>
The password to use when connecting to the database.

-u <user>
The username to use when connecting to the database.

-g <geometry column>
In the case of tables with multiple geometry columns, the
geometry column to use when writing the shape file.

-b Use a binary cursor. When used on pre-1.0.0 PostGIS versions
this will reduce the likelihood of coordinate drift due to
conversion to and from WKT format. Coordinate drifts will not
occur with PostGIS 1.0.0 and newer versions. It will be slightly
faster, but might fail if any NON-geometry column lacks a cast
to text.

-r Raw mode. Do not drop the gid field, or escape column names.

-d For backward compatibility: write a 3-dimensional shape file
when dumping from old (pre-1.0.0) postgis databases (the default
is to write a 2-dimensional shape file in that case). Starting
from postgis-1.0.0+, dimensions are fully encoded.

-k Keep identifiers case (don’t uppercase field names).

-m <filename>
Specify a file containing a set of mappings of (long) column
names to 10 character DBF column names. The content of the file
is one or more lines of two names separated by white space and
no trailing or leading space:

-? Display version and usage information.

With programming language – Export shapefile from postgreSQL

We have used codeigniter to execute the query and export the postgis data to shapefile. The scenario is very simple. We have a Road shapefile of a country, where we want to find the distance between two cities or points and render the same on map. For this, we have used pgr_dijkstra() alogrithm and find the shortest path. The shortest path output is collected as shapefile and rerendered on map. There are many ways to render the shortest path, just to understand pgsql2shp we used this one.

Here queries are written in PHP, where $start and $end  are the variable here. We have written query to take starting and ending point for finding shortest path. 

This command is normally executed in terminal as written above, but we can execute it in code shell_exec() method from PHP.

$start = $this->db->query(“SELECT source FROM network1 ORDER BY geom <-> ST_SetSRID(ST_Point ($dlong1,$dlat1),4326) LIMIT 1”)->result();
$end= $this->db->query(“SELECT source FROM network1 ORDER BY geom <-> ST_SetSRID(ST_Point ($dlong2,$dlat2),4326) LIMIT 1″)->result();
$start1= $start[0]->source;
$end1= $end[0]->source;
$query=”‘Select gid as id, source, target, st_length(geom::geography)/1000 as cost from network1′”;

$command= ‘pgsql2shp -f “/var/www/html/PHP_pgrouting/public/shpfolder/try_new.shp” -h localhost -u user -P “pass1” postgres “select seq,id1,id2,cost,geom from pgr_dijkstra(‘.$query.’,’.$start1.’,’.$end1.’,false, false) as di JOIN network1 pt ON (di.id2 = pt.gid)”‘;

echo shell_exec($command);

This will produce a shapefile, where we have rendered the same as you can see in the output.

Export shapefile from postgreSQL – pgsql2shp

I hope this article might have helped you in convert and export shapefile from postgreSQL with pgsql2shp tool. If you find any problem in implementing the steps, let me know via comment, so that we can solve the same.

Exit mobile version
%%footer%%