Download Tunnels Data in Shapefile, KML, MID +15 GIS Formats and Create Map

Need accurate and structured tunnel location data? Download Tunnels Data with ease using GIS Data by MAPOG—a powerful and intuitive platform built to support GIS professionals, urban planners, engineers, and researchers. With support for 15+ popular formats including Shapefile, KML, MID, and GeoJSON, MAPOG makes tunnel data accessible, precise, and compatible with a wide range of GIS tools. Whether you’re analyzing underground infrastructure, transport networks, or safety zones, MAPOG offers reliable tunnel datasets that streamline your mapping and spatial analysis workflows.

How to Download Tunnels Data

GIS Data by MAPOG brings a guided, hassle-free experience to users aiming to Download Tunnels Data. The platform includes 900+ data layers and supports formats like SHP, KML, GeoJSON, MID, CSV, SQL, DXF, MIF, GPX, and TOPOJSON. Its interface is built for both beginners and experts looking for scalable data from global tunnel infrastructures.

Download Tunnels Data of any countries

Note:
  • All data is provided in GCS datum EPSG:4326 WGS84 CRS (Coordinate Reference System).
  • Users need to log in to access and download their preferred data formats.

Step-by-Step Guide to Download Tunnels Data

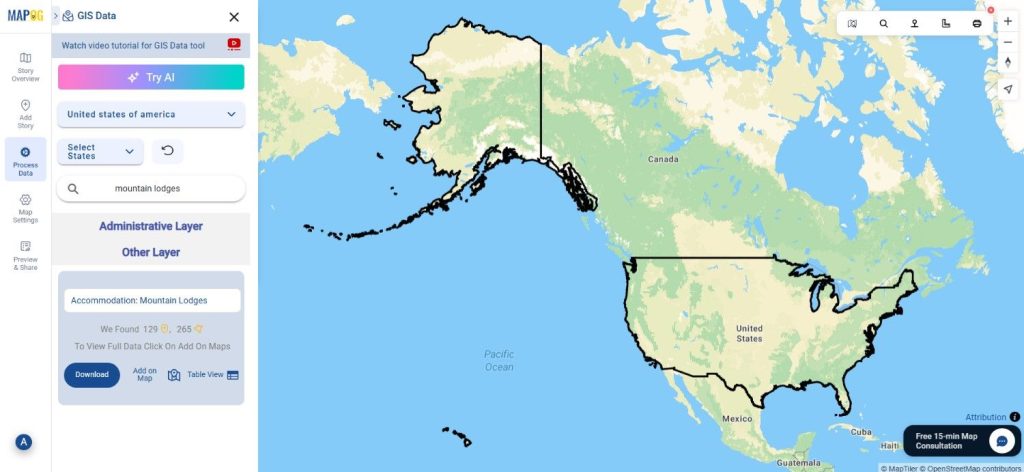
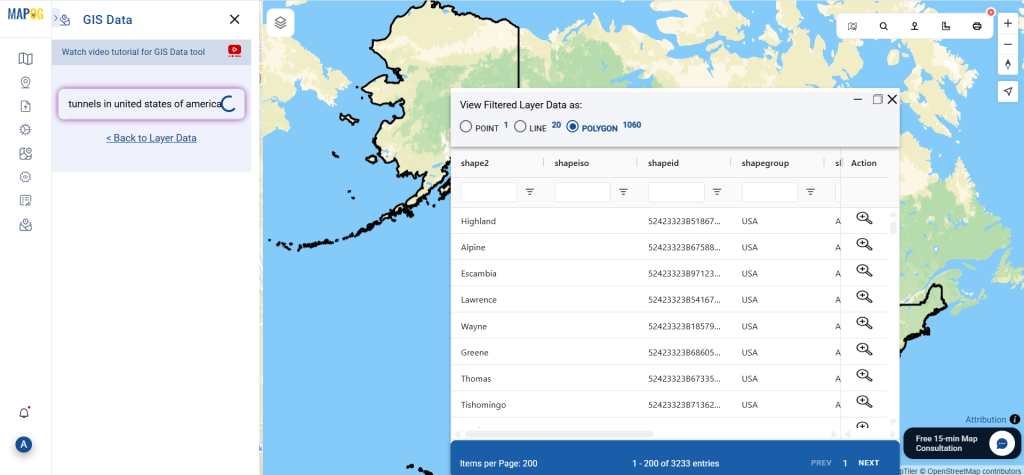
Step 1: Search for Tunnels Data

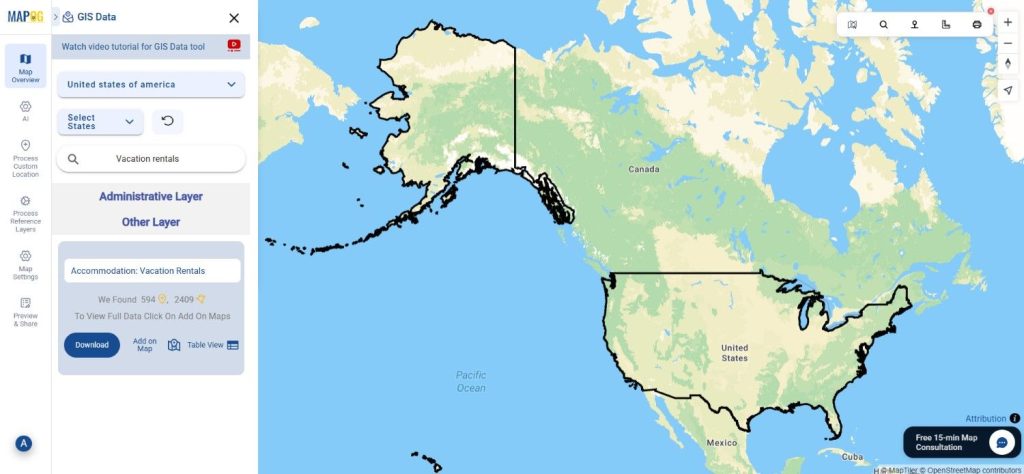
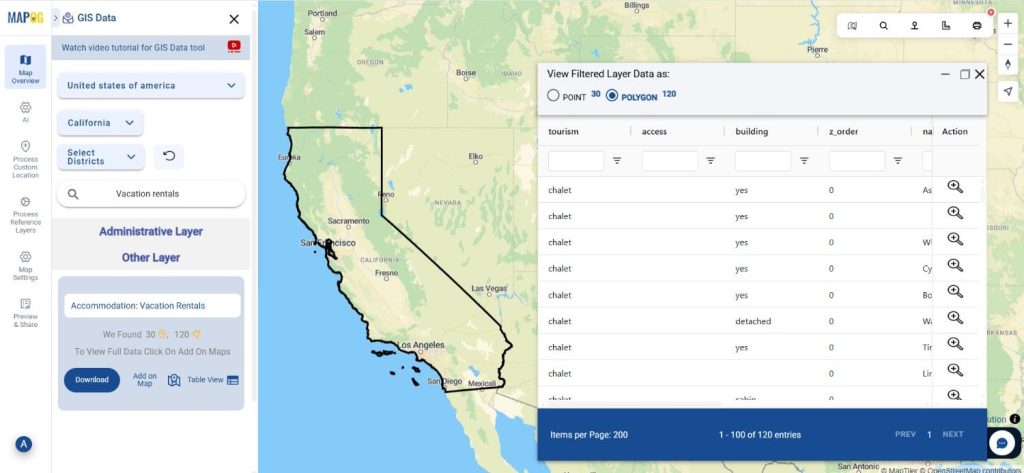
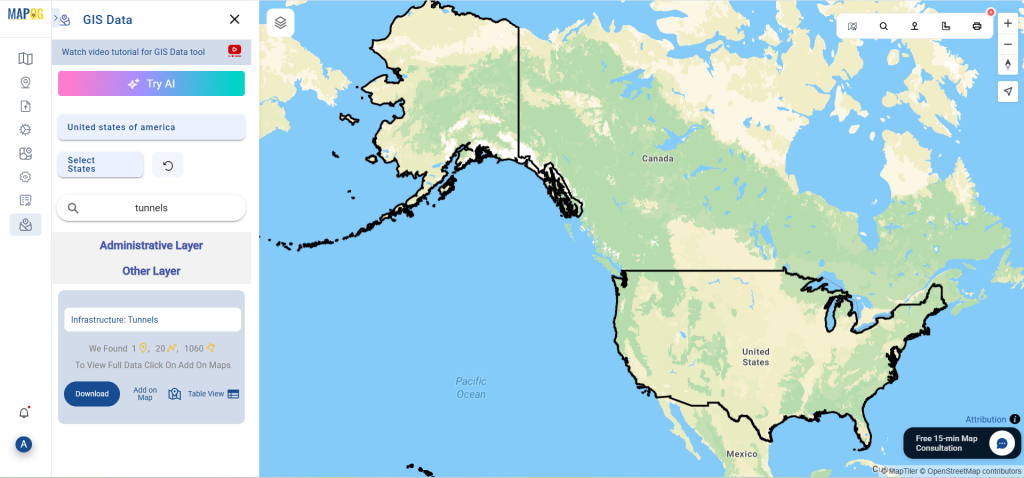
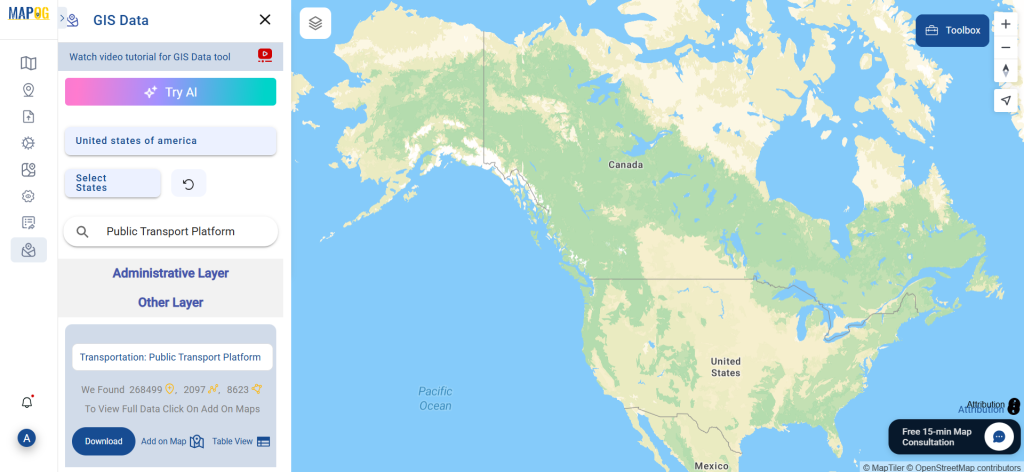
Start by entering “Tunnels” into the MAPOG search bar. You can navigate to the tunnel data layer and review its geometry type—whether it’s represented as lines or polygons. Attributes like tunnel type, length, usage, and status are also typically included.

Download Tunnels Data
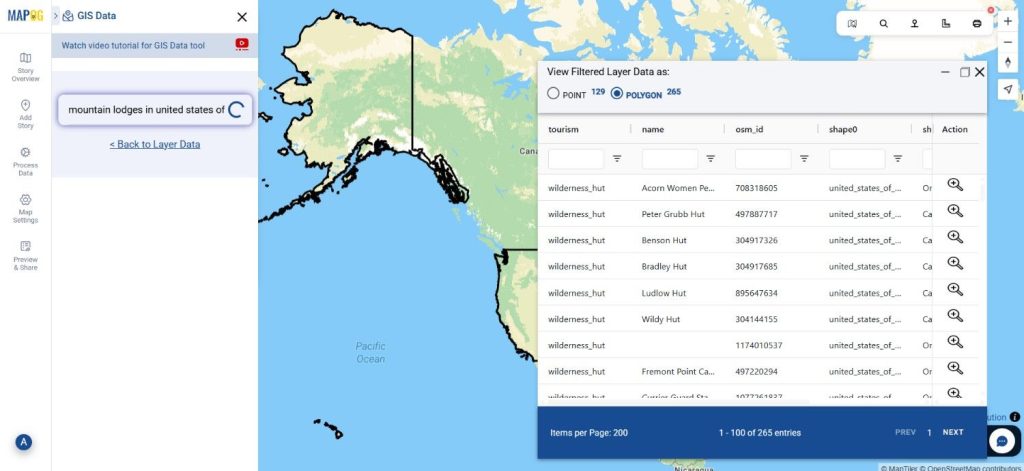
Step 2: Use AI Search Tool

Harness the power of the “Try AI” tool for quicker searches. Just type in something like “Tunnels in industrial zones” and let the AI engine return curated datasets in seconds. It’s an efficient alternative to manual browsing, saving time and improving accuracy.

Download Tunnels Data
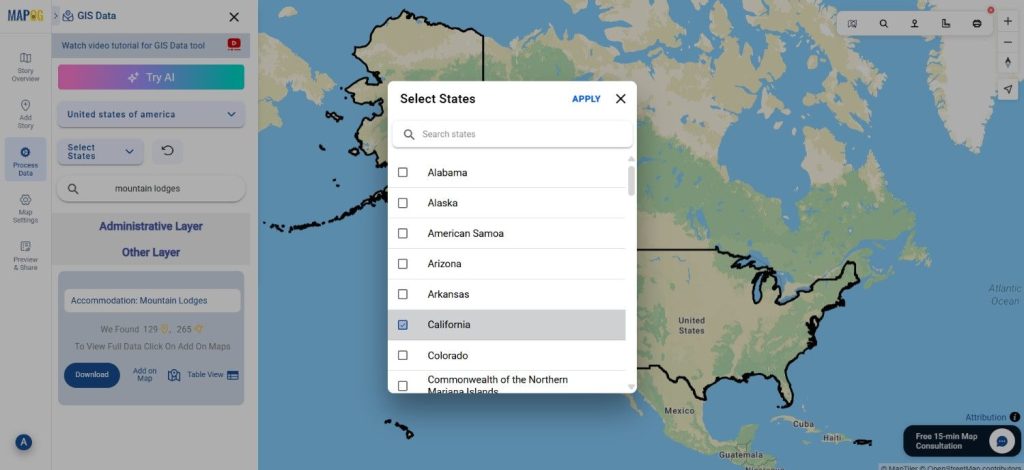
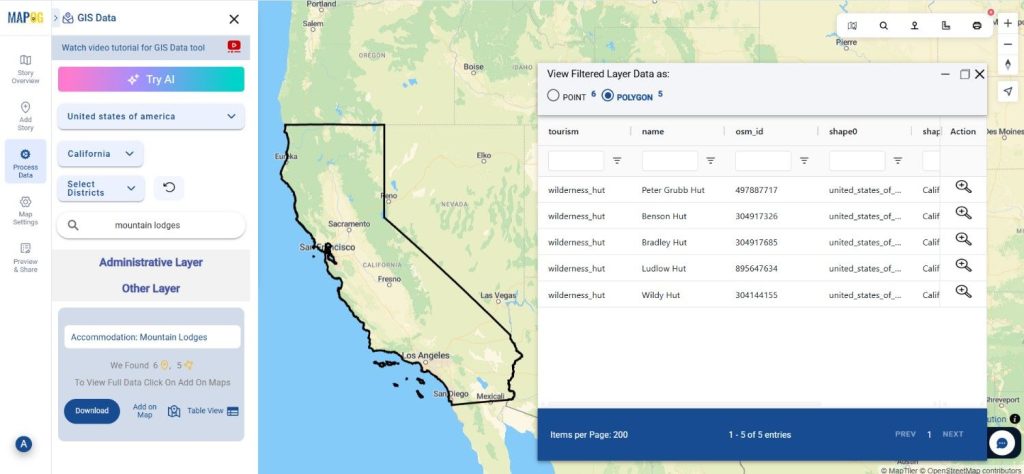
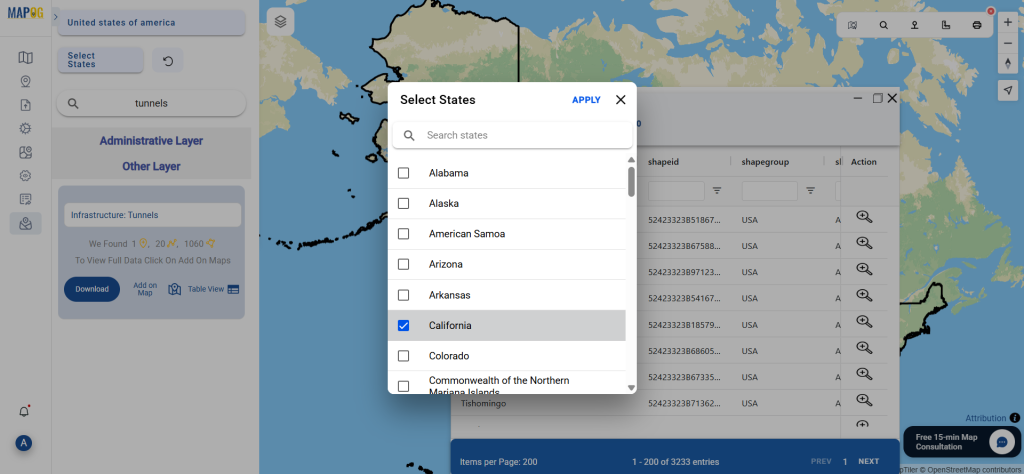
Step 3: Apply Data Filters

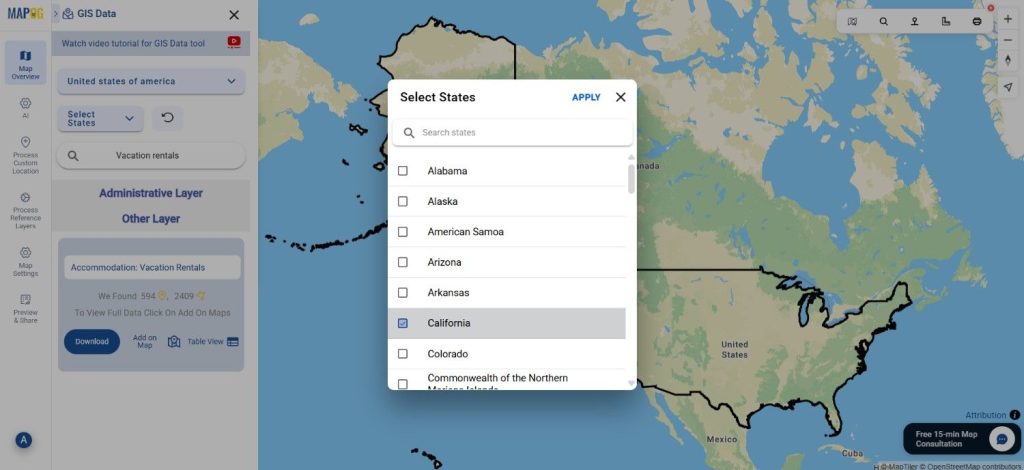
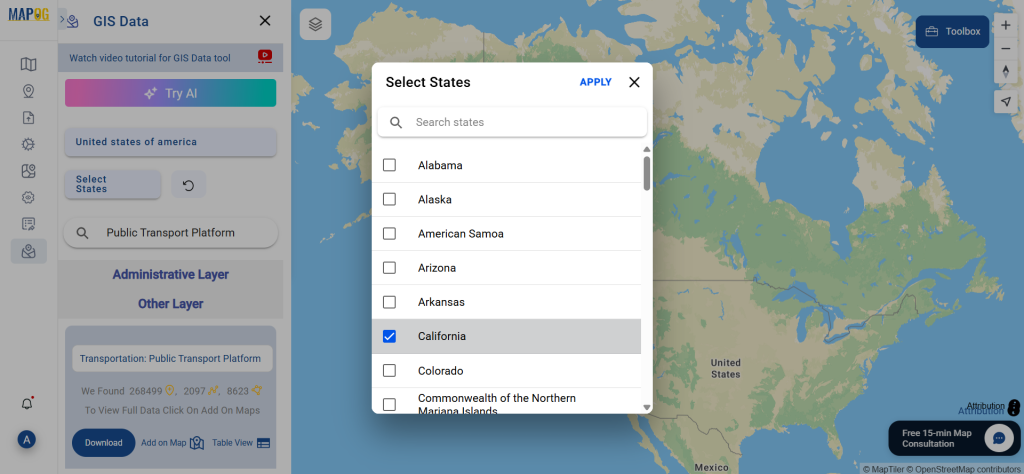
For more specific results, use the “Filter Data” option. Narrow your search by state or district to focus only on tunnel networks in your area of interest. This is especially useful when working with dense infrastructure datasets.

Download Tunnels Data
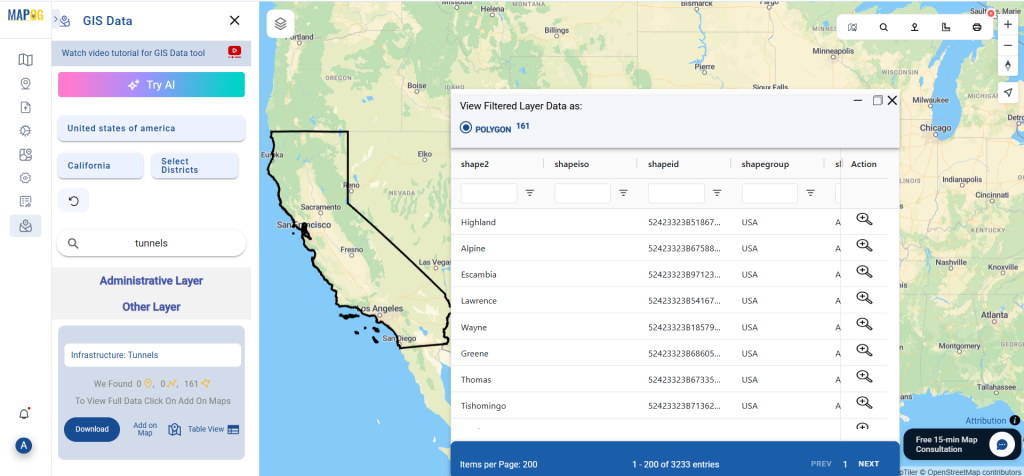
Step 4: Visualize with ‘Add on Map’

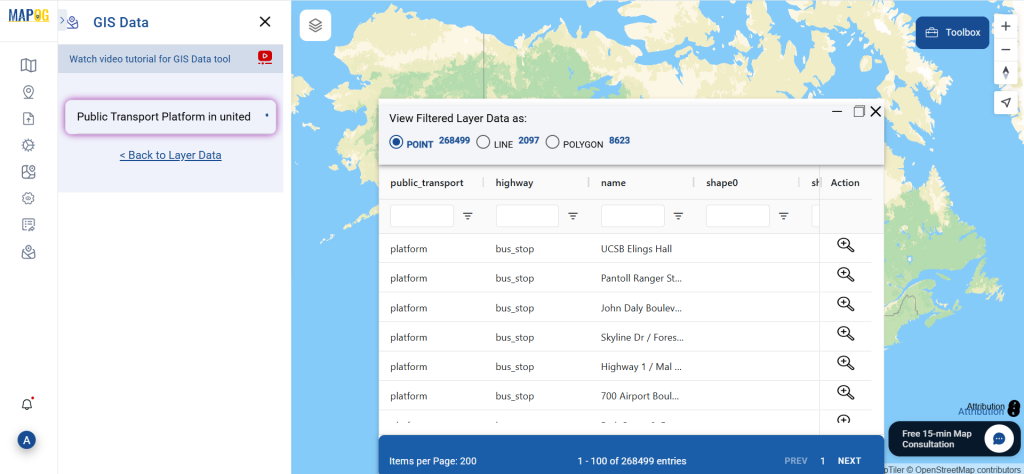
By selecting “Add on Map,” users can directly overlay the tunnel layer on the interactive map viewer. This lets you perform spatial analysis, observe network connectivity, assess proximity to key areas, and prepare detailed visual reports.

Download Tunnels Data
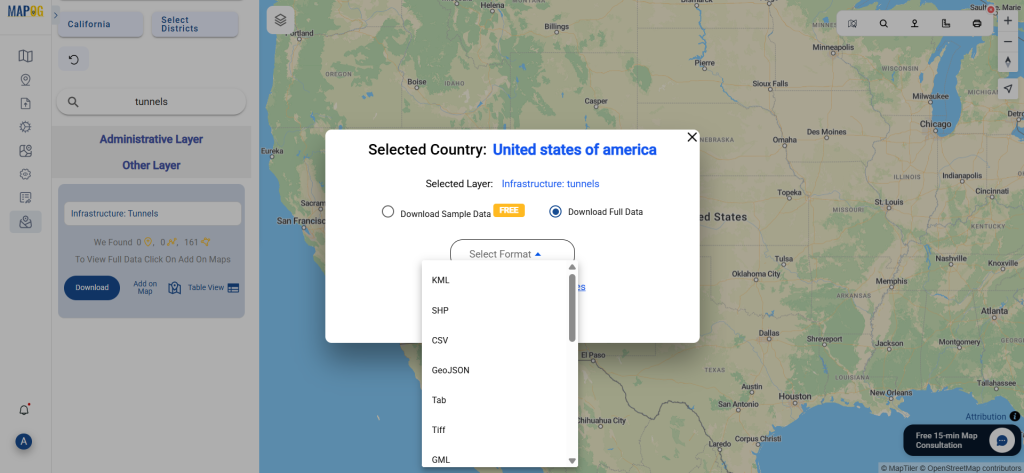
Step 5: Download Tunnels Data

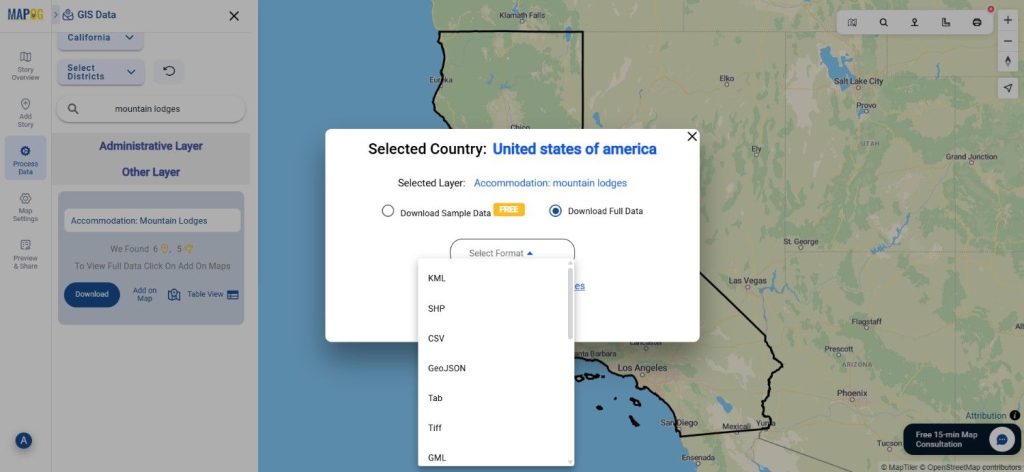
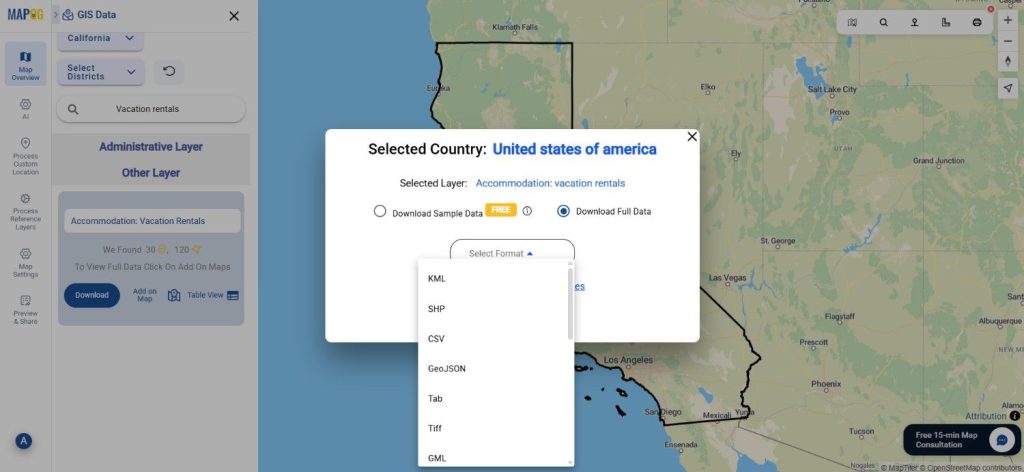
Once your dataset is selected and reviewed, click on “Download Data.” Choose whether you want a sample or full dataset. Select from Shapefile, KML, MID, GeoJSON, or any of the other supported formats, accept the terms, and proceed to download.

Download Tunnels Data

Final Thoughts

With GIS Data by MAPOG, the ability to Download Tunnels Data becomes straightforward, flexible, and reliable. Whether you’re designing infrastructure projects or conducting academic research, this platform equips you with high-quality tunnel data in multiple GIS-ready formats. Explore, filter, visualize, and download—MAPOG simplifies every step of your data journey.

With MAPOG’s versatile toolkit, you can effortlessly upload vector and upload Excel or CSV data, incorporate existing layers, perform polyline splitting, use the converter for various formats, calculate isochrones, and utilize the Export Tool.

For any questions or further assistance, feel free to reach out to us at support@mapog.com. We’re here to help you make the most of your GIS data.

Download Shapefile for the following:

  1. World Countries Shapefile
  2. Australia
  3. Argentina
  4. Austria
  5. Belgium
  6. Brazil
  7. Canada
  8. Denmark
  9. Fiji
  10. Finland
  11. Germany
  12. Greece
  13. India
  14. Indonesia
  15. Ireland
  16. Italy
  17. Japan
  18. Kenya
  19. Lebanon
  20. Madagascar
  21. Malaysia
  22. Mexico
  23. Mongolia
  24. Netherlands
  25. New Zealand
  26. Nigeria
  27. Papua New Guinea
  28. Philippines
  29. Poland
  30. Russia
  31. Singapore
  32. South Africa
  33. South Korea
  34. Spain
  35. Switzerland
  36. Tunisia
  37. United Kingdom Shapefile
  38. United States of America
  39. Vietnam
  40. Croatia
  41. Chile
  42. Norway
  43. Maldives
  44. Bhutan
  45. Colombia
  46. Libya
  47. Comoros
  48. Hungary
  49. Laos
  50. Estonia
  51. Iraq
  52. Portugal
  53. Azerbaijan
  54. Macedonia
  55. Romania
  56. Peru
  57. Marshall Islands
  58. Slovenia
  59. Nauru
  60. Guatemala
  61. El Salvador
  62. Afghanistan
  63. Cyprus
  64. Syria
  65. Slovakia
  66. Luxembourg
  67. Jordan
  68. Armenia
  69. Haiti And Dominican Republic
  70. Malta
  71. Djibouti
  72. East Timor
  73. Micronesia
  74. Morocco
  75. Liberia
  76. Kosovo
  77. Isle Of Man
  78. Paraguay
  79. Tokelau
  80. Palau
  81. Ile De Clipperton
  82. Mauritius
  83. Equatorial Guinea
  84. Tonga
  85. Myanmar
  86. Thailand
  87. New Caledonia
  88. Niger
  89. Nicaragua
  90. Pakistan
  91. Nepal
  92. Seychelles
  93. Democratic Republic of the Congo
  94. China
  95. Kenya
  96. Kyrgyzstan
  97. Bosnia Herzegovina
  98. Burkina Faso
  99. Canary Island
  100. Togo
  101. Israel And Palestine
  102. Algeria
  103. Suriname
  104. Angola
  105. Cape Verde
  106. Liechtenstein
  107. Taiwan
  108. Turkmenistan
  109. Tuvalu
  110. Ivory Coast
  111. Moldova
  112. Somalia
  113. Belize
  114. Swaziland
  115. Solomon Islands
  116. North Korea
  117. Sao Tome And Principe
  118. Guyana
  119. Serbia
  120. Senegal And Gambia
  121. Faroe Islands
  122. Guernsey Jersey
  123. Monaco
  124. Tajikistan
  125. Pitcairn

Disclaimer : The GIS data provided for download in this article was initially sourced from OpenStreetMap (OSM) and further modified to enhance its usability. Please note that the original data is licensed under the Open Database License (ODbL) by the OpenStreetMap contributors. While modifications have been made to improve the data, any use, redistribution, or modification of this data must comply with the ODbL license terms. For more information on the ODbL, please visit OpenStreetMap’s License Page.

Here are some blogs you might be interested in:

Download Public Transport Platform Data in Shapefile, KML, MID +15 GIS Formats

Looking for accurate and structured public transport information? Now you can Download Public Transport Platform Data with ease using GIS Data by MAPOG. This intuitive platform supports over 15 GIS formats including Shapefile, KML, GeoJSON, MID, and more—ensuring compatibility with most modern GIS tools. Whether you’re involved in transit planning, infrastructure development, or urban mobility studies, MAPOG offers a reliable way to access and analyze Public Transport Platform data for smarter mapping decisions.

How to Download Public Transport Platform Data

MAPOG has streamlined the entire process to help users quickly access Public Transport Platform datasets from hundreds of layers globally. Supporting a wide range of formats like SHP, KML, CSV, GeoJSON, SQL, DXF, MIF, TOPOJSON, GPX, and more, the platform caters to both technical and analytical needs.

Download Public Transport Platform Data of any countries

Note:
  • All data is provided in GCS datum EPSG:4326 WGS84 CRS (Coordinate Reference System).
  • Users need to log in to access and download their preferred data formats.

Step-by-Step Guide to Download Public Transport Platform Data

Step 1: Search for Public Transport Platform Data

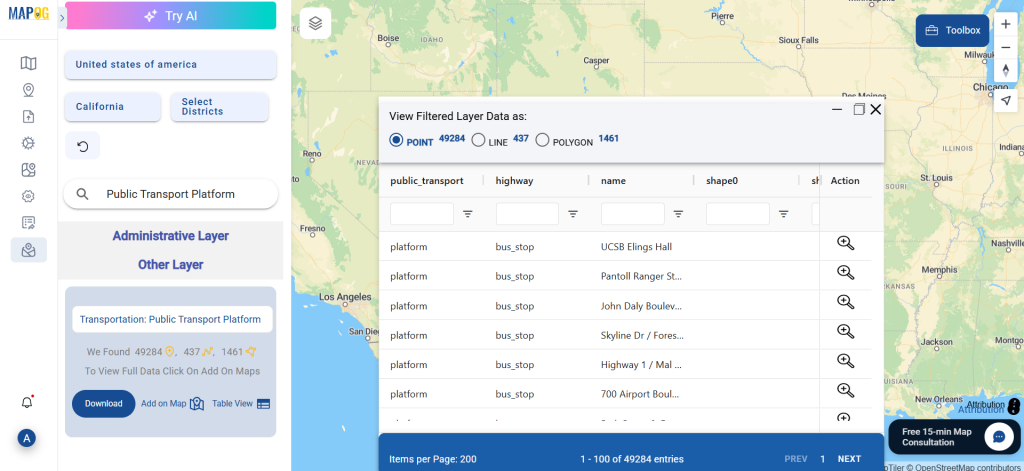
Begin by selecting your area of interest within the MAPOG interface. Use the “Search Layer” option to find “Public Transport Platform” data. Review the dataset details to check if the data is in point or polygon geometry format.

Download Public Transport Platform Data

Leverage MAPOG’s “Try AI” tool to make your search even quicker. Just enter phrases like “bus platforms in city” or “public transport access points,” and let the AI fetch the most relevant data layers instantly.

Download Public Transport Platform Data
Step 3: Refine Using Filter Data

For more targeted results, apply filters based on district, state, or urban zones. This step helps eliminate unnecessary data and ensures you’re working with only the most relevant Public Transport Platform information.

Download Public Transport Platform Data
Step 4: Visualize with Add on Map

Want to preview your data before downloading? Use the “Add on Map” feature to load the selected dataset onto MAPOG’s interactive map interface. This allows for a visual check of platform distribution, spatial relationships, and accessibility, which is useful for transport planning and analysis.

Download Public Transport Platform Data
Step 5: Download the Data

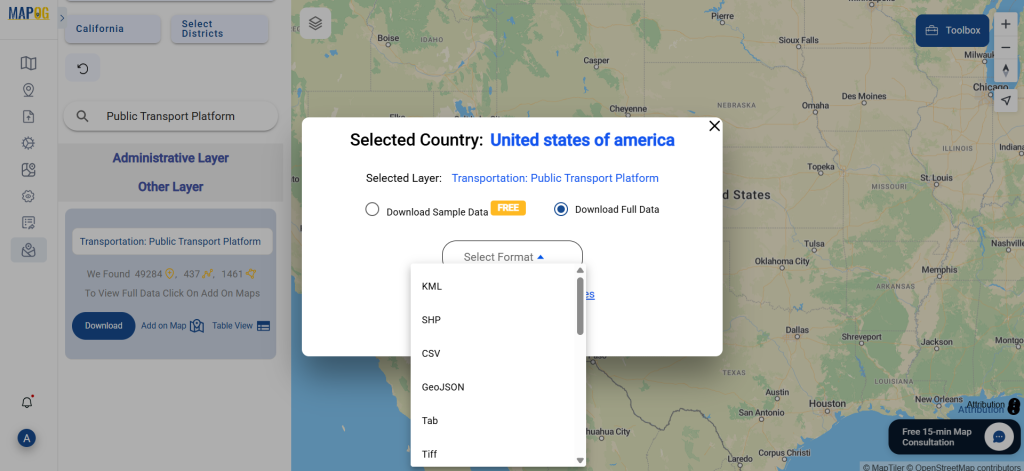
Once satisfied, click “Download Data.” You’ll have the choice between sample and full datasets. Select your preferred format—Shapefile, KML, MID, or others—accept the terms, and begin your download.

Download Public Transport Platform Data

Final Thoughts

MAPOG makes it incredibly easy to Download Public Transport Platform Data in the format that best suits your project. With its AI-enhanced search, rich filtering options, and multiple export formats, the platform empowers researchers, urban planners, and GIS analysts to make informed decisions with high-quality data. Whether for mapping, modeling, or infrastructure analysis, GIS Data by MAPOG is your go-to resource to Download Public Transport Platform Data efficiently and accurately.

With MAPOG’s versatile toolkit, you can effortlessly upload vector and upload Excel or CSV data, incorporate existing layers, perform polyline splitting, use the converter for various formats, calculate isochrones, and utilize the Export Tool.

For any questions or further assistance, feel free to reach out to us at support@mapog.com. We’re here to help you make the most of your GIS data.

Download Shapefile for the following:

  1. World Countries Shapefile
  2. Australia
  3. Argentina
  4. Austria
  5. Belgium
  6. Brazil
  7. Canada
  8. Denmark
  9. Fiji
  10. Finland
  11. Germany
  12. Greece
  13. India
  14. Indonesia
  15. Ireland
  16. Italy
  17. Japan
  18. Kenya
  19. Lebanon
  20. Madagascar
  21. Malaysia
  22. Mexico
  23. Mongolia
  24. Netherlands
  25. New Zealand
  26. Nigeria
  27. Papua New Guinea
  28. Philippines
  29. Poland
  30. Russia
  31. Singapore
  32. South Africa
  33. South Korea
  34. Spain
  35. Switzerland
  36. Tunisia
  37. United Kingdom Shapefile
  38. United States of America
  39. Vietnam
  40. Croatia
  41. Chile
  42. Norway
  43. Maldives
  44. Bhutan
  45. Colombia
  46. Libya
  47. Comoros
  48. Hungary
  49. Laos
  50. Estonia
  51. Iraq
  52. Portugal
  53. Azerbaijan
  54. Macedonia
  55. Romania
  56. Peru
  57. Marshall Islands
  58. Slovenia
  59. Nauru
  60. Guatemala
  61. El Salvador
  62. Afghanistan
  63. Cyprus
  64. Syria
  65. Slovakia
  66. Luxembourg
  67. Jordan
  68. Armenia
  69. Haiti And Dominican Republic
  70. Malta
  71. Djibouti
  72. East Timor
  73. Micronesia
  74. Morocco
  75. Liberia
  76. Kosovo
  77. Isle Of Man
  78. Paraguay
  79. Tokelau
  80. Palau
  81. Ile De Clipperton
  82. Mauritius
  83. Equatorial Guinea
  84. Tonga
  85. Myanmar
  86. Thailand
  87. New Caledonia
  88. Niger
  89. Nicaragua
  90. Pakistan
  91. Nepal
  92. Seychelles
  93. Democratic Republic of the Congo
  94. China
  95. Kenya
  96. Kyrgyzstan
  97. Bosnia Herzegovina
  98. Burkina Faso
  99. Canary Island
  100. Togo
  101. Israel And Palestine
  102. Algeria
  103. Suriname
  104. Angola
  105. Cape Verde
  106. Liechtenstein
  107. Taiwan
  108. Turkmenistan
  109. Tuvalu
  110. Ivory Coast
  111. Moldova
  112. Somalia
  113. Belize
  114. Swaziland
  115. Solomon Islands
  116. North Korea
  117. Sao Tome And Principe
  118. Guyana
  119. Serbia
  120. Senegal And Gambia
  121. Faroe Islands
  122. Guernsey Jersey
  123. Monaco
  124. Tajikistan
  125. Pitcairn

Disclaimer : The GIS data provided for download in this article was initially sourced from OpenStreetMap (OSM) and further modified to enhance its usability. Please note that the original data is licensed under the Open Database License (ODbL) by the OpenStreetMap contributors. While modifications have been made to improve the data, any use, redistribution, or modification of this data must comply with the ODbL license terms. For more information on the ODbL, please visit OpenStreetMap’s License Page.

Here are some blogs you might be interested in:

Switching between Google Maps and OpenStreetMap in React Native

Switching between Google Maps and OpenStreetMap in React Native : In this post I am going to discuss about Google Maps and OpenStreetMap in react native with one example.This example code  will just show the Google Maps and OpenStreetMap on the screen of mobile ,but before going to detail of this article I  suggest you to read the following page:

react-native-maps

Switching between Google Maps and OpenStreetMap in React Native

Installation :

First create a react native project by following command :

react-native init MyProject

Install React Native Map components  in your React Native project:

cd MyProject

npm install react-native-maps --save

Build configuration on iOS :

For this go to Link

Build configuration on Android:

Define the react-native-maps project in android/settings.gradle:

...
include ':react-native-maps'
project(':react-native-maps').projectDir = new File(rootProject.projectDir, '../node_modules/react-native-maps/lib/android')

Add the react-native-maps as an dependency of your app in android/app/build.gradle:

...
dependencies {
  ...
  implementation project(':react-native-maps')
}

In build.gradle of android(If you’ve defined project-wide properties ):

buildscript {...}
allprojects {...}

/**
 + Project-wide Gradle configuration properties
 */
ext {
    compileSdkVersion   = 26
    targetSdkVersion    = 26
    buildToolsVersion   = "26.0.2"
    supportLibVersion   = "26.1.0"
    googlePlayServicesVersion = "11.8.0"
    androidMapsUtilsVersion = "0.5+"
}

If you do not have project-wide properties defined and have a different play-services version then use the following instead :

...
dependencies {
   ...
   implementation(project(':react-native-maps')){
       exclude group: 'com.google.android.gms', module: 'play-services-base'
       exclude group: 'com.google.android.gms', module: 'play-services-maps'
   }
   implementation 'com.google.android.gms:play-services-base:10.0.1'
   implementation 'com.google.android.gms:play-services-maps:10.0.1'
}

Specify your Google Maps API Key:

Add your API key to your manifest file (android/app/src/main/AndroidManifest.xml):

<application>
   <!-- You will only need to add this meta-data tag, but make sure it's a child of application -->
   <meta-data
     android:name="com.google.android.geo.API_KEY"
     android:value="Your Google maps API Key Here"/>
</application>

To get API key:

Google maps API Key

Add import com.airbnb.android.react.maps.MapsPackage;and new MapsPackage() in your MainApplication.java:

import com.airbnb.android.react.maps.MapsPackage;
...
    @Override
    protected List<ReactPackage> getPackages() {
        return Arrays.<ReactPackage>asList(
                new MainReactPackage(),
                new MapsPackage()
        );
    }

Example: 

In our example ,there are four java script file as follow:

  • index.js
  • App.js
  • GoogleMapScreen.js
  • OpenStreetMapScreen.js

index.js:

import {AppRegistry} from 'react-native';
import App from './App';
import {name as appName} from './app.json';

AppRegistry.registerComponent(appName, () => App);

App.js :

import React, { Component } from 'react';
import {View,Text ,ScrollView} from 'react-native';
import { createDrawerNavigator,createAppContainer,DrawerItems, SafeAreaView } from 'react-navigation'
import {Container} from 'native-base';
import GoogleMapScreen from './src/GoogleMapScreen';
import OpenStreetMapScreen from './src/OpenStreetMapScreen';

const CustomDrawerContentComponent = (props) => (
     <ScrollView>
        <View style={{height:80,backgroundColor:'#1a8cff',alignItems:'center',justifyContent:'center'}}>
         <Text style={{ color:'white',fontSize:30}}>Maps</Text>
        </View>
        <SafeAreaView style={{flex:1}} forceInset={{ top: 'always', horizontal: 'never' }}>
        <DrawerItems {...props} />
       </SafeAreaView>
     </ScrollView>
);

const MyDrawerNavigator = createDrawerNavigator(
   {
    GoogleMap:GoogleMapScreen,
    OpenStreetMap:OpenStreetMapScreen,
   },
   {
    contentComponent:CustomDrawerContentComponent
   }
);

const MyApp = createAppContainer(MyDrawerNavigator);

class App extends React.Component{
   render(){
      return(
        <Container>
          <MyApp />
        </Container>
     );
   }
}

export default App;

Explaination of App.js : 

In App.js java script file,we are importing component from native-base and React-Navigation 3.x ,we need to install:

Install NativeBase

npm install native-base --save

Install Peer Dependencies

react-native link

Install the react-navigation package

npm install --save react-navigation

install react-native-gesture-handler :

npm install --save react-native-gesture-handler

Link all native dependencies:

react-native link

In this code , one drawer is created for two screen namely GoogleMapScreen and OpenStreetMapScreen , for more detail on drawer in react-navigation 3.x ,you can refer to following post:

drawer in react-navigation 3.x

GoogleMapScreen.js

import React, { Component } from 'react';
import {
StyleSheet,
View,
Dimensions,
ScrollView,
Image
} from 'react-native';
import {Button,Container,Header,Left,Right,Icon,Text,Body } from 'native-base';
import MapView from 'react-native-maps';

const { width, height } = Dimensions.get('window');

const ASPECT_RATIO = width / height; //,
const LATITUDE = 22.720555;
const LONGITUDE = 75.858633;
const LATITUDE_DELTA = 0.0922;
const LONGITUDE_DELTA = LATITUDE_DELTA * ASPECT_RATIO;

class GoogleMapScreen extends React.Component {
   static navigationOptions = {
     drawerLabel: 'Google Maps',
     drawerIcon: ({ tintColor }) => (
           <Image
                 source={require('../image/icons8-google-maps-48.png')}
            />
     ),
};
constructor(props) {
  super(props);
  this.state = {
    region: {
      latitude: LATITUDE,
      longitude: LONGITUDE,
      latitudeDelta: LATITUDE_DELTA,
      longitudeDelta: LONGITUDE_DELTA,
    },
  };
}
render() {
  return (
   <Container>
    <Header>
     <Left style={{ flexDirection: 'row' }}>
      <Icon onPress={() => this.props.navigation.openDrawer()} name="md-menu" style={{ color: 'white', marginRight: 15 }} />
     </Left>
     <View style={{alignItems:'center',justifyContent:'center'}}>
       <Text style={{ color: 'white' }} >Google Maps</Text>
     </View>
     <Right>
       <Icon name="md-cart" style={{ color: 'white' }} />
     </Right>
    </Header>
    <View >
     <MapView
        provider={this.props.provider}
        style={styles.map}
        scrollEnabled={true}
        zoomEnabled={true}
        pitchEnabled={true}
        rotateEnabled={true}
        initialRegion={this.state.region}
     />
    </View>
  </Container>
  );
 }
}// End of MyHomeScreen class
export default GoogleMapScreen;

const styles = StyleSheet.create({
   map: {
    width: 400,
    height: 800,
   },
});

Explaination of GoogleMapScreen.js: 

This code is going to show google maps on the screen of mobile. These constants are define :

const { width, height } = Dimensions.get('window');

const ASPECT_RATIO = width / height;
const LATITUDE = 22.720555;
const LONGITUDE = 75.858633;
const LATITUDE_DELTA = 0.0922;
const LONGITUDE_DELTA = LATITUDE_DELTA * ASPECT_RATIO;

In constructor ,region object is initialize as follow:

this.state = {
  region: {
    latitude: LATITUDE,
    longitude: LONGITUDE,
    latitudeDelta: LATITUDE_DELTA,
    longitudeDelta: LONGITUDE_DELTA,
  },
};

The following MapView tag  will shaow Google Maps on screen:

<MapView
   provider={this.props.provider}
   style={styles.map}
   scrollEnabled={true}
   zoomEnabled={true}
   pitchEnabled={true}
   rotateEnabled={true}
   initialRegion={this.state.region}
/>

OpenStreetMap.js

import React, { Component } from 'react';
import {View,StyleSheet,StatusBar,Image,Dimensions} from 'react-native';
import {Button,Container,Header,Left,Right,Icon,Text,Radio } from 'native-base';
import MapView ,{ MAP_TYPES, PROVIDER_DEFAULT,UrlTile } from 'react-native-maps';

const { width, height } = Dimensions.get('window');

const ASPECT_RATIO = width / height;
const LATITUDE = 22.720555;
const LONGITUDE = 75.858633;
const LATITUDE_DELTA = 0.0922;
const LONGITUDE_DELTA = LATITUDE_DELTA * ASPECT_RATIO;

class OpenStreetMapScreen extends React.Component {
  static navigationOptions = {
    drawerLabel: 'OpenStreetMap',
    drawerIcon: ({ tintColor }) => (
    <Image
         source={require('../image/Openstreetmap_logo.png')}
         style={{width:40,height:40}}
    />
   ),
};
constructor(props) {
   super(props);
     this.state = {
       region: {
         latitude: LATITUDE,
         longitude: LONGITUDE,
         latitudeDelta: LATITUDE_DELTA,
         longitudeDelta: LONGITUDE_DELTA,
       },
     };
 }
get mapType() {
   return this.props.provider === PROVIDER_DEFAULT ? MAP_TYPES.STANDARD : MAP_TYPES.NONE;
}
render() {
  return (
   <Container>
    <Header>
     <Left style={{ flexDirection: 'row' }}>
      <Icon onPress={() => this.props.navigation.openDrawer()} name="md-menu" style={{ color: 'white', marginRight: 15 }} />
     </Left>
     <View style={{alignItems:'center',justifyContent:'center'}}>
      <Text style={{ color: 'white' }} >OpenStreetMap</Text>
     </View>
     <Right>
      <Icon name="md-cart" style={{ color: 'white' }} />
     </Right>
    </Header>
    <View >
     <MapView
       region={this.state.region}
       provider={null}
       mapType={this.mapType}
       rotateEnabled={false}
       style={{flex: 1}}
       style={styles.map}
       showsUserLocation>
       <UrlTile
urlTemplate="http://a.tile.openstreetmap.de/tiles/osmde/{z}/{x}/{y}.png"
maximumZ={19}
/>
      </MapView>
     </View>
    </Container>
   );
  }
}
export default OpenStreetMapScreen

const styles = StyleSheet.create({
   map: {
    width: 400,
    height: 800,
   },
});

Explaination of OpenStreetMap.js :

Code of OpenStreetMap.js is  similar to GoogleMapScreen.js  only difference is in MapView tag as follow:

<MapView
  region={this.state.region}
  provider={null}
  mapType={this.mapType}
  rotateEnabled={false}
  style={{flex: 1}}
  style={styles.map}
  showsUserLocation>
  <UrlTile
urlTemplate="http://a.tile.openstreetmap.de/tiles/osmde/{z}/{x}/{y}.png"
maximumZ={19}
/>
</MapView>

Here MapView has one child tag <UrlTile> and prop of this tag is set to url as shown above in code which will print OpenStreetMap.

prop

mapType={this.mapType}

Here mapType function is called ,and return of this function is assign to mapType  prop.

mapType function:

get mapType() {
    return this.props.provider === PROVIDER_DEFAULT ? MAP_TYPES.STANDARD : MAP_TYPES.NONE;
}

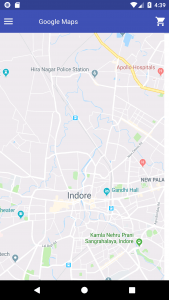
When you will run above Project ,following output will come:

Switching between Google Maps and OpenStreetMap in React Native

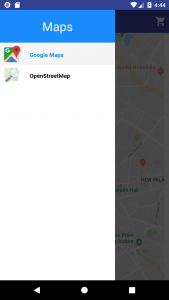
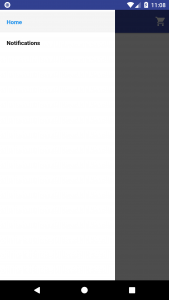
In the header ,we are having menu on left side. On the click of this menu,a drawer will open as shown below:

Switching between Google Maps and OpenStreetMap in React Native

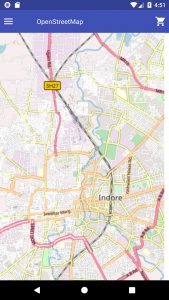
We are having two option in drawer 1)Google Maps 2)OpenStreetMap. When we will click Google Maps ,Google Map will be on screen  as shown by first ScreenShot  , now when we will click second option of OpenStreetMap then output will be as shown below:

Switching between Google Maps and OpenStreetMap in React Native


So, this all about switch from Google Map to OpenStreetMap in react native. Please do comment if something’s missing.

Check out more on GIS Apps –

If you want to hire our team then visit Hire us


Drawer React Navigation 3.x – react native

Drawer React Navigation 3.x – react native: In this post we are going to learn about drawer navigation of React Navigation 3.x with one example,, but before going to detail of this article I  suggest you to read the official documentation of React navigation 3.x as follow:

React Navigation 3.x

Drawer React Navigation 3.x – react native

In the below example  we are going to learn basics of drawer and how to implement  it in our application.

Installation :

First create a react native project by following command :

react-native init MyProject

Install the react-navigation package in your React Native project.

cd MyProject
npm install --save react-navigation

# or with yarn 
# yarn add react-navigation

install react-native-gesture-handler :

npm install --save react-native-gesture-handler

# or with yarn
# yarn add react-native-gesture-handler

Link all native dependencies:

react-native link

After all this my project’s package.json file is as follow:

{
  "name": "MyProject",
  "version": "0.0.1",
  "private": true,
  "scripts": {
      "start": "node node_modules/react-native/local-cli/cli.js start",
      "test": "jest"
   },
   "dependencies": {
   "react": "16.6.1",
   "react-native": "0.57.7",
   "react-native-gesture-handler": "^1.0.10",
   "react-navigation": "^3.0.5"
  },
  "devDependencies": {
  "babel-jest": "23.6.0",
  "jest": "23.6.0",
  "metro-react-native-babel-preset": "0.50.0",
  "react-test-renderer": "16.6.1"
  },
 "jest": {
   "preset": "react-native"
  }
}

In our Project we are having two java script file as follow:

  • index.js
  • App.js

index.js :

import {AppRegistry} from 'react-native';
import App from './App';
import {name as appName} from './app.json';

AppRegistry.registerComponent(appName, () => App);

App.js :

import React, { Component } from 'react';
import { View } from 'react-native';
import { createDrawerNavigator,createAppContainer } from 'react-navigation'
import { Button,Container,Header,Left,Right,Icon,Text } from 'native-base';

class MyHomeScreen extends React.Component {
  render() {
    return (
      <Container>
        <Header>
          <Left style={{ flexDirection: 'row'}}>
           <Icon onPress={() => this.props.navigation.openDrawer()} name="md-menu" style={{ color: 'white', marginRight: 15 }} />
          </Left>
          <Right>
           <Icon name="md-cart" style={{ color: 'white' }} />
          </Right>
        </Header>
       <View style={{ marginTop:100,marginLeft:100}}>
         <Button onPress={() => this.props.navigation.navigate('Notifications')} >
           <Text>Go to notifications</Text>
         </Button>
        </View>
       </Container>
     );
   }
 }// End of MyHomeScreen class

class MyNotificationsScreen extends React.Component {
   render() {
     return (
       <View style={{ marginTop:100,marginLeft:100}}>
         <Button onPress={() => this.props.navigation.goBack()} >
           <Text>Go back home</Text>
         </Button>
       </View>
     );
    }
}//End of MyNotificationsScreen class

const MyDrawerNavigator = createDrawerNavigator({
   Home:{ 
      screen: MyHomeScreen,
   },
   Notifications: {
      screen: MyNotificationsScreen,
   },
 });
 
const MyApp = createAppContainer(MyDrawerNavigator);

class App extends React.Component{
    render(){
      return(
        <Container>
          <MyApp >
            </MyApp >
        </Container>
      );
    }
}//End of App class

export default App;

In above code of App.js file we have used component of native base ,and therefore we will install native base as follow :

Install NativeBase

npm install native-base --save

Install Peer Dependencies

react-native link

Explaination of App.js :

In this file App.js, we have define three class namely as follow:

  • MyHomeScreen
  • MyNotificationsScreen
  • App

and two constants as follow:

  • MyDrawerNavigator
  • MyApp

We are creating two screen with the help of two class MyHomeScreen and MyNotificationsScreen 

class MyHomeScreen :

class MyHomeScreen extends React.Component {
  render() {
    return (
      <Container>
       <Header>
        <Left style={{ flexDirection: 'row' }}>
         <Icon onPress={() => this.props.navigation.openDrawer()} name="md-menu" style={{ color: 'white', marginRight: 15 }} />
        </Left>
        <Right>
         <Icon name="md-cart" style={{ color: 'white' }} />
        </Right>
       </Header>
       <View style={{ marginTop:100,marginLeft:100}}>
        <Button onPress={() => this.props.navigation.navigate('Notifications')} >
         <Text>Go to notifications</Text>
        </Button>
       </View>
      </Container>
    );
  }
}// End of MyHomeScreen class

Explaination of MyHomeScreen class :

In this class we are creating header of screen ,on left side of header we are creating Icon of “md-menu”,and onPress of this Icon we have open the drawer with the help of this code :

onPress={() => this.props.navigation.openDrawer()}

In this home screen one button is also given ,on press of this button MyNotificationsScreen is called with following code :

onPress={() => this.props.navigation.navigate('Notifications')}

class MyNotificationsScreen :

class MyNotificationsScreen extends React.Component {
  render() {
   return (
     <View style={{ marginTop:100,marginLeft:100}}>
      <Button onPress={() => this.props.navigation.goBack()} >
       <Text>Go back home</Text>
      </Button>
     </View>
   );
  }
}//End of MyNotificationsScreen class

Explaination of MyNotificationsScreen class :

In this class we are creating a button ,and on press of this button we are going back to home screen from this notification screen ,for this we are using following code:

onPress={() => this.props.navigation.goBack()}

Constant MyDrawerNavigator :

const MyDrawerNavigator = createDrawerNavigator({
   Home: {
      screen: MyHomeScreen,
   },
   Notifications: {
      screen: MyNotificationsScreen,
   },
});

Constant MyApp :

const MyApp = createAppContainer(MyDrawerNavigator);

Class App :

class App extends React.Component{
  render(){
    return(
      <Container>
        <MyApp />
      </Container>
    );
  }
}

Explaination of App class:

In this class we are using <MyApp /> tag .

When you will run the above code,  following output will come

Drawer React Navigation 3.x - react native
On Left side of Header we are having menu ,on press of this drawer will be open as follow:

Drawer React Navigation 3.x - react native

If you face any problem during implementing this tutorial, please let us know. Feel free to comment in given comment box.

You might be interested React Native Geolocation

React Native Geolocation – GPS – GIS Mobile App

Geolocation in React Native is the identification or estimation of the real-world geographic location of a mobile phone .

In this post, we will  discuss  how to find Geolocation of mobile phone in react native with one example, but before going to detail of this post I  suggest you to read the official documentation.

React Native Geolocation

React Native Geolocation – GPS – GIS Mobile App

Installation

iOS : installation for ios

Android:

Our App will request  access to location, for this we need to add following line of code in our App’s AndroidManifest.xml which is located at  android/app/src/main/AndroidManifest.xml in our App.

<uses-permission android:name="android.permission.ACCESS_FINE_LOCATION" />

API Overview

The geolocation api exists on the global navigator object in React Native,  so we would access it via navigator.geolocation.

I will be covering only one method available  on   navigator.geolocation

getCurrentPosition

The getCurrentPosition   method allows us to request a user’s location at any time. This method take three parameter as follow:

geolocation.getCurrentPosition(geo_success, [geo_error], [geo_options]);

parameters of method :

geo_success - a success callback
[geo_error] -an error callback
[geo_options]-a configuration object

The success callback will be passed an object that looks like :

{
    "timestamp": 1484669056399.49,
     "coords": {
           "accuracy": 5,
           "altitude": 0,
           "altitudeAccuracy": -1,
           "heading": -1,
           "latitude": 37.785834,
          "longitude": -122.406417,
          "speed": -1
     }
}

The error callback will be passed a standard error message.

The config object has

  • enableHighAccuracy (boolean)— which allows you to get the most accurate location.
  • timeout (milliseconds)— how long does the API have to return the position before throwing an error?
  • maximumAge (milliseconds) — if a location exists in the device cache, how old can it be before it’s no longer valuable to your app?

Example

Here we are discussing one example in which we will try to find out the current position of mobile( latitude,longitude).In our project there are two file:

  1. index.js
  2. App.js
index.js
import {AppRegistry} from 'react-native';
import App from './App';
import {name as appName} from './app.json';

AppRegistry.registerComponent(appName, () => App);
App.js
import React, { Component } from 'react';
import { View } from 'react-native';
import { Container, Header, Content, Card, CardItem, Body, Text } from 'native-base';

class App extends Component {
constructor(props) {
super(props);

this.state = {
latitude: null,
longitude: null,
error: null,
};
}

componentDidMount() {
navigator.geolocation.getCurrentPosition(
(position) => {
this.setState({
latitude: position.coords.latitude,
longitude: position.coords.longitude,
error: null,
});
},
(error) => this.setState({ error: error.message }),
{ enableHighAccuracy: true, timeout: 20000, maximumAge: 1000 },
);
}

render() {
return (
<Container>
<Content>
<Card>
<CardItem style={{backgroundColor:'grey'}}>
<Body>
<Text>Latitude: {this.state.latitude}</Text>
<Text>Longitude: {this.state.longitude}</Text>
{this.state.error ? <Text>Error: {this.state.error}</Text> : null}
</Body>
</CardItem>
</Card>
</Content>
</Container>
);
}
}

export default App;
Explaination of App.js :

In this code we are importing some component from native base ,so we need to add this dependency in our project as follow:

npm install native-base --save

and

react-native link

In App class we have constructor and two function namely  componentDidMount() and render()

constructor
constructor(props) {
super(props);

this.state = {
latitude: null,
longitude: null,
error: null,
};
}

In this constructor initial value of latitude, longitude and error are define to null.

componentDidMount() method:
componentDidMount() {
navigator.geolocation.getCurrentPosition(
(position) => {
this.setState({
latitude: position.coords.latitude,
longitude: position.coords.longitude,
error: null,
});
},
(error) => this.setState({ error: error.message }),
{ enableHighAccuracy: true, timeout: 20000, maximumAge: 1000 },
);
}

The componentDidMount() method is  called at the time of  initializing of a component .so when this method is called we find the location of mobile by calling getCurrentPosition() method as shown above in code.


navigator.geolocation.getCurrentPosition() has three argument
(position) => {
this.setState({
latitude: position.coords.latitude,
longitude: position.coords.longitude,
error: null,
});
}

This is a  success callback parameter of getCurrentPosition() method ,we are collecting result in position .

and position object look like:

{
    "timestamp": 1484669056399.49,
     "coords": {
           "accuracy": 5,
           "altitude": 0,
           "altitudeAccuracy": -1,
           "heading": -1,
           "latitude": 37.785834,
          "longitude": -122.406417,
          "speed": -1
     }
}

from this position object we collect the latitude and longitude as follow:

position.coords.latitude

position.coords.longitude

These values are assign to latitude and longitude of App class by following code

this.setState({
latitude: position.coords.latitude,
longitude: position.coords.longitude,
error: null,
});
(error) => this.setState({ error: error.message })

This is the second argument of getCurrentPosition() method ,and this is an error callback parameter of method ,in this we are collecting error in error if it occur. and with the help of setState() method ,we are storing the error message into error of App class.

{ enableHighAccuracy: true, timeout: 20000, maximumAge: 1000 }

This is the third argument of getCurrentPosition() method, a configuration object, in this we are suppling three value   enableHighAccuracy: true, timeout: 20000, maximumAge: 1000.

render() {
return (
<Container>
<Content>
<Card>
<CardItem style={{backgroundColor:'grey'}}>
<Body>
<Text>Latitude: {this.state.latitude}</Text>
<Text>Longitude: {this.state.longitude}</Text>
{this.state.error ? <Text>Error: {this.state.error}</Text> : null}
</Body>
</CardItem>
</Card>
</Content>
</Container>
);
}
}

In this render method we are creating a card and on this card we are printing the location of mobile in terms of latitude and longitude if error is null otherwise we print the error on screen of mobile.

So this about all about React Native Geolocation- GPS. If you phase any  problem in implementing please let us know by commenting below.

Want GIS application – Please contact us at juhi@engineerphilosophy.com

More on GIS –

PostGIS, Geoserver and Leaflet | GIS Web Development

In this article we will see how data can query in Postgres and store and view at Geoserver and Leaflet i.e GIS Web Development with PostGIS, Geoserver and Leaflet. For this you will require setup of all three. You can visit our tutorial to install Geoserver For Linux or geoserver install in windows, Postgres and Postgis installation for Ubuntu 16.04. and a basic of Leaflet Js Javascript Library. If you are done with intial setup, then we can first start with to adding Shapefile in postgres by creating  database in database.

PostGIS, Geoserver and Leaflet | GIS Web Development – Steps

Step 1: After installing Geoserver and Postgress postgis in your system you need to download dataset. The data we are using is shapefile for this tutorial, which you can download from the sources given in this post. The shapefile can be administrative boundary or road network etc. For any region. This website will help you to download zip file as well, which will have all supporting file for shapefile.

Step 2: Now you need to open Postgres, add database, table and add shape file using shp2pgsql. This all has been explained in our tutorial.

Step 3: Start Geoserver by running shell file provided in bin folder of geoserver. That can be run by executing the given command on terminal.

cd <path to Geoserver/bin>
sh startup.sh

Then Open browser and type

http://localhost:8080/geoserver 

and login by using your credentials. Generally its admin as username and password as geoserver.

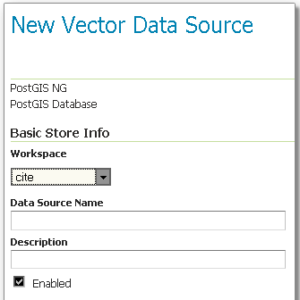
Step 4: Now create a new workspace on Geoserver. Now Move to workspace option in data section by providing required information. Create new store as PostGIS and provide information required.  Here you need to give workspace name and data source name you created. If you want you can write the description about your data.

PostGIS, Geoserver and Leaflet | GIS Web Development

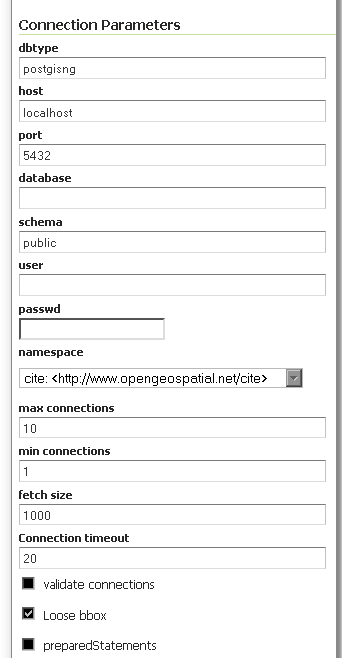
Now you need to provide connection parameter.

PostGIS, Geoserver and Leaflet | GIS Web Development

Dbype is the type of database, you can leave it as default or can specify your database type. Host and port: these are the parameter, which help geoserver to connect with postgres. The Host is space where database exist. The port to connect with postgres host, you can provide if you have set any otherwise make it as 5432.

Database: this is the database, which you have created using postgis. You are not sure about the name you can check it on pgAdmin or in terminal.

\l : this will provide you the list of available database. For this you must work with proper user-name.

Schema: to know your table, which you have created in database you can execute \d as this will provide you list of table associated database with their schema.

User and Password: this the USER with whom you have created database. In postgres you can create a new user with proper password.

Namespace: Namespace to be associated with the database. This field is altered by changing the workspace name. Remaining option you can leave as it is. And save the information.

Stpe 5: Now open the Layer option in data section, searched for your workspace and publish the layer.

Stpe 6: Here you will see tabs as data and publishing. In data tab you need to provide the reference coordinate system (CRS) by clicking on compute from data or compute from native bounds. After this you can save this layer with default styling. If you want to style your layer, which includes color, symbols etc. You can visit our tutorial styling vector data.

Step 7: Now moving to layer preview option in same data section. Here you can see your shape file.

Step 8: The shape file now can be render on map using leaflet javascript library.

For that you need to create HTML file, add leaflet library. After this create a div, which will contain map. Using L.map() and initialize the map and set view using setView() this takes center latitude longitude and zoom as arguments. You can check how to load a layer of polygon, point or polyline in leafletjs.

After that the shape file using L.TileLayer.WMS() , provide the base WMS URL, and specify whatever WMS options you need. The option can be layer, transparent and format etc. After this  use addTo() function to add layer to initialized map. Open that HTML file on browser to see the map with rendered shapefile.

Hope this PostGIS, Geoserver and Leaflet | GIS Web Development helped you in creating a map layer of shapefile which is loaded in postgis, and added the wms layer from geoserver which is then served as map in browser with leafletjs. If you find any problem in understanding the same, do let us know by commenting below.