In this guide, we’ll walk you through how to efficiently convert your GeoJSON files to KMZ using the powerful Converter Tool in MAPOG. Whether you’re a beginner or an experienced user, Converting GeoJSON to KMZ with MAPOG, this tutorial will help you understand the process in easy steps.
Key Concept to Converting files
The Converter Tool is a feature in MAPOG that helps you change your data from one format to another. It’s like magic! You give it your data in one form, and it transforms it into another form that you need for your analysis. Additionally, with GIS Data, you can download data in any format, making it versatile and adaptable for various applications.
Online GeoJSON to KMZ GIS Converter
Step 1: Upload the Data
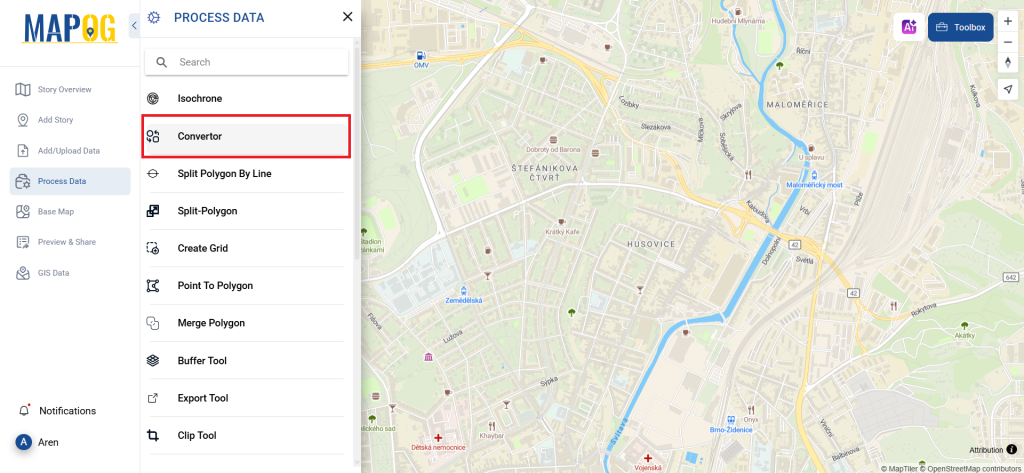
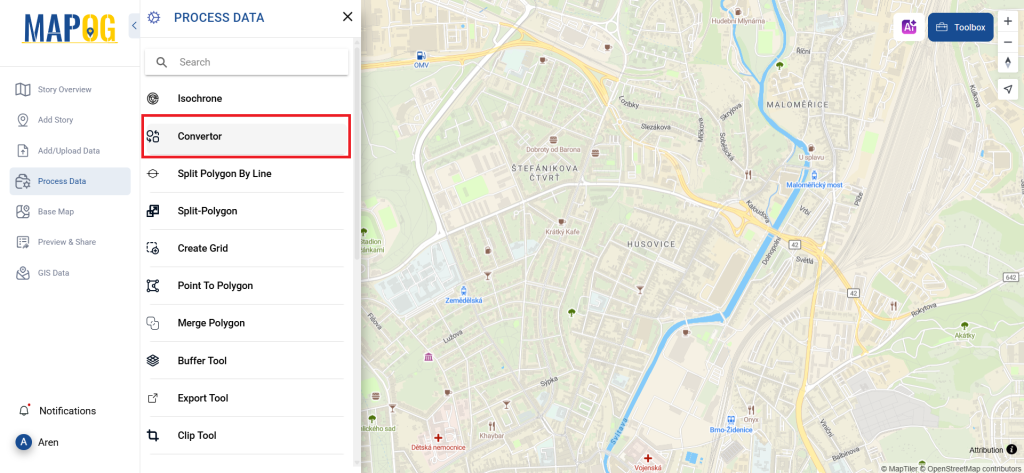
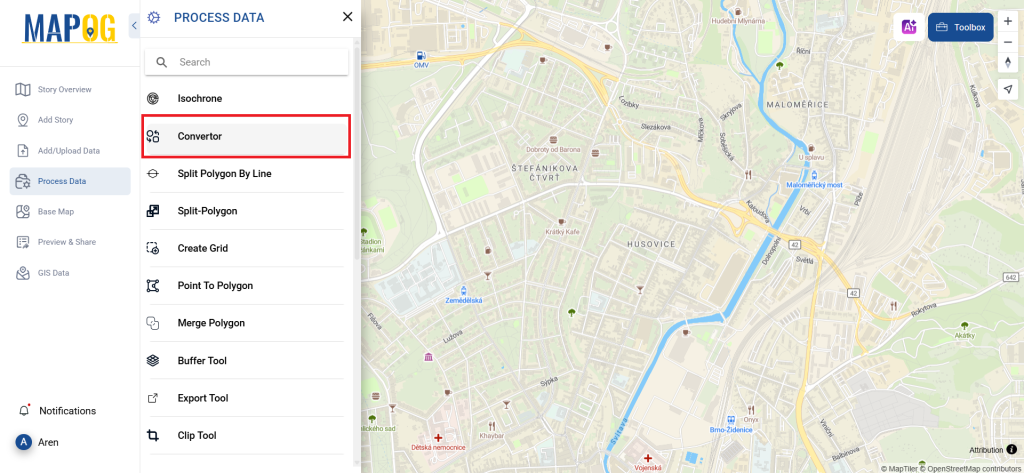
1. Click on the “Process Data” menu and choose the “Converter Tool” option.
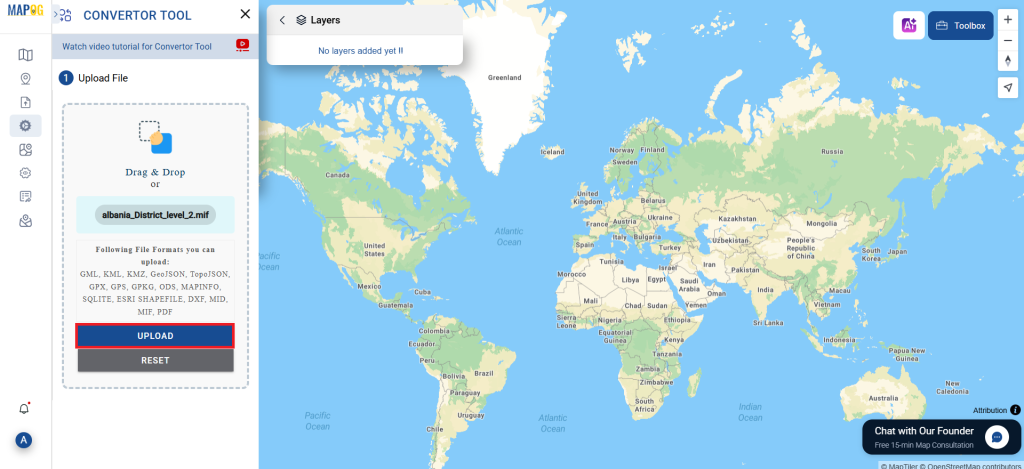
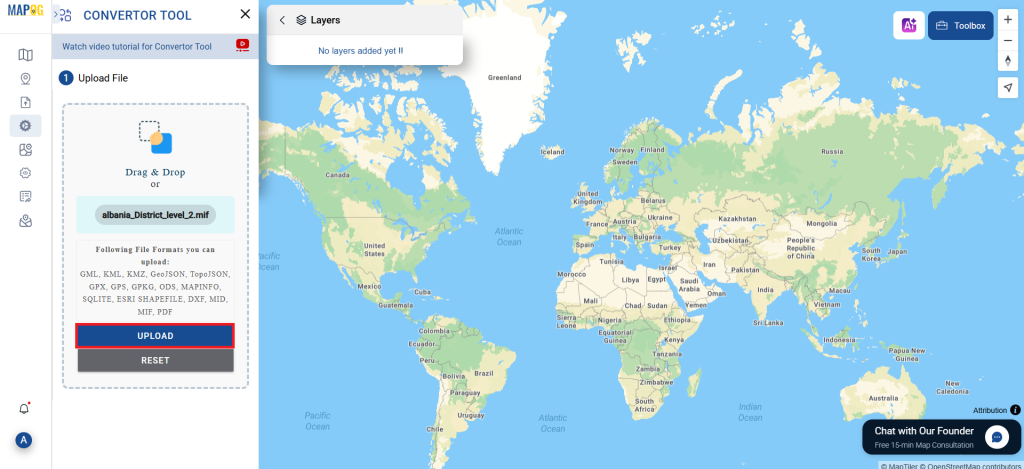
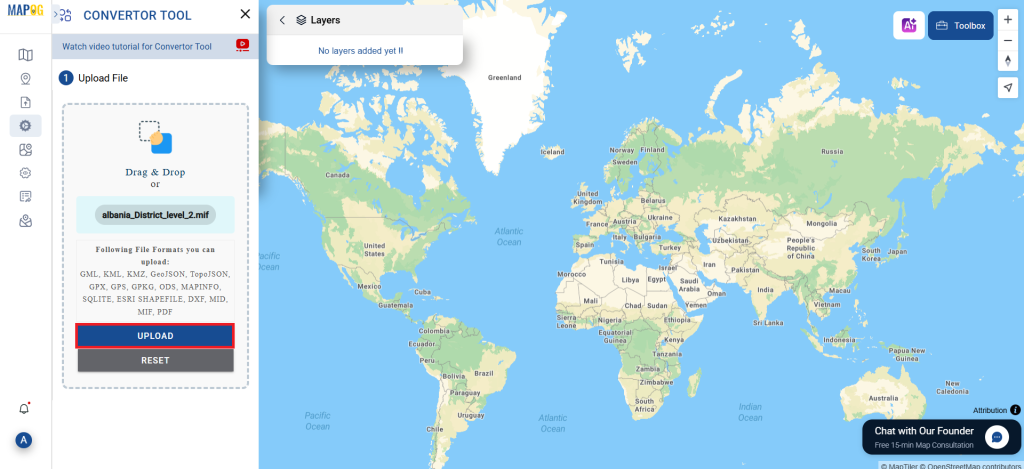
2. Upload your GeoJSON file. This is your starting point where you provide the data that needs conversion.
Step 2: Select the Format for Conversion
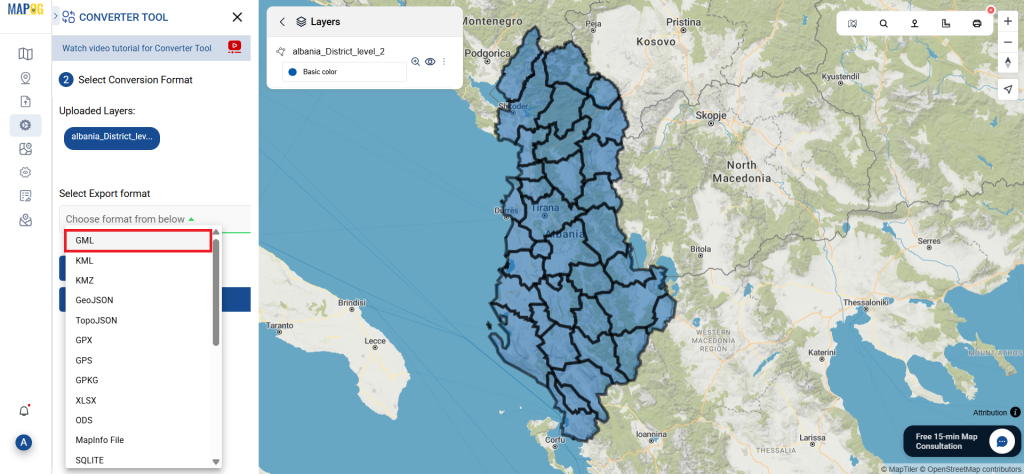
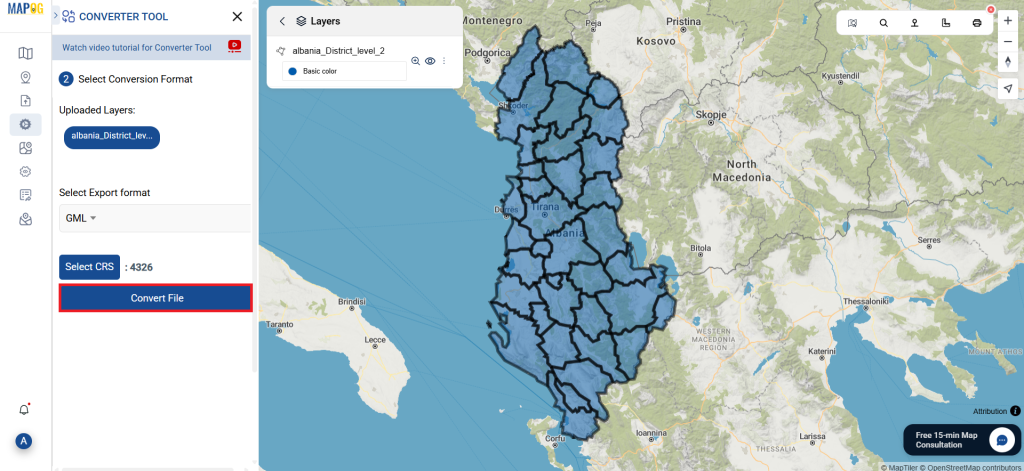
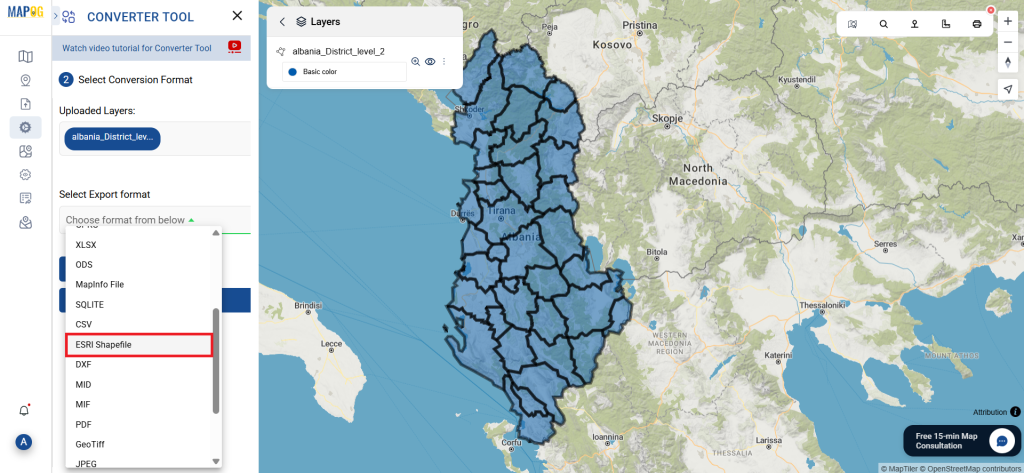
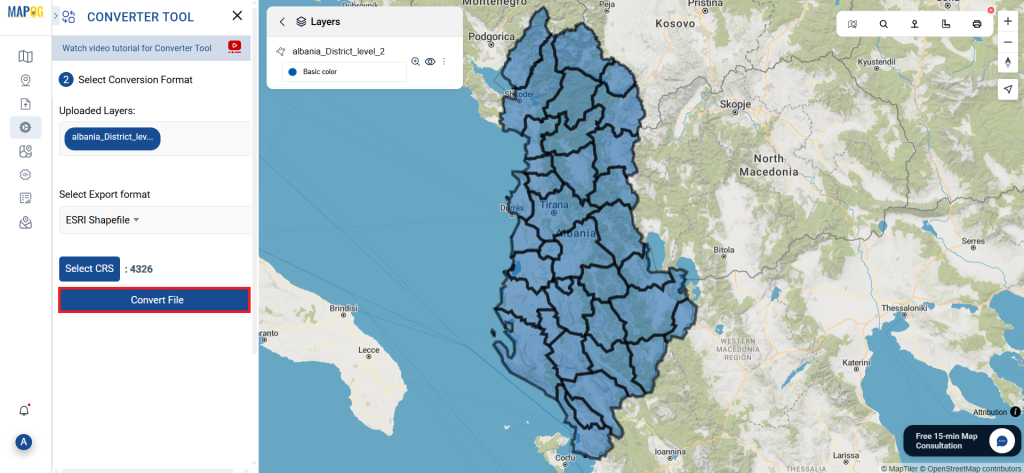
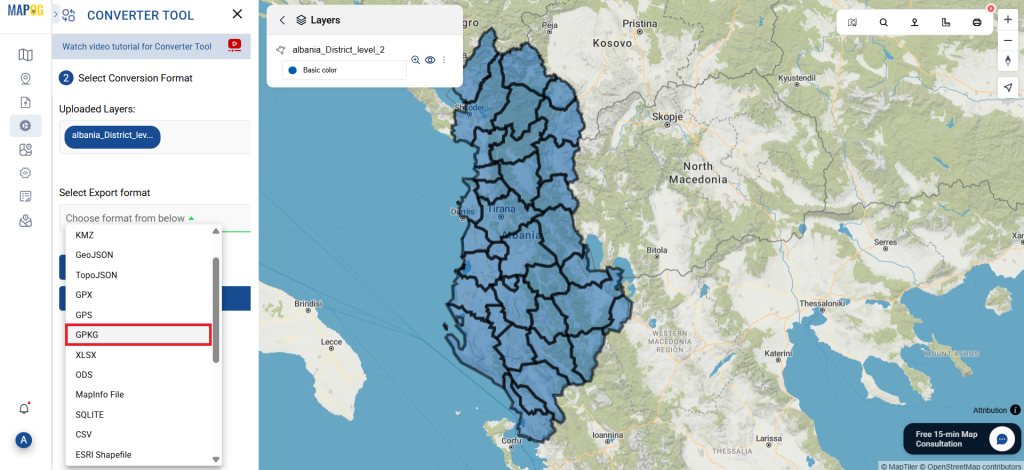
1. Choose the output file format as KMZ. The tool offers various formats, but for this guide, we are focusing on converting to KMZ.
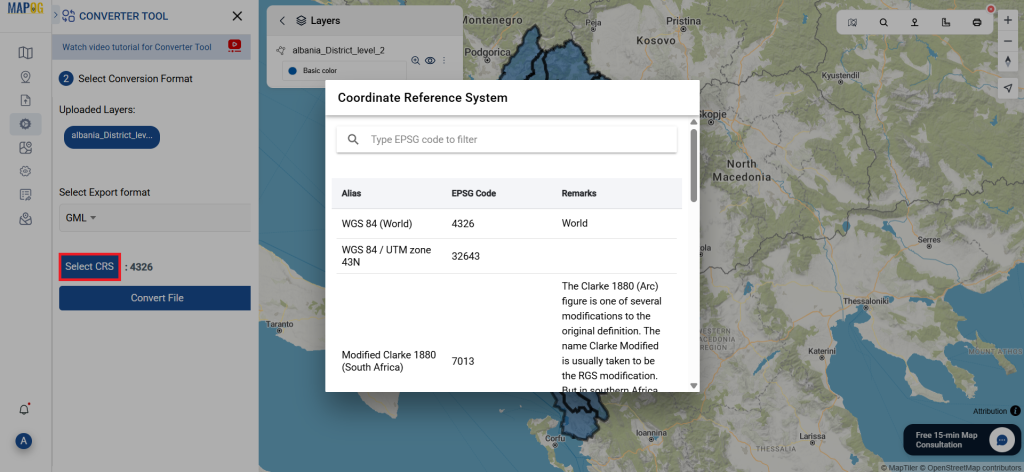
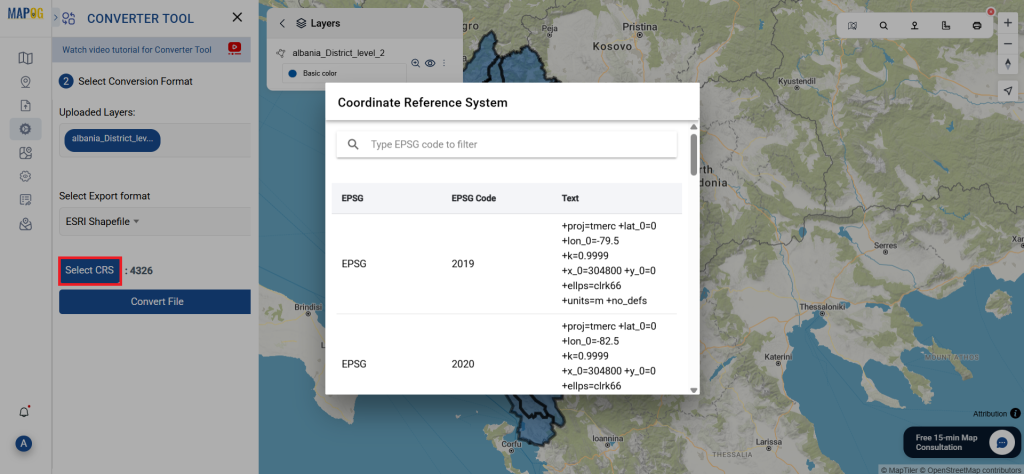
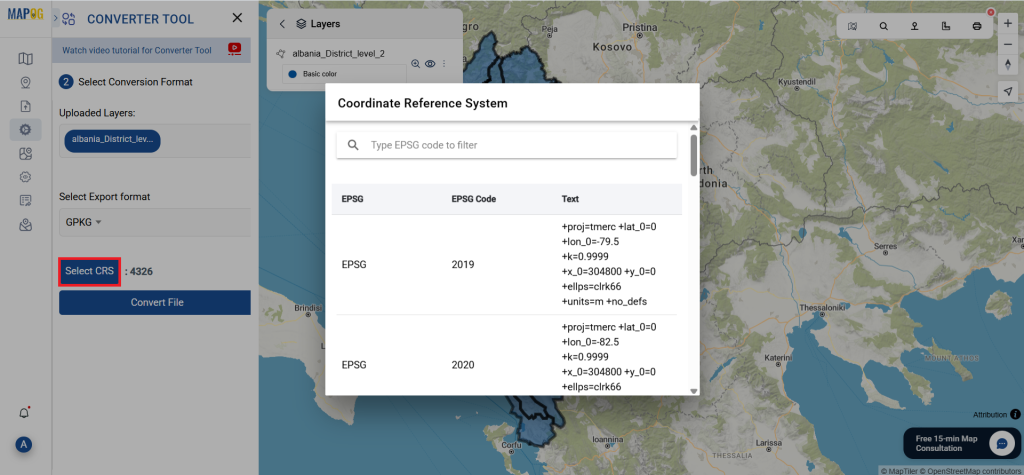
2.You can also set the CRS at this stage.
Step 3: Run the Conversion
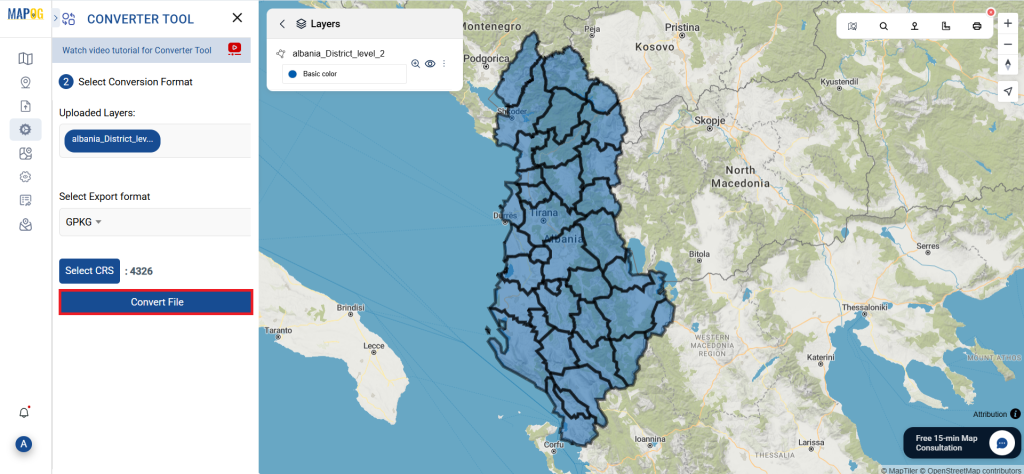
Click ‘Convert Files’ and let the tool work its magic. The Converter Tool processes your data, transforming it from GeoJSON to KMZ format.
Step 4: Review and Download
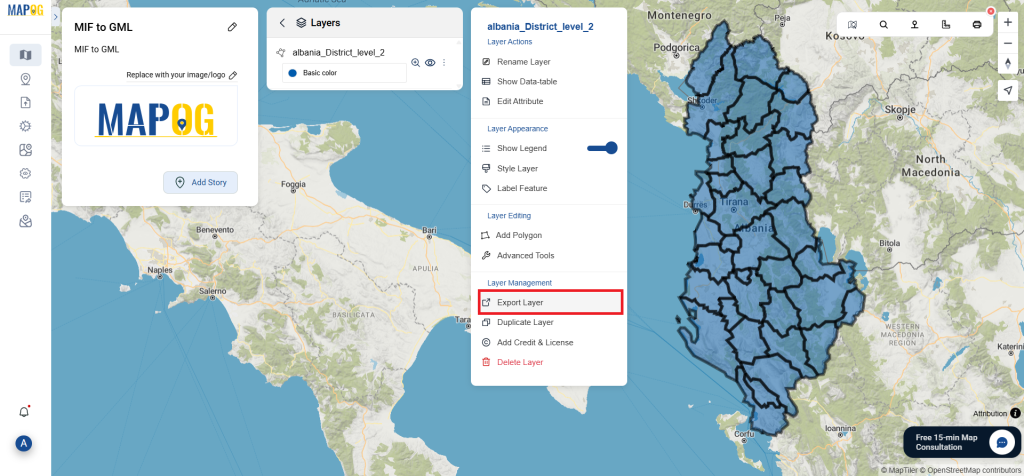
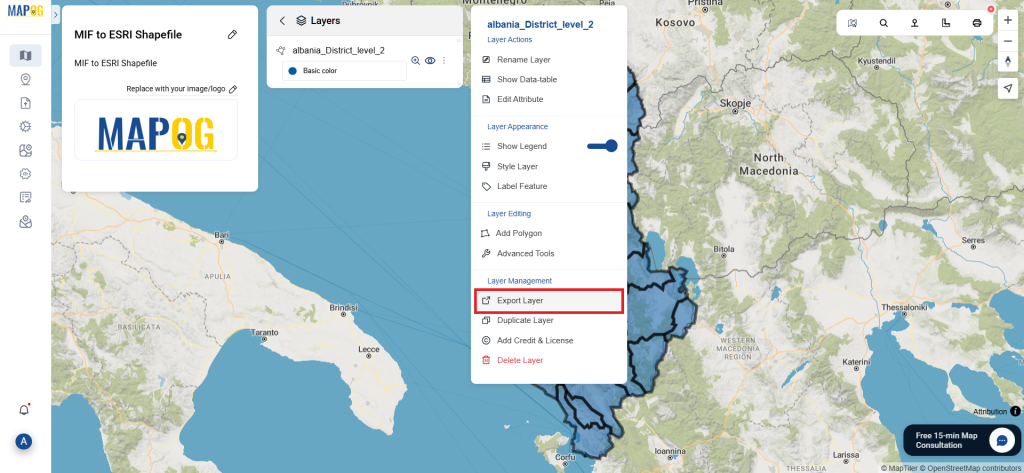
Finally, review your converted KMZ data to ensure it looks right. Once satisfied, download the converted file. This step is crucial to verify that the conversion has been successful and the data integrity is maintained.
And there you have it! You’ve successfully used the Converter Tool in MAPOG to convert your GeoJSON files to KMZ. Now you can easily convert your data for all your analysis needs. This feature simplifies the process of handling different data formats, making your workflow more efficient and effective.
In this guide, it will provide step by step of how the GPS files can be easily and quickly converted to KMZ format with the help of Converter Tool of MAPOG. So, both if you are a first-time user and a regular one, Converting GPS to KMZ with MAPOG, the entire process will be explained in simple steps for you.
Key Concept to Converting files
Converter Tool is a tool in the MAPOG used for the purpose of converting the information you have from one type to another. It’s like magic! You input data into it in one form, and you get it output in another form that you could use in your analysis. Moreover, GIS data has a download in any format that means it is shift able in any kind of uses.
Online GPS to KMZ GIS Converter
Step 1: Upload the Data
1. Select the data through the “Process Data” and go to the “Converter Tool”.
2. Upload your GPS file. This is your entry point where you feed in the information that needs conversion.
Step 2: Select the Format for Conversion
1. Select the output format as KMZ if you want to expatriate only the data. The tool provides several options in arriving at the result but for this guide, we are using the option to convert the file to KMZ.
you can also set the CRS to make sure your data aligns perfectly with the needs of your spatial analysis.
Step 3: Run the Conversion
Go to ‘Convert Files’ and watch the tool at work. Working with the Converter Tool you input your data and then the tool converts it from the GPS format to the KMZ format.
Step 4: Review and Download
Take a moment to review your converted KMZ data to make sure everything looks correct. Once you’re happy with it, go ahead and download the file. This step is really important to ensure that the conversion worked properly and that all your data is intact.
Step 5: Point to Polygon Feature
To add a point to polygon to a map, click the process data button in the header, select the Point to Polygon Feature, enter the converted file, and click on convert. It will create polygon feature for each point feature in the dataset.
That’s it! You’ve mastered the Converter Tool in MAPOG to turn your GPS files into KMZs. Now, transforming your data is easier than ever, ready for any analysis you need. This handy feature streamlines dealing with various data formats, making your work smoother and more productive.
In this guide, we’ll walk you through how to efficiently convert your GML files to SQLITE using the powerful Converter Tool in MAPOG. Whether you’re a beginner or an experienced user, Converting GML to SQLITE with MAPOG, this tutorial will help you understand the process in easy steps.
Key Concept to Converting files
The Converter Tool is a feature in MAPOG that helps you change your data from one format to another. It’s like magic! You give it your data in one form, and it transforms it into another form that you need for your analysis. Additionally, with GIS data, you can download data in any format, making it versatile and adaptable for various applications.
2. Upload your GML file. This is your starting point where you provide the data that needs conversion.
Step 2: Select the Format for Conversion
1. Choose the output file format as SQLITE. The tool offers various formats, but for this guide, we are focusing on converting to SQLITE.
2.You can also set the CRS at this stage.
Step 3: Run the Conversion
Click ‘Convert’ and let the tool work its magic. The Converter Tool processes your data, transforming it from GML to SQLITE format.
Step 4: Review and Download
Finally, review your converted SQLITE data to ensure it looks right. Once satisfied, download the converted file. This step is crucial to verify that the conversion has been successful and the data integrity is maintained.
Step 5: Add Basic Style
To make your map visually stunning, you can use basic style by using the style editor. Here you can change color, border color, border width and many more things, after changing save style.
And there you have it! You’ve successfully used the Converter Tool in MAPOG to convert your GML Files to SQLITE. Now you can easily convert your data for all your analysis needs. This feature simplifies the process of handling different data formats, making your workflow more efficient and effective.
Playgrounds are essential spaces that promote outdoor activities, physical fitness, and social interaction. Accurate GIS Data on playgrounds helps urban planners, researchers, and policymakers optimize recreational spaces. With GIS Data by MAPOG, users can effortlessly Download Playground Data in various formats like Shapefile, KML, and GeoJSON. The platform ensures quick access to high-quality GIS data for detailed mapping and analysis.
Why Choose GIS Data by MAPOG?
GIS Data by MAPOG is a user-friendly platform designed to provide seamless access to playground datasets across 200+ countries. It offers over 900+ layers of administrative and geographic data in formats such as KML, SHP, CSV, GeoJSON, and more. This makes it a go-to solution for anyone looking to analyze or visualize playground locations efficiently.
All data is provided in GCS datum EPSG:4326 WGS84 CRS (Coordinate Reference System).
Users need to log in to access and download their preferred data formats.
Step-by-Step Guide to Download Playground Data
Step 1: Search for Playground Data
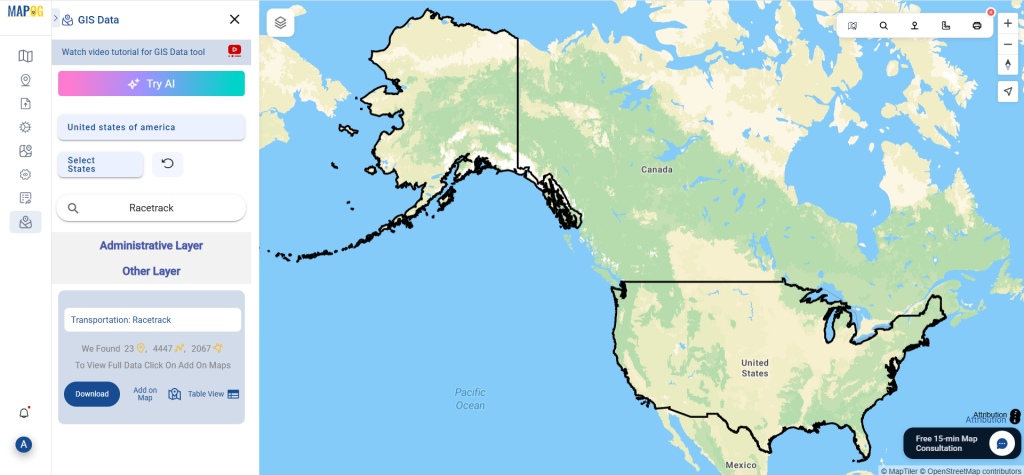
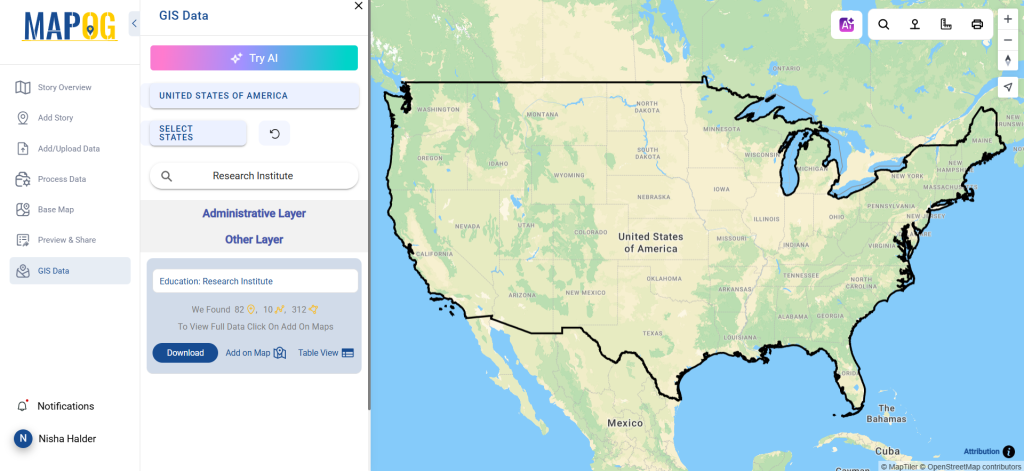
Log in to MAPOG and open the GIS Data interface. Choose your country and use the search option to locate Playground Data. Review attributes such as point or polygon formats to ensure relevance to your project.
To streamline your search, try the “Try AI” tool at the top left. Enter your specific query, and AI will fetch the most relevant playground datasets, saving you time.
Step 3: Apply Filters
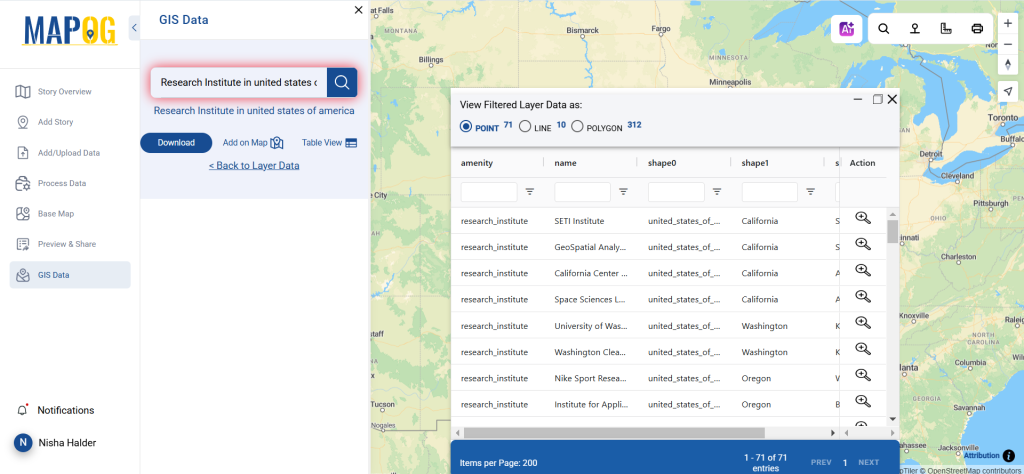
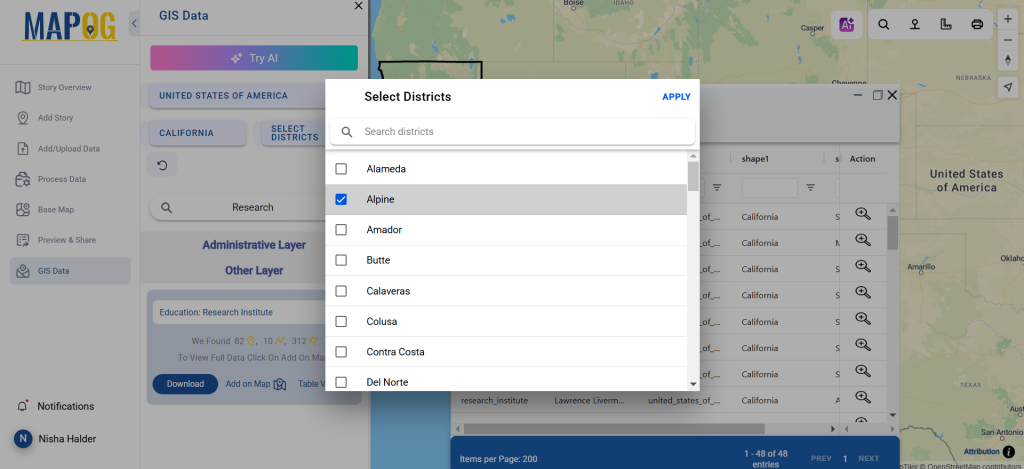
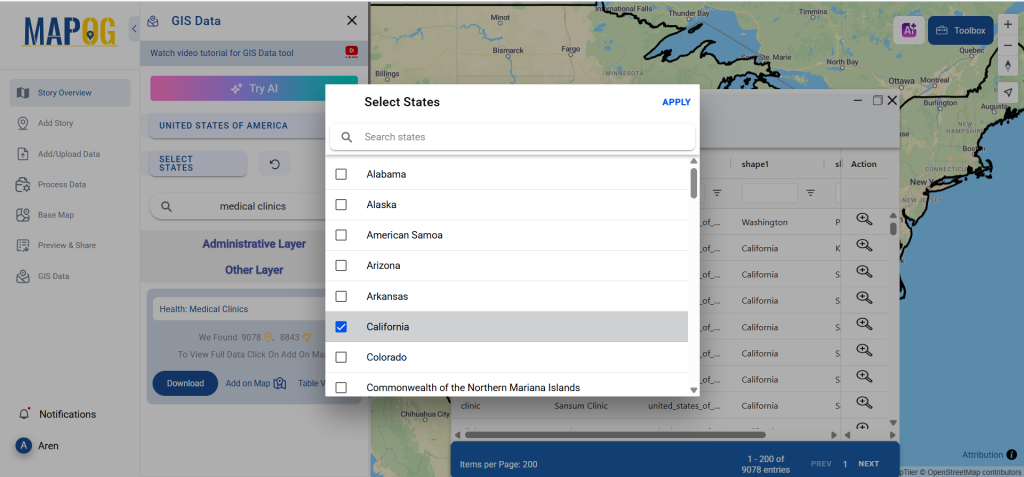
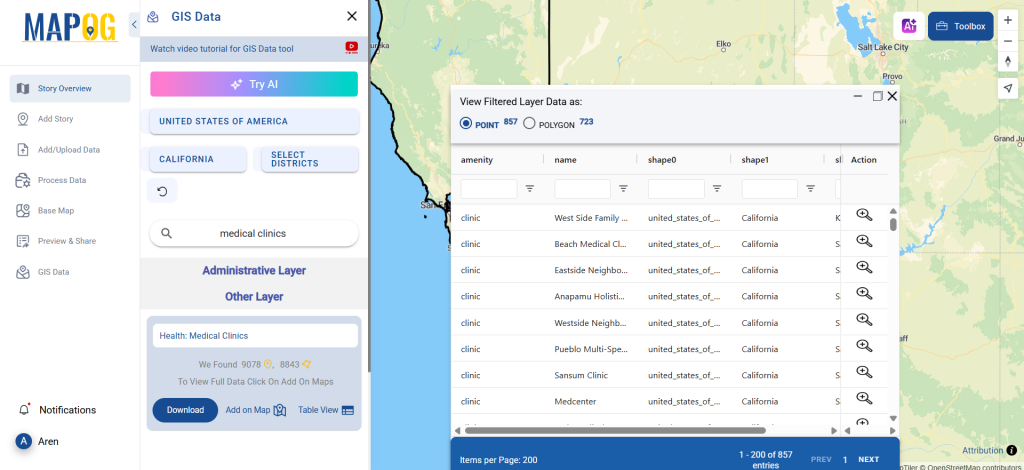
Refine your search using state or district filters. This enhances precision, allowing users to focus on specific playground locations instead of broad country-wide datasets.
Step 4: Add to Map for Visualization
Click “Add on Map” to overlay playground data onto an interactive map. This feature helps visualize spatial relationships and patterns, improving decision-making for urban planning and infrastructure development.
Step 5: Download Playground Data
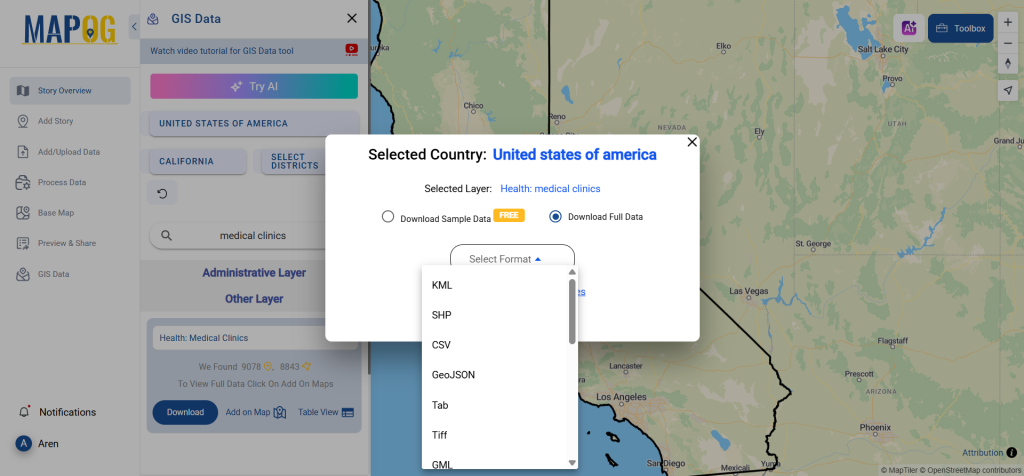
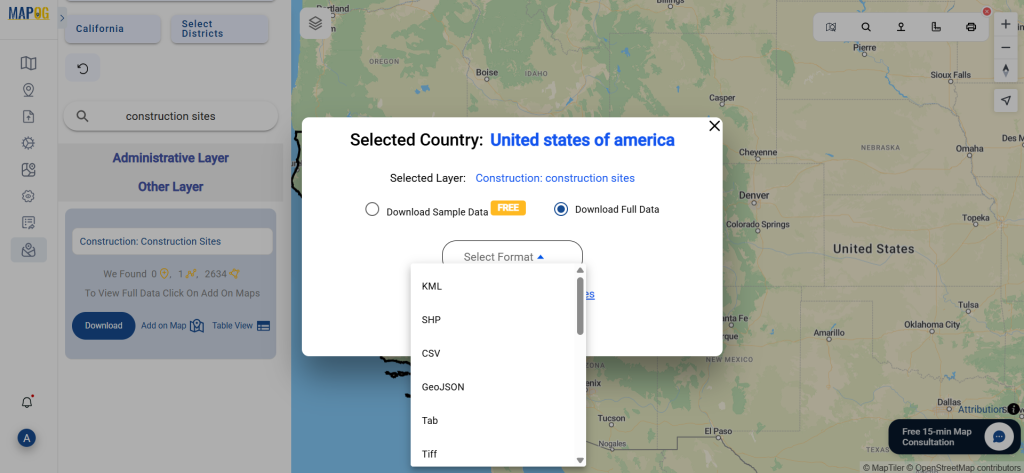
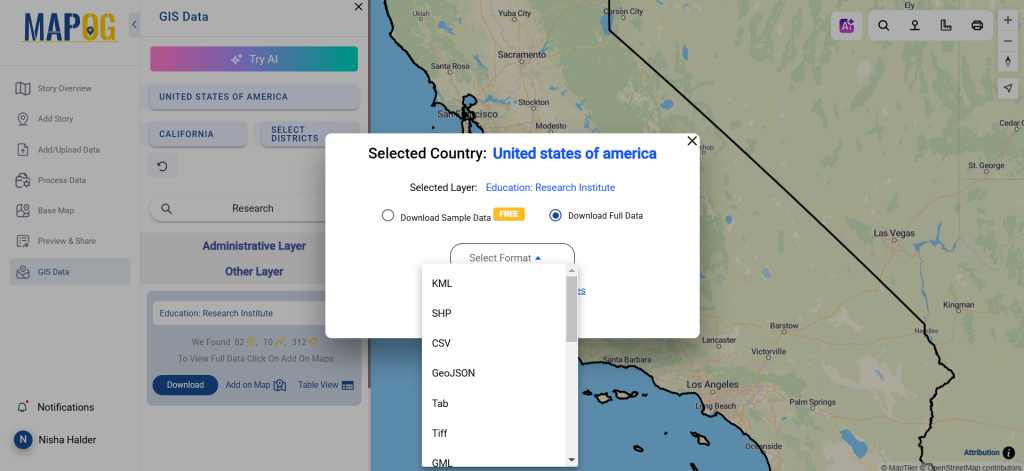
Once satisfied, click “Download Data”. You can choose between a sample dataset or the full dataset. Select the required format (SHP, KML, GeoJSON, etc.), accept the terms, and finalize the download.
Final Thoughts
GIS Data by MAPOG makes it easy to Download Playground Data in multiple formats for urban planning, research, and recreation mapping. With seamless access to accurate GIS data, users can enhance decision-making and improve community spaces. Whether you’re a GIS expert or a beginner, MAPOG provides everything needed for efficient data handling and visualization.
Disclaimer : The GIS data provided for download in this article was initially sourced from OpenStreetMap (OSM) and further modified to enhance its usability. Please note that the original data is licensed under the Open Database License (ODbL) by the OpenStreetMap contributors. While modifications have been made to improve the data, any use, redistribution, or modification of this data must comply with the ODbL license terms. For more information on the ODbL, please visit OpenStreetMap’s License Page.
GIS Data by MAPOG is a user-friendly platform designed for effortless GIS data access. Users can Download Stadium Data in multiple formats like Shapefile, KML, and GeoJSON. With a seamless interface, it allows downloading administrative and geographic datasets. This makes stadium mapping and analysis more efficient and detailed across the globe.
Understanding the Process
MAPOG simplifies downloading stadium data by providing a clear step-by-step guide. With over 200 countries and 900+ layers, users can access stadium data in various formats like Shapefile, KML, MID, and many others. The platform supports diverse GIS formats, ensuring smooth integration into any project.
All data is provided in GCS datum EPSG:4326 WGS84 CRS (Coordinate Reference System).
Users need to log in to access and download their preferred data formats.
Step-by-Step Guide to Download Stadium Data
Step 1: Search for ‘Stadium Data’
Log in to GIS Data by MAPOG and select the desired country. Use the search layer option to locate Stadium Data. Users can view data attributes such as location, and area type.
Try the “Try AI” feature in the upper left corner for an advanced search experience. Enter the specific stadium data you need along with the region, and the AI tool will fetch accurate results quickly.
Step 3: Apply Filters
Use the filter data option to narrow your search based on specific cities, districts, or stadium types. This feature improves data precision, making it easier to focus on a particular region or stadium category.
Step 4: Visualize on Map
With the “Add on Map” feature, users can overlay stadium data onto the map analysis interface. This enhances visualization, spatial analysis, and decision-making for GIS projects.
Step 5: Download Stadium Data
Click the “Download Data” button. Choose between sample data or the full dataset. Select the required format (Shapefile, KML, GeoJSON, or others) from the available options. Agree to the terms and conditions, then proceed with the download.
Conclusion
GIS Data by MAPOG makes it easy to Download Stadium Data in multiple GIS formats. Whether for sports planning, research, or mapping, users can access detailed stadium datasets with just a few clicks. The platform’s extensive data coverage and format variety make it an essential tool for GIS professionals, urban planners, and sports analysts.
Disclaimer : The GIS data provided for download in this article was initially sourced from OpenStreetMap (OSM) and further modified to enhance its usability. Please note that the original data is licensed under the Open Database License (ODbL) by the OpenStreetMap contributors. While modifications have been made to improve the data, any use, redistribution, or modification of this data must comply with the ODbL license terms. For more information on the ODbL, please visit OpenStreetMap’s License Page.
GIS Data by MAPOG is a user-friendly platform that allows users to download landfill data in multiple GIS formats, including Shapefile, KML, and GeoJSON. With a simple and efficient interface, users can access detailed landfill datasets for analysis, urban planning, and environmental studies. The platform provides data for over 200 countries, making it a valuable resource for researchers, GIS professionals, and policymakers.
How to Download Landfill Data?
GIS Data by MAPOG simplifies the download landfill data process, offering a step-by-step guide. The platform supports various formats, including SHP, KML, CSV, GeoJSON, Tab, SQL, TIFF, GML, KMZ, and more. This ensures compatibility with leading GIS software for seamless data integration.
All data is provided in GCS datum EPSG:4326 WGS84 CRS (Coordinate Reference System).
Users need to log in to access and download their preferred data formats.
Step-by-Step Guide to Download Landfill Data
Step 1: Search for Landfill Data
Log in to MAPOG and navigate to the GIS Data section. Select the desired country and use the search layer option to find Landfill Data. Review data attributes such as point or polygon format, location details.
Try the “Try AI” feature in the upper left corner. Enter the required landfill data and location, and the AI will suggest the most relevant datasets. This tool speeds up the search process and improves accuracy.
Step 3: Apply Data Filters
Use the filter option to refine your landfill dataset. Narrow down results by state, district, or specific landfill types. This step helps in analyzing local waste management trends effectively.
Step 4: Visualize Data on the Map
Click “Add on Map” to overlay landfill data onto a GIS map. This feature allows users to analyze spatial relationships, landfill distribution, and proximity to urban areas. You can integrate this dataset into an existing project or create a new map
Step 5: Download Landfill Data
Click on “Download Data” and choose between a sample dataset or the full version. Select the required format, such as Shapefile, KML, GeoJSON, or MID. Agree to the terms and conditions, then proceed with the final download.
Conclusion
With GIS Data by MAPOG, users can easily download landfill data in various GIS formats. Whether for urban planning, environmental assessments, or research, the platform offers up-to-date and accurate landfill datasets. The simple interface and advanced features make MAPOG a top choice for GIS professionals and analysts. Start exploring and download landfill data today!
Disclaimer : The GIS data provided for download in this article was initially sourced from OpenStreetMap (OSM) and further modified to enhance its usability. Please note that the original data is licensed under the Open Database License (ODbL) by the OpenStreetMap contributors. While modifications have been made to improve the data, any use, redistribution, or modification of this data must comply with the ODbL license terms. For more information on the ODbL, please visit OpenStreetMap’s License Page.
GIS Data by MAPOG is a user-friendly platform that allows users to download shops data in various GIS formats, including Shapefile, KML, and GeoJSON. The platform provides an intuitive interface to access administrative and geographic data, enabling detailed mapping and analysis of shop locations worldwide. Whether you need data for retail planning, business expansion, or urban analysis, MAPOG simplifies the process.
Understanding Shops Data
Shops data includes details of retail stores, supermarkets, shopping malls, and other commercial establishments. This information is valuable for business intelligence, logistics, and urban development. With GIS Data by MAPOG, users can access shop location data in multiple formats, ensuring seamless integration into GIS applications for analysis and visualization.
All data is provided in GCS datum EPSG:4326 WGS84 CRS (Coordinate Reference System).
Users need to log in to access and download their preferred data formats.
Step-by-Step Guide to Download Shops Data
Step 1: Search for Shops Data
After logging in to GIS Data by MAPOG, select your desired country. Use the search option to locate the Shops Data layer. The results will show whether the data is available as points (individual shop locations) or polygons (shopping zones). Users can search for specific locations like malls, grocery stores, and retail chains.
The Try AI tool, located in the upper left corner, simplifies the search process. Enter your query, such as “supermarkets in Canada” or “shopping malls in Germany,” and AI will instantly retrieve the relevant data layers.
Step 3: Apply Filters for Precise Data
To refine your search, use the Filter Data option. Narrow down the results by country, state, or district to get highly specific shop location datasets. This feature helps users extract detailed data tailored to their business or research needs.
Step 4: Visualize with ‘Add on Map’ Feature
Before downloading, analyze the data using the Add on Map feature. This function overlays shop locations onto an interactive map, helping users understand spatial relationships and optimize decision-making.
Step 5: Download the Data
Click on the Download Data button. Choose between sample data or the full dataset. Select your preferred format—Shapefile, KML, GeoJSON, or one of the 15+ supported formats. Accept the terms and conditions, then click download to retrieve your file.
Conclusion
GIS Data by MAPOG provides a seamless way to download shops data in multiple GIS formats. Whether for business expansion, location analysis, or retail planning, this platform ensures accuracy and accessibility. Get started today and unlock valuable insights with GIS-powered shop location data!
Disclaimer : The GIS data provided for download in this article was initially sourced from OpenStreetMap (OSM) and further modified to enhance its usability. Please note that the original data is licensed under the Open Database License (ODbL) by the OpenStreetMap contributors. While modifications have been made to improve the data, any use, redistribution, or modification of this data must comply with the ODbL license terms. For more information on the ODbL, please visit OpenStreetMap’s License Page.
Looking to Download Drop-in Centers Data for your next GIS project or planning initiative? With GIS Data by MAPOG, accessing reliable, up-to-date geographic datasets is simple and efficient. Whether you’re working in the fields of social welfare, community health outreach, or urban resource mapping, this platform supports over 15 GIS formats including Shapefile, KML, MID, and GeoJSON—ensuring smooth compatibility with major GIS tools and software.
How GIS Data by MAPOG Works?
MAPOG’s intuitive system simplifies the process of discovering, visualizing, and downloading location-based datasets. It supports users with advanced tools like AI-assisted search, layer visualization, and customizable format options. Whether you’re analyzing accessibility or planning expansion, you can easily download Drop-in Centers Data for more informed spatial analysis.
All data is provided in GCS datum EPSG:4326 WGS84 CRS (Coordinate Reference System).
Users need to log in to access and download their preferred data formats.
Step-by-Step Guide to Download Drop-in Centers Data
Step 1: Search for Drop-in Centers Data
Begin by logging into the GIS Data by MAPOG portal. Use the search layer function and type in “Drop-in Centers Data.” Review the attributes available—data may appear as points or polygons, depending on how it has been collected and categorized.
Use MAPOG’s built-in “Try AI” feature to quickly find relevant datasets. Enter phrases like “Drop-in centers near me” or “Community shelters,” and the tool will auto-suggest matching layers, saving you time and effort.
Step 3: Apply Filters for Targeted Results
Narrow your results using the Filter Data option. This allows users to search by state or district, enabling deeper exploration within a region. Whether you’re working locally or across multiple jurisdictions, this feature ensures data accuracy and relevance.
Step 4: Visualize with “Add on Map”
Click on “Add on Map” to view your selected data on MAPOG’s interactive GIS interface. This lets you analyze spatial distribution, evaluate service gaps, and understand proximity to other key facilities—all in real time.
Step 5: Download Drop-in Centers Data
Once you’re satisfied with your selection, click on “Download Data.” Choose from sample or full datasets and select from formats like Shapefile, KML, MID, CSV, GeoJSON, DXF, or SQL, among others.
Final Thoughts
With powerful tools, smart filters, and diverse format options, GIS Data by MAPOG makes it seamless to download Drop-in Centers Data for any kind of mapping, analysis, or planning task. Whether you’re a researcher, urban planner, social worker, or GIS professional, this platform equips you with the spatial intelligence needed to make meaningful, data-driven decisions.
Disclaimer : The GIS data provided for download in this article was initially sourced from OpenStreetMap (OSM) and further modified to enhance its usability. Please note that the original data is licensed under the Open Database License (ODbL) by the OpenStreetMap contributors. While modifications have been made to improve the data, any use, redistribution, or modification of this data must comply with the ODbL license terms. For more information on the ODbL, please visit OpenStreetMap’s License Page.
Looking to explore or map culturally significant sites? Download Historical Monuments Data quickly and accurately using GIS Data by MAPOG. This intuitive platform offers data in over 15 GIS formats—including Shapefile, KML, GeoJSON, and MID—ensuring compatibility with major GIS tools. Whether you’re engaged in heritage conservation, academic research, urban planning, or tourism development, this tool provides well-structured, ready-to-use datasets that support detailed spatial analysis and visualization.
How to Download Historical Monuments Data
GIS Data by MAPOG offers a robust way to explore and download monument data from hundreds of geographic layers. The system supports a wide variety of file formats—such as KML, SHP, CSV, GeoJSON, SQL, DXF, MIF, TOPOJSON, and GPX—making it a preferred choice for GIS professionals, developers, and researchers alike.
All data is provided in GCS datum EPSG:4326 WGS84 CRS (Coordinate Reference System).
Users need to log in to access and download their preferred data formats.
Step-by-Step Guide to Download Historical Monuments Data
Step 1: Search for Historical Monuments Data
Begin by selecting the region of interest within the MAPOG interface. Use the “Search Layer” function and look for “Historical Monuments Data.” Depending on the dataset, the information may appear as points or polygons, representing locations or boundaries.
Let MAPOG’s “Try AI” assist you. Simply input keywords like “Monuments near me” or “Heritage sites,” and the AI tool will present the most relevant layers. This feature not only saves time but also enhances search accuracy.
Step 3: Apply Data Filters
Fine-tune your search using the Filter Data option. You can narrow the dataset by selecting specific states and districts. For nationwide datasets, this feature enables deep-level filtering—making it easier to locate and analyze monuments based on administrative boundaries.
Step 4: Visualize with ‘Add on Map’
Click the Add on Map option to overlay the selected layer onto the GIS map analysis interface. This allows for better visualization and spatial examination of monument locations, clustering, accessibility, and relation to nearby landmarks or infrastructure.
Step 5: Download Historical Monuments Data
Once you’ve finalized your dataset, click “Download Data.” Choose whether to download a sample or the full dataset. Select your desired format—Shapefile, KML, GeoJSON, MID, or others—accept the usage terms, and download your data for offline or project use.
Final Thoughts
With MAPOG’s powerful GIS platform, the ability to download Historical Monuments Data becomes efficient and user-friendly. The platform caters to diverse GIS applications, offering detailed insights and flexibility in how data is accessed and applied. Whether you’re a cultural researcher, urban planner, or GIS enthusiast, MAPOG ensures that heritage-focused spatial data is always within reach.
Disclaimer : The GIS data provided for download in this article was initially sourced from OpenStreetMap (OSM) and further modified to enhance its usability. Please note that the original data is licensed under the Open Database License (ODbL) by the OpenStreetMap contributors. While modifications have been made to improve the data, any use, redistribution, or modification of this data must comply with the ODbL license terms. For more information on the ODbL, please visit OpenStreetMap’s License Page.
This tutorial will walk you through the process of using MAPOG‘s Converter Tool to rapidly and simply convert GPS files to GEOJSON format. Thus, we will break down the entire process of converting GPS to GeoJSON with MAPOG into easy steps for you, regardless of whether you are a first-time user or not.
Key Concept to Converting files
One tool in the MAPOG is the Converter Tool, which is used to change the type of information you have. It accepts data supplied in one format and outputs it in another that you can use for analysis. Additionally, GIS data may be downloaded in any format, meaning it can be used for a variety of purposes.
2. Upload your GPS file. This is the entry point where you enter the data to be converted.
Step 2: Decide on the Conversion Format
1. If you wish to export just the data, choose GeoJSON as the output format. The application offers other ways to get the desired outcome, but in this tutorial, we’ll be using the option to convert the file to GeoJSON.
2. At this point, you can also adjust the Output CRS.
Step 3: Execute the Conversion
Navigate to “Convert Files” to observe the tool in action. When you use the Converter Tool, you enter your data and it transforms it from GPS to GeoJSON format.
Step 4: Review and Download
Check that everything seems proper by taking a moment to go over your converted GeoJSON data. You can download the file now that you’re satisfied. To make sure the conversion went well and that all of your data is intact, this step is crucial.
Step 5: Create buffer
We can create buffer in this map, click the buffer tool on process data, select the create buffer option, select the newly converted file in the select layer section, choose the range of the buffers, and click submit.
And that’s it! You now know how to use MAPOG’s Converter Tool to convert GPS files to GeoJSON. It’s now simpler than ever to modify your data and get it ready for whatever analysis you require. This useful tool makes handling different data types easier, which improves the efficiency and productivity of your work.
We use cookies to ensure that we give you the best experience on our website. If you continue to use this site we will assume that you are happy with it.