GoeServer is one of the best server for storing Vector data. Geoserver is open source software and free to use. To know how to publish vector data and style it on Geoserver you can follow this tutorial. Before this you need to install Geoserver on your system for that read out our previous tutorial, install first GeoServer on Windows or Ubuntu operating system. You can also look for publish and style raster dataset in GeoServer.
GeoServer supports various Vector DataSet:
- Shapefile
- Directory of spatial files
- Java Properties
- GeoPackage
- GML
Here we will use Shapefile as vector dataset as an example to publish and style in map in geoserver.
A shapefile stores non-topological geometry and attribute information for the spatial features in a data set. The geometry for a feature is stored as a shape comprising a set of vector coordinates whereas attribute information can be seen in the attribute table.
GeoServer has been optimized for serving large shapefile (GB size) with good speed. We need to publish shapefile and then using WMS service we can use data with high speed. The OGC Web Map Service (WMS) specification defines an HTTP interface for requesting georeferenced map images from a server.
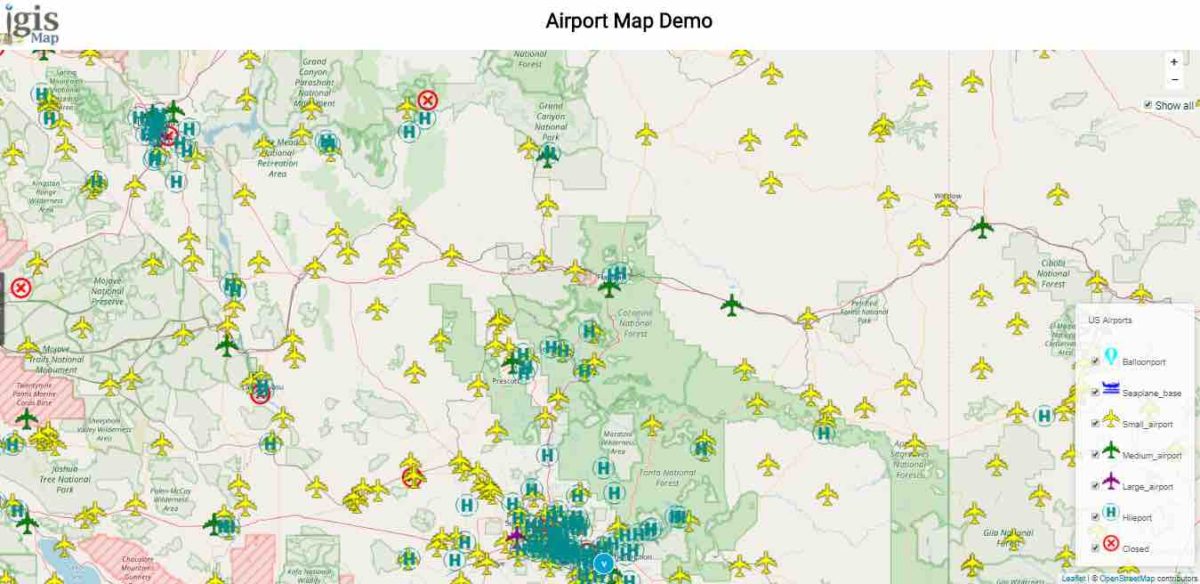
How a shapefile can be published on geoserver is described below. The published and styled data will look something like image showed as feauregiven in the post . This geometry for shapefile is point and icon based styling has used.
Publish Style Vector Dataset on GeoServer
Publish Vector Data on GeoServer – Host Shapefile SHP
We can publish many type of files on geoserver that can be in raster or vector format. In this tutorial we will see how we can publish shape file on GeoServer.
Start GeoServer application in your computer. It will run in command prompt then in web browser search localhost:8080/geoserver/web. Provide the Username and Password and click login to login as administrator of GeoServer.
Step 1 to publish vector data in geoserver:
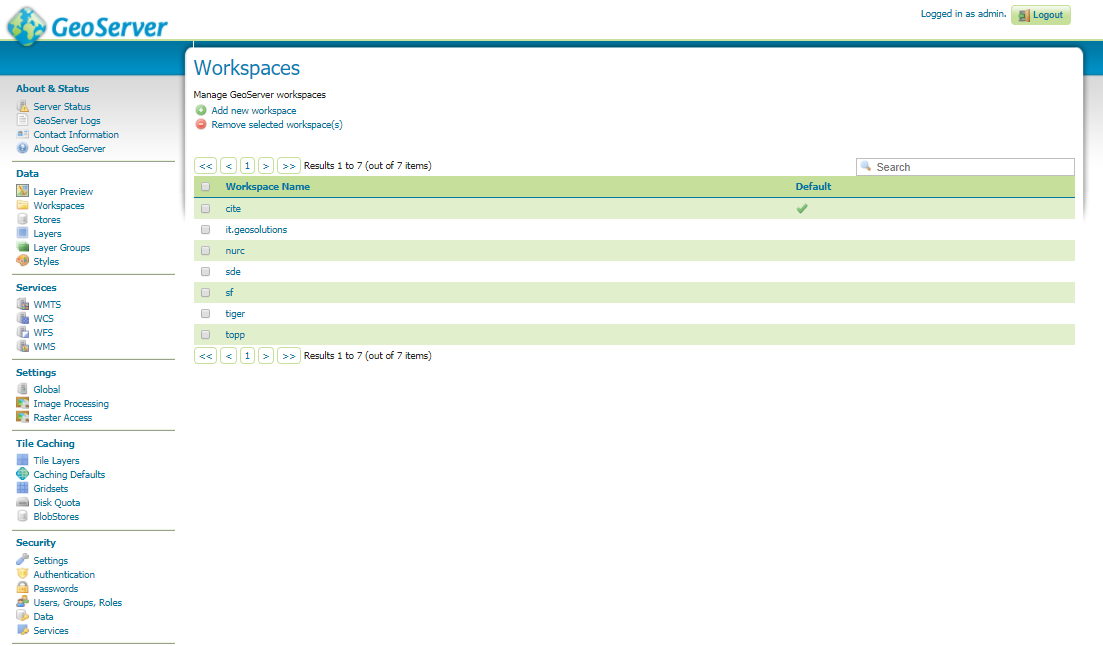
First of all you need to login to GeoServer then create a workspace, which can be done by selecting workspace option on the right side of screen under data section. Add the new workspace give a name and URI. In information technology, a Uniform Resource Identifier (URI) is a string of characters used to identify a resource, which can be same as name and submit the information.
Step 2:
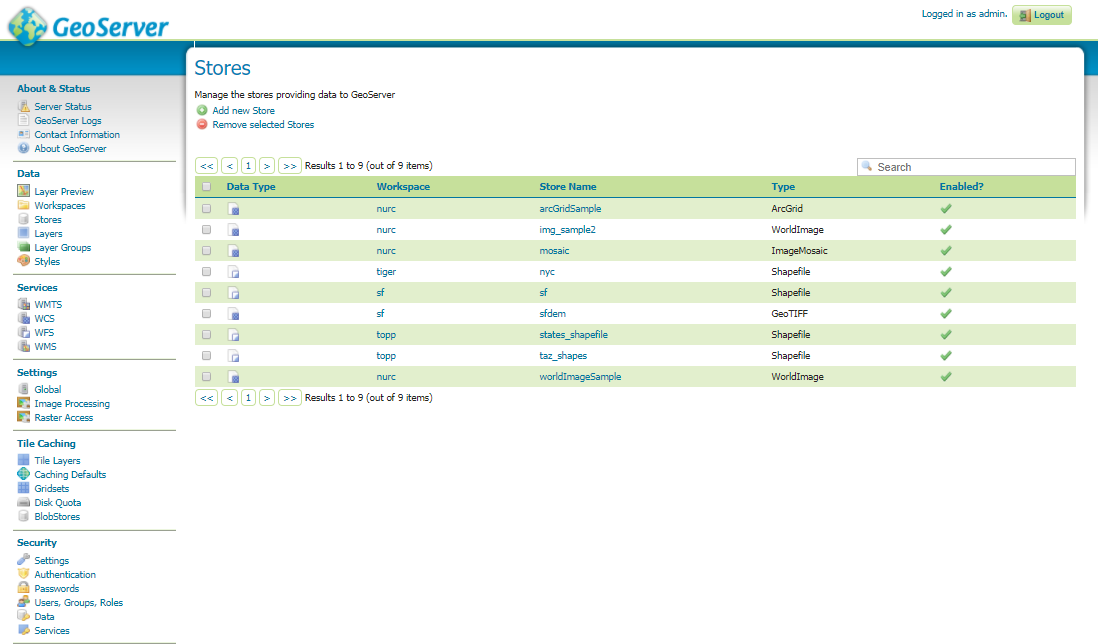
Now add the store by selecting stores option under same section. Click Add new store and select shapefile or directory of spatial files. Under directory of spatial file add your work space and data source name. Under connection parameters browse your file location then click save option. After saving you will be able to publish the layer. Click publish option.
Step 3 to publish vector data in geoserver:
after selecting publish option check the name of shape file. Under Coordinate Reference Systems heading check the coordinate system of your shape file. Under bounding boxes select Computes from SRS (spatial reference system) bound and in the next part select compute from native bound. Then save the information. After saving you will be able to see the shapefile name with your workspace and store name.
Step 4:
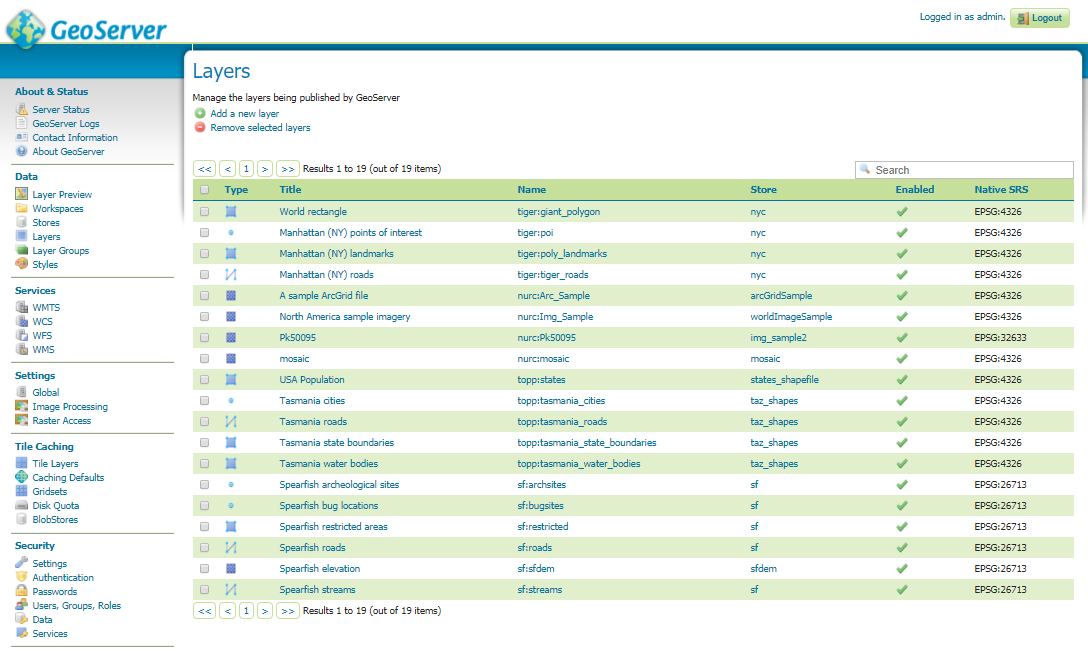
Now select the Layer Preview option under same section. And open your shape file using openLayer option in Command format column.
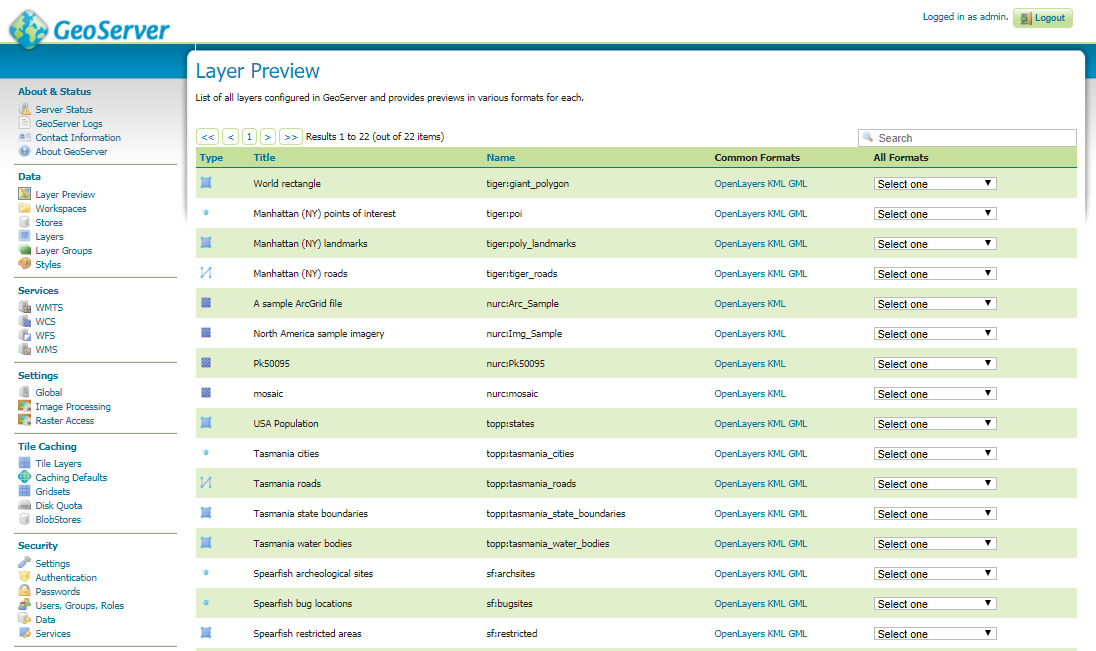
As the layer is visible now you have a link in URL bar. You can add this link in QGIS using add WMS/WMTS layer and see the shape file.
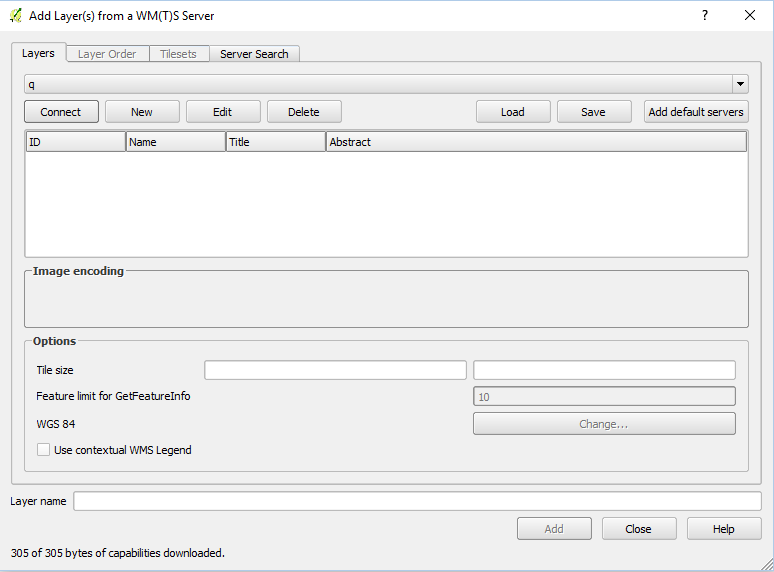
Open QGIS and click the add WMS/WMTS layer option and then click new button to add new WMS layer.
Add the URL and click ok.
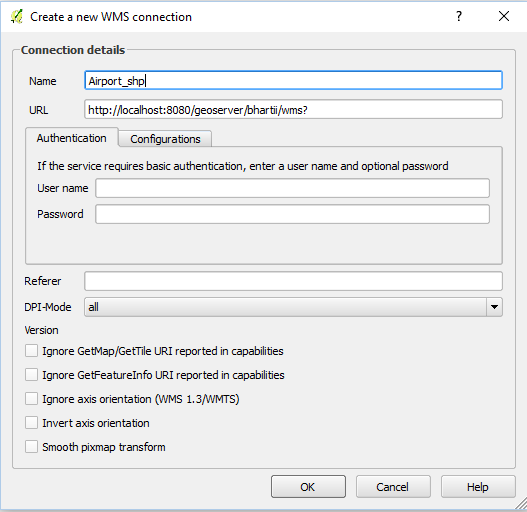
Then connect the layer and add to display.
Shape file can contain point, line or polygon, which can be styled on geoServer. To style any feature on geoserver we required to add style name. This style can be customised. Some styling is already given in style option under Data section.
To add built in style to your shapefile follow the given steps-
Step 1:
First of all make sure your file has been added on server. Then open that layer using layer option in data section.
Step 2:
There will be 4 tabs as data, publishing, dimensions and tile caching. As on adding layer you already have visited data tab and set SRS coordinates. Now click publishing tab.
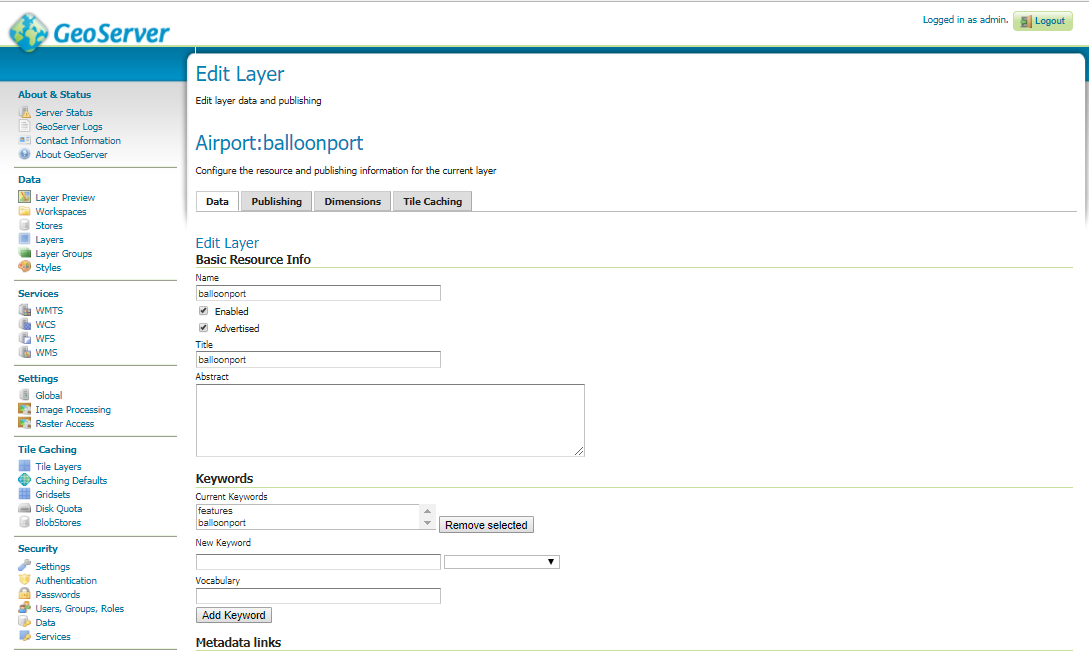
In publishing tab find the WMS setting option, under that option check the Queryable checkbox and select style in default style dropdown.
There are styles for point, line, polygon and raster.
1. Burg: point
2. Dem: raster
3. Capitals: points
4. Roads: line
5. Lakes: polygon
6. Raster: raster
7. Point: point
8. Line: line
9. Polygon: polygon
10. Rain: raster
11. Population: raster
According to your shape file you can add the style and click to save.
Step 3 of style vector dataset in geoserver:
Now to check the styling click the layer preview option under same data section. Open as openLayer.
For more details you can visit http://docs.geoserver.org/latest/en/user/data/webadmin/layers.html website.
Styling Based on Attributes: Sometimes we need to style according to attributes. For example population greater than 5000, population equal to 5000 and population less than 5000 so we need some coding to define all these.
The Styled Layer Descriptor (SLD) Profile of the Web Map Service (WMS) Encoding Standard defines an encoding that extends the WMS standard to allow user-defined symbolization and colouring of geographic feature (vector data) and coverage data (raster data).
SLD (Styled Layer Descriptor ) has some elements in geoserver for vector dataset as :
The root element for an SLD is <StyledLayerDescriptor>. It contains a Layers and Styles elements which describe how a map is to be composed and styled.
- <NamedLayer>: A reference to a named layer in the server catalogue
- <UserLayer>: A layer defined in the style itself
- <FeatureTypeStyle>: The FeatureTypeStyle element specifies the styling that is applied to a single feature type of a layer. It contains a list of rules which determine the symbology to be applied to each feature of a layer.
- Under Rule element we specified filter with binary comparison operators PropertyIsEqualTo. Where property name is the attribute column you want to perform operation on and literal is the attribute value.
<ogc:Filter>
<ogc:PropertyIsEqualTo>
<ogc:PropertyName>type</ogc:PropertyName>
<ogc:Literal>balloonport</ogc:Literal>
In this article we have used Airport shape file, containing attributes as name and type of airports as point feature. So here we have styled this data based on type of airport.
- PointSymbolizer: which styles features as points
- LineSymbolizer: which styles features as lines
- PolygonSymbolizer: which styles features as polygons
- TextSymbolizer: which styles text labels for features
- RasterSymbolizer: which styles raster coverages
<PointSymbolizer> in geoserver for vector dataset:
contains an optional <Geometry> element, and a required <Graphic> element specifying the point symbology. So as we want to change the point with icons so graphic element is used. <ExternalGraphic> element specifies an external image file to use as the symbol. Then using onlineResource define the path of graphic and format. The xlink:href attribute specifies the location of the image file. The value can be either a URL or a local pathname relative to the SLD directory. The value can contain CQL expressions delimited by ${ }. The attribute xlink:type=”simple” is also required. The graphic size can be by using size element. Then close all the elements by using “/”.
<PointSymbolizer>
 <Graphic>
 <ExternalGraphic>
 <OnlineResource xlink:type="simple" xlink:href="http://localhost:7080/akshay_ep/ep/05airports/airports/airballoon.png"/>
 <Format>image/png</Format>
Full length code
<StyledLayerDescriptor xmlns="http://www.opengis.net/sld" xmlns:ogc="http://www.opengis.net/ogc" xmlns:xlink="http://www.w3.org/1999/xlink" xmlns:xsi="http://www.w3.org/2001/XMLSchema-instance" version="1.0.0" xsi:schemaLocation="http://www.opengis.net/sld StyledLayerDescriptor.xsd">
 <NamedLayer>
 <Name>Attribute-based point</Name>
 <UserStyle>
 <Title>GeoServer SLD Cook Book: Attribute-based point</Title>
 <FeatureTypeStyle>
 <Rule>
 <Name>balloonport</Name>
 <Title>balloonport</Title>
 <ogc:Filter>
 <ogc:PropertyIsEqualTo>
 <ogc:PropertyName>type</ogc:PropertyName>
 <ogc:Literal>balloonport</ogc:Literal>
 </ogc:PropertyIsEqualTo>
 </ogc:Filter>
 <PointSymbolizer>
 <Graphic>
 <ExternalGraphic>
 <OnlineResource xlink:type="simple" xlink:href="http://localhost:7080/akshay_ep/ep/05airports/airports/airballoon.png"/>
 <Format>image/png</Format>
 </ExternalGraphic>
 <Size>32</Size>
 </Graphic>
 </PointSymbolizer>
 </Rule>
 </FeatureTypeStyle>
 </UserStyle>
 </NamedLayer>
 </StyledLayerDescriptor>
To apply this code open the style option, add a new style and give name and workspace. After that select SLD ( Styled Layer Descriptor ) from format drop down and copy this code in editor. Validate apply and submit this.
After this open your shape file and repeat the steps described above. In the last open this layer as Openlayer from layer preview section.