Merge two or more polygons, points or polyline of Shapefile

Merge two or more polygons, points or polyline of Shapefile in QGIS. Do you want to merge features of to combine them into one feature and to maintain its database dbf values along with it. QGIS – Quantum Geographic information system is of the most important for geographers and with the help of this tool I would demonstrate you to merge features within same layer. You can also have a look on how to merge more than two shapefiles.

If you haven’t installed QGIS, lets install Latest Quantum GIS first and open it up. Here are the steps to merge features of shapefile in QGIS.

Merge two or more polygons, points or polyline of Shapefile in QGIS:

We can merge two features in Shapefile in QGIS easily. Let’s say I have a Shapefile states.shp and I want to merge two states. Open up your QGIS tool.

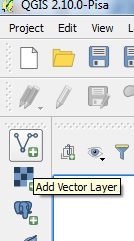
1.) Select the layer and click the toggle edit button from the toolbar.

Merge two or more polygons, points or polyline of Shapefile
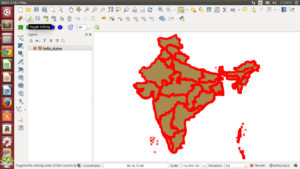
2.) Click on select tool from toolbar as indicated in the image.

Merge two or more polygons, points or polyline of Shapefile

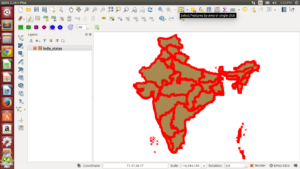
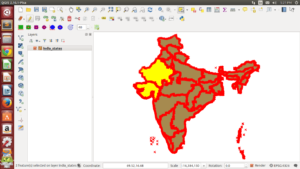
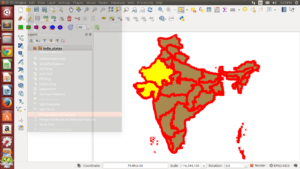
3.) Press control (ctrl) key and click on the features you want to merge to select them.

Merge two or more polygons, points or polyline of Shapefile

4.) Click on the Edit option where you can find find merge selected features.

Merge two or more polygons, points or polyline of Shapefile

5.) You will see this window after selecting merge selected button.

Merge two or more polygons, points or polyline of Shapefile

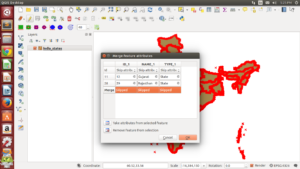
6.) In the above dialogue box you can see there are three columns and four rows. In the first row you can select options for the fields so that what value you want to assign for the merged feature. Go ahead and try the given options.

7.) In the last row you can see the option you selected or you can delete that value by simply double clicking on the field and press delete from keyboard. After you are done you can click ok.

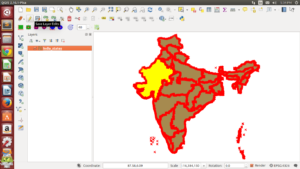
8.) You can see the features are merged. you can also check attribute table.

9.) click on save layer edits buttons and then click on toggle editing button if you are done.

Merge two or more polygons, points or polyline of Shapefile

That is all about merging two features of shapefile whether it is polygon, polyline or point features. If you are getting any problem in performing the above steps, do comment below, we would try to solve the problem by discussing over here.

Edit – Export – download data from OpenStreetMap in QGIS

Edit – Export – download data from OpenStreetMap (OSM). Open Street Map is a free editable map of the world, and is very easy to handle. Here in this post we will see how to edit and create geometries on open street map. Also how to export, download and convert the .osm file to any other file.

Steps to Edit – Export – Download data from OpenStreetMap:

1.) Sign in – Before starting editing you need to have one Account in OpenStreetMap to your, so create the one if you don’t have any and login with your account.

2.) Click the Edit dropdown menu button, placed at the upper left of the map, where you will find following three options:

Edit - Export - download data from OpenStreetMap
Edit – Export – download data from OpenStreetMap

Where In-Browser editor are used to edit online and JOSM is used for offline editing.

3.) Lets try with iD In-Browser editor for demonstrating editing here. So click Edit with iD option.

4.) Screen will shows up as follows:

Edit - Export - download data from OpenStreetMap

In right hand side you have various option which you can explore one by one and is very easy to understand. Bing Ariel imagery is preferred in background which is by default is in background however you can select any background you want.

Edit - Export - download data from OpenStreetMap

5.) Now we can start editing. You can select either Point, Line or Polygon from your screen.

6.) Click on the screen on the location where you want to edit. If you selected a point then just click on the location and press enter and then fill the entries on the left hand side and give necessary information.

7.) Click save and your edits will be saved, which you may see it again by opening the osm in another session. Likewise you can digitize lines and polygons.

8.) You can export the map from osm and it will be downloaded to your computer with extension .osm.

Edit - Export - download data from OpenStreetMap
Edit – Export – download data from OpenStreetMap

The exported .osm file can be opened in QGIS or many other GIS tools.

Here I am showing you how to open .osm file in QGIS. Select Add Vector Layer icon as shown below, and browse to the location where you saved the downloaded file and click open.

Edit - Export - download data from OpenStreetMap

A pop-up will open. Select layers as shown in figure.

Edit - Export - download data from OpenStreetMap
Edit – Export – download data from OpenStreetMap

Now select OK. The downloaded map will be imported on the map canvas. In the layers space, you can see four layers which was exported as an example which are .osm layers and can be easily converted to any other GIS vector file like shapefiles.

Download OpenStreetMap OSM data directly from QGIS:

1.) We can also download osm map of our desired location to our computer using QGIS.

2.) In QGIS click vector and click openstreetmap and click download data.

Edit - Export - download data from OpenStreetMap

3.) Enter the coordinates. Click … and give the name of the output file and click download.

4.) Downloading will take some time depending on the size of the data.

QGIS tutorial – A simple Guide

After downloading map you can convert back the osm data to any other spatial data, preserving database attributes too. You can also use some advance plugin given in repository of QGIS. I hope this post would have helped you to export Spatial data with the help of OpenStreetMap. If you are getting any problem in performing the steps do comment below also, if have any other tricks to export spatial data from openstreetmap or any other source do provide us the reference by commenting below.

Upload or add kml or KML file on Google Earth

Upload or add kml or KML file on Google Earth. KML or KMZ is a file which models geographic features for displaying in Google Earth or Google Maps. You can easily add and upload KML file on Google Earth. This files can be easily created on Google Map or on Google Earth or on Any GIS tool. You may need to upload a shared or newly created KML file from third party, and want to verify whether the overlapped KML or KMZ file is valid or not. You may use Google Earth Pro instead Google Earth as it is now free to download.

Before following the below steps, download or create one of the KML file to taking demo. You can either create and export KML file from Google Map or from Google Earth or you may also convert your shapefile to KML or KMZ file from QGIS.

Upload or add kml or KML file on Google Earth

Steps to Upload or add kml or KML file on Google Earth

1.) Launch Google Earth in your desktop either Mac or Windows OS.

2.) Click on File menu, and select Open. Now browse to the KML or KMZ file which you want to upload on Google Earth. This will upload KML or KMZ file which may either be point, multipoint, line or polygon.

3.) In the places panel, you may file a new folder with Temporary Places containing your KML map. Double click on the KML map appear in panel to explore all layers and all associated elements(point, line or polygon).
To every element present in layer, you can either cut, copy, paste and delete,  and save – download the KML map to my places folder of Google Earth. Also you change the properties i.e Description, Style or Color of markers and line, Altitue and Measurement.

Upload or add kml or KML file on Google Earth

Steps to Upload or Add multiple KML maps on Google Earth:

1.) To add multiple KML file, you first need to follow the above steps to add the one.

2.) Now on the folder where your maps is actually loaded i.e in my case in “Temporary Places” right click and select add -> Network link. This will open up a New network link window.

3.) Select browse, and navigate to another KML file which you want to upload.

Upload or add kml or KML file on Google Earth

4.) Ok. Now your system is ready with multiple KML file on Google Earth. You can customize the uploaded KML file in same way as described above. Now you can perform GIS operation and analysis on Google Earth with uploaded overlayed KML file.

Hope this tutorial would have help you. If you find any problem in uploading KML file, do comment below. Also do share which type of data file you frequently upload on Google earth.